If you’re a proud owner of an Iron Flask water bottle, you’re undoubtedly aware of its versatility. One of the key features that set this water bottle apart is the interchangeable lids. This article will guide you through the process of changing the lids on your Iron Flask water bottle, ensuring you can optimize your hydration experience based on your needs. So, let’s dive right in.
Why Change Lids?
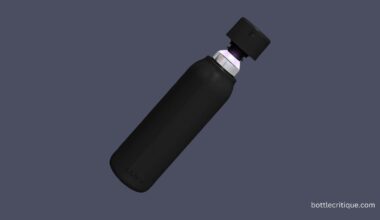
You might be wondering why you’d want to change the lid of your water bottle in the first place. Well, the Iron Flask comes with three different lids, each designed for a specific use case. There’s the standard flip lid, the straw lid, and the stainless steel lid. Changing lids can transform your water bottle, tailoring it to your specific needs.
What You’ll Need:
- Your Iron Flask water bottle.
- The lid you wish to change to.
- A clean, dry towel or cloth (optional).
Now that you have everything ready, let’s get into the step-by-step process of changing the lids on your Iron Flask water bottle. Remember, it’s a simple and straightforward process, so don’t stress!
Introduction: Why change the lids of your Iron Flask Water Bottle?
There are a number of reasons why you might want to change the lid on your Iron Flask water bottle. Perhaps the seal has worn out over time and your bottle is no longer leak-proof. Maybe you’ve misplaced your lid and need a replacement, or you simply want to switch up the style to match your mood or outfit. Whatever your reasons, changing the lid on your Iron Flask water bottle is a simple process that can significantly enhance your hydration experience.
Benefits of changing your Iron Flask water bottle lid
- Variety: Iron Flask offers a variety of lid options to suit your lifestyle and preferences. From straw lids for easy sipping to flip lids for quick access to your drink, there’s a lid style for every situation.
- Functionality: Different lid types can provide different functionalities. For example, a sports lid might be more useful for your gym sessions, while a flip lid might be more convenient for your office use.
- Hygiene: It’s important to keep your water bottle lid clean to maintain good hygiene. Having multiple lids allows you to switch out lids while one is being cleaned.
Reasons for lid replacement
Lid replacement might be necessary if you notice any of the following:
- Wear and tear: Over time, the seal on your water bottle lid might wear out, causing leaks. In such cases, it’s best to replace the lid to maintain the functionality of your bottle.
- Loss: It’s not uncommon to misplace the lid of your water bottle. If you can’t find your lid, getting a new one is a quick and easy solution.
- Desire for a change: Sometimes, you might just want a change! Switching up your lid can give your trusty water bottle a whole new look.
In conclusion, changing the lid of your Iron Flask water bottle can improve functionality, enhance aesthetics, and maintain hygiene. So don’t hesitate to switch up your lid style or replace a worn-out lid to keep enjoying your Iron Flask water bottle to the fullest.
Different types of lids for your Iron Flask Water Bottle
One of the remarkable things about your Iron Flask Water Bottle is its versatility. This extends to its lids. These water bottles come with three types of lids which can be interchanged depending on your needs and preferences. Let’s take a glance at the different lids available for your Iron Flask Water Bottle.
1. The Standard Lid
The first lid is the standard lid. This is the default lid that comes with your initial purchase. It is perfect for everyday use, offering a secure fit to prevent leaks while being easy to open and close.
2. The Flip Lid
The second type is the flip lid. This lid comes with a built-in straw for easy sipping, making it an ideal choice for workouts or other situations where you need to hydrate quickly without interrupting your flow.
3. The Carabiner Straw Lid
The third one is the carabiner straw lid. This lid features a straw as well, but with the added benefit of a handy carabiner. This means you can easily attach your Iron Flask to your backpack, bike, or other gear, providing convenience when you’re on the go.
Each of these lids adds unique functionality to your Iron Flask Water Bottle. The beauty of these interchangeable lids is that you can switch them out as needed, making your water bottle adaptable to a variety of situations.
Step-by-Step Guide: How to change the Straw Lid of your Iron Flask Water Bottle
Are you looking to freshen up your Iron Flask water bottle experience with a new straw lid? You’ve come to the right. Make sure to do this over a sink or a cloth to avoid any spillage. Once unscrewed, set the lid aside on the clean, dry cloth.
Step 2: Clean the Bottle Opening
With the old lid removed, now is a great time to give the opening of your bottle a quick clean. This will ensure that your new lid fits perfectly and provides you with a fresh, clean sip every time. Use a damp cloth to wipe around the opening, then dry it off well.
Step 3: Attach the New Straw Lid
Now, let’s move to the exciting part – attaching your new straw lid! Just align the threads of the new lid with those on the bottle opening and gently twist it on. Make sure not to over-tighten to avoid damaging the threads.
Step 4: Test the Lid
Finally, it’s time to test your new lid. Fill your Iron Flask water bottle with your favorite beverage, close the lid tightly, and take a sip. If there are no leaks and the straw works well, congratulations! You’ve successfully changed the lid on your Iron Flask water bottle.
Note: Remember to clean your new lid before first use and routinely afterwards for hygiene purposes.
Changing the lid on your Iron Flask water bottle is just that easy! Enjoy your upgraded hydration experience with your new straw lid. Keep hydrated and stay healthy!
Step-by-Step Guide: How to change the Flip Lid of your Iron Flask Water Bottle
Changing the flip lid of your Iron Flask Water Bottle may seem like a challenging task, but it’s actually a simple process that can be done in just a few easy steps. Whether your current lid is damaged, or you just want to switch things up, this guide has got you covered. Let’s dive right in!
1. Gather the Necessary Items
Before you begin, make sure you have the following items ready: A replacement flip lid for your Iron Flask Water Bottle, a soft cloth, and warm soapy water. The cloth and water will be used to clean the bottle’s threads, ensuring a perfect fit for the new lid.
2. Remove the Current Lid
Start by unscrewing the current flip lid from your Iron Flask. Simply grip the lid firmly and turn it counterclockwise until it comes off. Be careful not to use too
Step-by-Step Guide: How to change the Stainless Steel Lid of your Iron Flask Water Bottle
Ever wondered how to change the stainless steel lid of your Iron Flask water bottle? Fear not, friend – we’ve got you covered. This guide will take you through it, step by step. It’s simpler than you might think!
What You’ll Need
- Your Iron Flask water bottle
- The new lid you want to switch to
Got everything? Great! Let’s get started.
Step 1: Unscrew the Existing Lid
Hold your Iron Flask firmly in one hand and with the other, gently turn the stainless steel lid counter-clockwise. It should start to loosen. Keep turning it until it comes off completely. And voila! Step one is done.
Step 2: Check the Bottle Neck
Once the lid is off, take a moment to check the neck of the bottle. Make sure it’s clean and free of any debris. This ensures a good fit for your new lid and keeps your bottle hygienic.
Step 3: Screw On the New Lid
Now, take your new lid and place it on top of the bottle. Start turning it clockwise this time. Keep going until it’s tight and secure. But remember, don’t overdo it! You don’t want to damage the threads.
And that’s it! You’ve successfully changed the lid on your Iron Flask water bottle. Easy as pie, right?
Troubleshooting Tips
If you’re having trouble getting the new lid on, don’t worry. Here are a few tips to help you out:
- Check the threads on both the bottle and the lid. If they’re damaged, it might be difficult to screw the lid on.
- Make sure the lid is properly aligned with the bottle before you start turning it.
- If the lid seems too tight or loose, try adjusting it slightly. It should fit snugly, but not too tight.
Remember, patience is key. Take your time and you’ll get the hang of it in no time. Happy hydrating!
Tips to keep in mind while changing the lids of your Iron Flask Water Bottle
So you’re looking to swap out the lid on your beloved Iron Flask water bottle, huh? Well, you’re in luck. It’s not rocket science, but there are a few tips you should bear in mind to make the process as smooth as possible.
1. Choose Your Lid Wisely
First things first, you’ve got to pick the right lid. Iron Flask offers a variety of lids to choose from, each with its own unique benefits. From the classic straw lid to the handy flip lid, the choice is yours. Just remember, you want to choose a lid that best suits your daily needs.
2. Clean Before You Change
Before you switch out your lids, give your bottle and the new lid a good clean. Not only does this keep your bottle hygienic, but it also ensures a better fit. After all, no one wants a loose lid or, worse, a leaky one!
3. The Right Way to Screw
The key to changing lids is to screw it on correctly. Make sure you’re not cross-threading the lid by screwing it on too hastily. It should fit snugly, without needing too much muscle.
4. Testing For Leaks
Once you’ve got your new lid securely in place, give it a quick test to check for leaks. Fill up your Iron Flask with water, give it a gentle shake, and see if any water escapes. If it doesn’t, you’re good to go!
5. Maintenance Is Key
Now that you’ve changed your lid, don’t forget to clean it regularly. This will keep it in tip-top shape and extend its lifespan. Keep in mind that all Iron Flask lids are top-rack dishwasher safe, making maintenance a breeze.
Remember, the right lid can elevate your hydration experience. So take your time, choose wisely, and enjoy your Iron Flask to the fullest!
How to clean the lids of your Iron Flask Water Bottle?
Ever wondered why your favorite Iron Flask Water Bottle isn’t tasting as fresh as it used to? It’s probably because your bottle’s lid needs a good clean! But don’t worry, it’s easier than you might think and I’m here to guide you through it. So, let’s roll up those sleeves and get started, shall we?
Here’s what you’ll need:
- Warm water: Not too hot, not too cold, just right to get those tricky bits clean.
- Mild dish soap: We don’t want any harsh chemicals messing with your hydration, so let’s stick with the mild stuff.
- A soft brush: This is great for getting into those hard-to-reach areas. A toothbrush would do the trick too!
Alright, now that we’ve got everything ready, let’s get cleaning!
Step-by-step guide to clean your Iron Flask lid:
- First things first, fill your sink or a large bowl with warm water.
- Add a few drops of the mild dish soap and give it a good swirl to make sure it’s well mixed.
- Next, unscrew the lid from your Iron Flask Water Bottle and place it in the soapy water.
- Let it soak for about 10-15 minutes.
- After soaking, pick up your brush and gently scrub the lid, paying special attention to the grooves and edges.
- Rinse thoroughly under clean water and let it air dry completely before reattaching it to your bottle.
And voila! Your Iron Flask Water Bottle lid is now as clean as a whistle and ready to keep your drinks tasting their best. Remember, a clean lid not only keeps your drinks fresh but also prolongs the life of your beloved Iron Flask. So, make this cleaning routine a habit. Your taste buds will thank you!
Conclusion: Enjoy your Iron Flask Water Bottle with the lid of your choice!
So, there you have it! You’ve successfully navigated the ins and outs of changing the lid on your Iron Flask water bottle. Pretty simple, right? Whether you’re going for a run, hitting the gym, or just hanging out at home, changing your lid to suit your needs is a breeze.
Now, you’re not just limited to one way of enjoying your favorite beverage. You can switch between the straw lid for a quick hydration hit during your intense workout sessions, or the flip lid for a more relaxed and spill-free experience. The freedom to customize your drinking experience is now right at your fingertips!
Remember:
- Always ensure your lids are properly cleaned: Hygiene is key when it comes to water bottles. So, make sure you clean your lids properly before and after use.
- Check the lids for any damage: Regularly inspect your lids for any wear and tear. Damaged lids can cause leaks and may affect the insulating properties of your bottle.
- Store your lids properly: When not in use, store your lids in a cool, dry place to prevent any potential damage or wear.
So go ahead! Mix and match your lids to find the perfect fit for your daily routine. With the right lid, your Iron Flask water bottle can be your trusty companion, keeping your drinks just the way you like them – piping hot or ice cold. Enjoy the convenience and versatility that this high-quality water bottle provides. So, what are you waiting for? Get hydrating!