Have you ever been out on a chilly day and wished you had something warm to hold onto? Or maybe you’re just looking for a way to keep your drink warm during a long commute? If so, you’ve come to the right place. In this article, we’re going to walk through a step-by-step process on how to warm up a water bottle. It’s a simple, convenient, and safe method that anyone can do. So, ready to add a little extra warmth to your day?
Why Warm Up a Water Bottle?
Ever wondered why it’s a good idea to warm up your water bottle? Well, there are several practical reasons to do so. Not only does it provide immediate comfort during chilly nights, but it can also have positive effects on your health and well-being. It’s simple, really: a warm water bottle can be your best friend when you need a bit of warmth and relaxation.
- Comfort: A warm water bottle can provide a sense of comfort and warmth, especially during cold nights. It’s like having a mini-heater right by your side!
- Relief from aches: If you suffer from muscle aches or menstrual cramps, a warm water bottle can provide relief. The heat can help to relax tense muscles and ease the pain.
- Improved sleep: By providing a gentle, consistent source of warmth, a warm water bottle can help you fall asleep faster and stay asleep longer. Who doesn’t want a good night’s rest?
So, are you ready to learn how to warm up your water bottle effectively? Read on, because we’re about to share some easy-to-follow steps that will have you enjoying the benefits of a warm water bottle in no time!
What Kind of Water Bottle Can You Warm Up?
Before diving into the process of warming up a water bottle, it’s crucial to understand what kind of water bottle can be safely warmed up. Not all water bottles are created equal, and some materials are better suited to heat than others.
Plastic Bottles: When it comes to plastic water bottles, it’s a bit of a mixed bag. Be sure to check the bottom of the bottle for a recycling symbol. If it has a number 5, it means the bottle is made of Polypropylene, which can handle heat up to 275 degrees Fahrenheit. However, other types of plastic can release harmful chemicals when heated, so it’s best to be cautious.
Glass Bottles: Glass is a great material for warming because it can handle high temperatures without releasing any harmful substances. Just ensure that the glass is labeled as ‘thermal-resistant’ or ‘heat-resistant’ to avoid any risk of breakage.
Metal Bottles: Stainless steel bottles can handle heat and are a safe option. However, aluminum bottles should not be used for warming, as they can react with the water and produce harmful substances.
Now that you’re familiar with the types of bottles suitable for warming, let’s move on to the best practices for warming them up.
Tools You Will Need to Warm Up Your Water Bottle
Before we dive straight into the process of warming up your water bottle, it’s important to first gather all the necessary tools. Having these at hand will not only make the process smoother, but also safer. So, what will you need?
- Kitchen Towel: This will protect your hands from the heat and also provide a secure grip as you handle the warmed bottle.
- Large Pot: Choose a pot that is large enough to fully submerge your water bottle.
- Stove or Induction Cooker: You will need a heat source to warm the water in the pot. A stove or an induction cooker are the most common choices.
- Thermometer: This is necessary to keep track of the water’s temperature and ensure it’s just right for your bottle.
- Water Bottle: Of course, you will need the water bottle you intend to warm up.
Note that the specific tools you’ll need might vary slightly depending on the type of water bottle you have and how warm you want your water to be. Always make sure to follow the manufacturer’s instructions when warming up your water bottle.
Method 1: Boiling Water
Boiling water is perhaps the most common and straightforward method to warm up a water bottle. It’s a technique that’s been used for generations, and it’s likely one you’ve used yourself without even realizing it. But how exactly does it work? Let’s break it down:
Step 1: Fill a Pot with Water
Begin by filling a pot with water. Be sure to use enough water to completely cover your water bottle. This will ensure that heat is distributed evenly throughout the bottle.
Step 2: Bring the Water to a Boil
Next, place the pot on your stove and turn the heat to high. Wait for the water to reach a rolling boil. This could take anywhere from a few minutes to 15 minutes, depending on the size of your pot and the heat of your stove.
Step 3: Submerge the Water Bottle
Once the water is boiling, carefully lower your water bottle into the pot using a pair of tongs or a slotted spoon. Be sure not to drop the bottle in, as this could splash boiling water and potentially cause burns.
Step 4: Let the Bottle Warm Up
Let the bottle sit in the boiling water for a few minutes. The heat from the water will transfer to the bottle, warming it up. Make sure to watch the pot closely during this time to prevent the water from boiling over.
Step 5: Remove and Dry the Bottle
After a few minutes, use the tongs or a slotted spoon to carefully remove the bottle from the boiling water. Place it on a heat-safe surface and allow it to cool slightly before handling it. Then, dry it off with a clean towel.
And there you have it — a warmed-up water bottle. Remember, always handle boiling water with care to avoid accidents and burns.
Method 2: Microwave Oven
Feeling a chill? Your microwave can help warm your water bottle in just a few minutes. However, it’s crucial to handle this method with care. Here’s how to do it right:
Instructions:
- Inspection: Before anything else, check if your water bottle is microwave-safe. It’s often printed on the bottle or the manufacturer’s website. Ignore this step, and you risk damaging both your bottle and microwave.
- Preparation: Remove the lid from your bottle. This is to prevent any built-up pressure from causing the bottle to burst in the microwave.
- Timing: Set the microwave to heat for around 1-2 minutes, depending on the amount of water and power of your microwave. It’s best to start with a shorter timeframe and then add more time if needed.
- Checking: After the set time, carefully touch the bottle to test its temperature. If it’s not warm enough, you can put it back in the microwave. Remember, always handle the bottle with caution as it may be hotter than expected.
Remember: Microwaving a water bottle should be a last resort. It can be a quick fix, but it’s not the most recommended method because it can damage some types of bottles and unevenly heat the water. Always use a microwave-safe bottle and never leave the microwave unattended while heating.
Warming up your water bottle in the microwave can be a simple and quick solution when you’re in need of warmth. Just remember to always prioritize safety over speed to avoid any potential hazards.
Method 3: Electric Kettle
Have you considered using an electric kettle to warm up your water bottle? It’s a quick and effective solution that requires minimal effort on your part. Here’s how to do it:
Step 1: Fill the Kettle
Start by filling your electric kettle with water. Make sure you add enough water to submerge your water bottle. Remember not to overfill the kettle; it may lead to spillage or overheating.
Step 2: Heat the Water
Switch on the kettle and let the water heat up. It’s advisable to heat the water to a temperature that’s comfortable to touch. You don’t want the water too hot as it might damage your water bottle or cause burns.
Step 3: Immerse the Water Bottle
Once the water is heated, turn off the kettle and carefully immerse your water bottle into it. Ensure the water bottle is tightly sealed to prevent any water from entering it.
Step 4: Let it Sit
Let the bottle sit in the hot water for a few minutes, allowing it to warm up. The duration will depend on the material of your water bottle and how warm you want it to be.
Step 5: Remove and Dry
After the desired time, carefully remove the water bottle using a pair of tongs or a similar tool to avoid burns. Dry it off with a towel and it’s ready to use.
Note: Not all water bottles are suitable for this method. Plastic bottles, for instance, can warp or even melt when exposed to high temperatures. Always check the manufacturer’s instructions before proceeding.
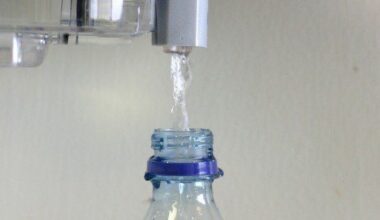
Method 4: Hot Water Tap
Has it ever crossed your mind that your hot water tap can be an effective tool to warm up your water bottle? Indeed, it is a straightforward and practical method.
Step-by-step Guide
- Fill the Bottle: Start by filling your water bottle with tap water. Ensure the water level is high enough to provide the desired warmth.
- Heat the Water: Turn on the hot water tap and let it run for a minute or so to reach its maximum temperature.
- Empty and Refill: Empty the initial water in the bottle and refill it with the now hot tap water.
- Seal the Bottle: Securely seal the bottle with its cap to retain the heat for as long as possible.
Remember, the heat from the tap water warms up the bottle. However, be mindful that the tap water’s temperature may not be scorching hot. But it can be warm enough to raise your water bottle’s temperature to a comfortable level.
Pro Tip: Add a thermal cover to your water bottle after this process to keep the water warm for a longer period.
In conclusion, the hot water tap method is a hassle-free and cost-effective way to warm up your water bottle. Give it a try and enjoy warm water whenever you want!
How Long Should You Warm Up Your Water Bottle?
How long should you warm up your water bottle, you ask? It’s a good question and the answer depends on a few factors. Let’s delve into it.
Size of the Water Bottle:
- Small Bottle (0.5 liters or less): A smaller water bottle typically takes around 10-15 minutes to warm up.
- Medium Bottle (0.5 to 1 liter): These usually take between 15-20 minutes to warm to a comfortable temperature.
- Large Bottle (1 liter or more): Larger bottles require about 20-30 minutes to warm up properly.
Type of the Water Bottle:
- Plastic Bottle: These bottles heat up faster but also lose their heat faster. You may need to reheat them after a while.
- Stainless Steel Bottle: Stainless steel bottles take slightly longer to warm up, but they retain heat much longer.
Your Desired Temperature
Ultimately, the time it takes to warm your water bottle will also depend on your desired temperature. If you prefer your water lukewarm, it might only take 10 minutes. If you want your water really hot, you may need to wait up to 30 minutes or more. Always remember, safety first. Make sure the water isn’t too hot to handle!
In conclusion, there is no one-size-fits-all answer to how long you should warm up your water bottle. It varies based on the bottle’s size, type, and your personal temperature preference. Experiment with different times and find what works best for you.
Tips for Safely Warming Up Your Water Bottle
Ever wondered how to warm up your water bottle safely? Look no further! Here, as it may cause the bottle to warp or damage.
Avoid Direct Heat
It’s important to avoid exposing your water bottle to direct heat. This includes microwaves, stoves, or direct sunlight. These sources of heat can cause materials like plastic to melt or release harmful substances.
Remember, safety comes first when warming up your water bottle. Always choose methods that are safe for both the material of your bottle and your health.
Alternative Ways to Keep Your Water Bottle Warm
Ever wished your water bottle could stay warm a little longer? You’re not alone. Luckily, there are quite a few alternative ways to keep your water bottle warm. Here’s some of them:
Pre-Warming Your Bottle
Believe it or not, one of the simplest ways to keep your water warm is by pre-warming your bottle. How does that work?
- Fill the bottle with hot tap water. This will help in raising the temperature of the bottle.
- Let it sit for a few minutes. This will allow the heat from the water to transfer to the bottle.
- Empty the hot water and replace it with your actual warm beverage. Now, your warm beverage will stay hot for a longer time.
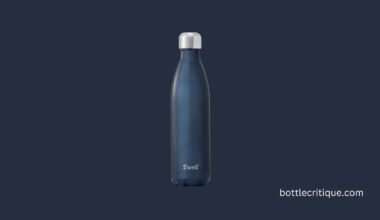
Insulating Your Bottle
Insulation is another effective method for keeping your water bottle warm. It works by reducing the amount of heat that escapes from the bottle. Here’s how to do it:
- Use an insulated bottle. These bottles are specifically designed to keep liquids warm. They work by creating a barrier between the liquid and the surrounding air.
- Wrap your bottle. If you don’t have an insulated bottle, you can still insulate your regular bottle. Wrap it in aluminum foil, a towel, or even your jacket. This will reduce the amount of heat that escapes.
Using Bottle Warmers
Perhaps the most straightforward way to keep your water bottle warm is to use a bottle warmer. These are devices designed specifically for this purpose. Although they may be an investment, they can be quite effective.
Remember, no one likes a cold beverage when they’re expecting it to be warm. Choose the method that best suits your needs and enjoy your warm drink longer!
Conclusion: Enjoy Your Warm Drink Anytime, Anywhere
Warming up your water bottle, whether it’s for a comforting hot drink, a soothing bed warmer, or to alleviate some physical discomfort, can be done easily with the methods we’ve discussed. It’s a simple, yet effective way to enjoy the benefits of warm water no matter where you are or what time it is. What’s more, these steps are straightforward and require only basic items that most of us already have at home.
Let’s take a moment to recap what we’ve covered:
- Using a Microwave: With careful timing and monitoring, a microwave can quickly heat your water bottle. Just remember, safety is paramount. Don’t microwave plastic bottles or bottles with metal parts.
- Stovetop Method: A simple, traditional method that ensures evenly heated water. It takes a bit more time and attention, but the result is worth it. Again, ensure only heat-resistant and stove-safe bottles are used.
- Electric Kettle: If you have an electric kettle, this might be the quickest and most convenient method. Just fill, boil, and pour – it’s as simple as that.
Remember, the goal isn’t just to warm the water, but to do it safely and efficiently. Always prioritize safety in everything you do. Also, be mindful of the material your water bottle is made of, as not all materials can withstand heat.
“A warm drink can comfort the body, soothe the mind, and invigorate the soul. So why not enjoy this simple pleasure anytime, anywhere?”
With these easy-to-follow instructions, you’re well-equipped to warm up your water bottle whenever the need arises. So go on and enjoy your warm drink anytime, anywhere!