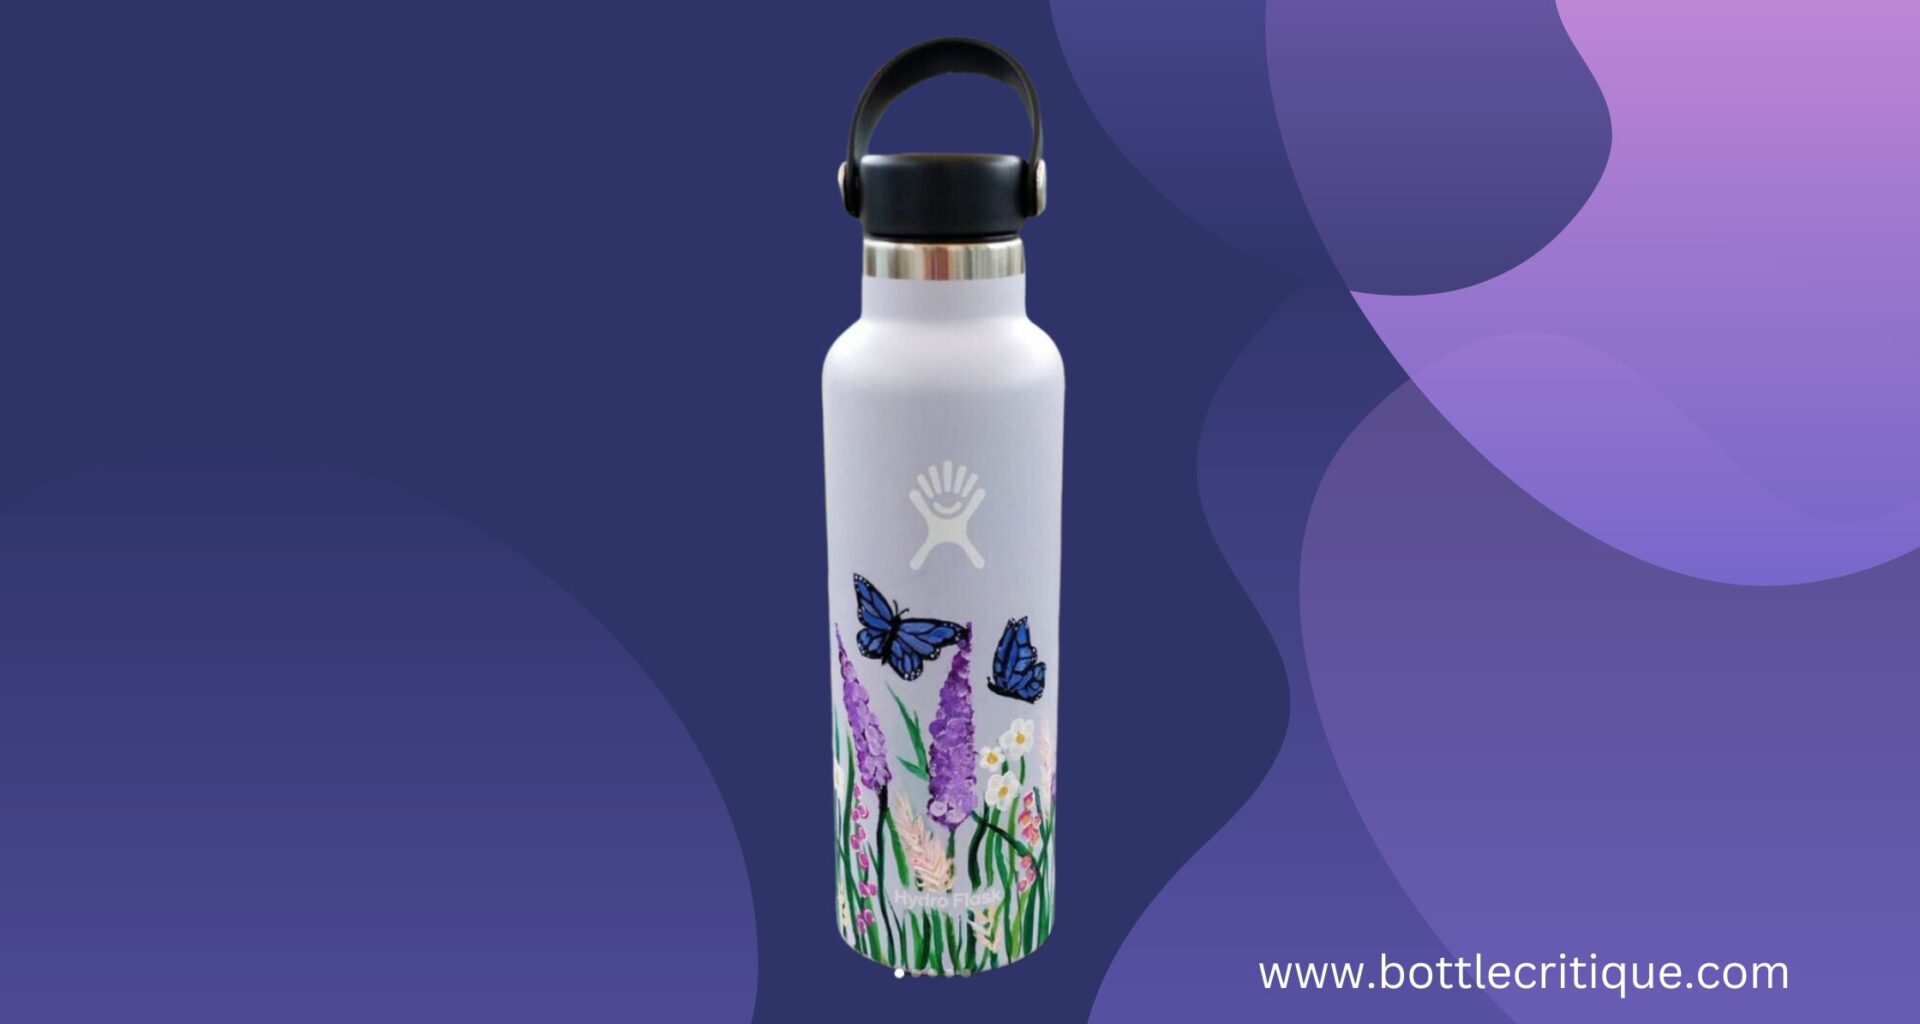
Ever stumbled upon a water bottle so drab it makes tap water seem exciting? Ever wished you could jazz it up, but didn’t know how? Well, get ready to uncork your creativity because today, we’re diving into the art of sealing acrylic paint on water bottles!
Why acrylic paint, you ask? Well, aside from being brighter than a peacock in a disco, acrylic paint is also super durable and versatile. It’s like the Swiss army knife of the art world!
But hold your horses! Before you start splashing colors left, right, and center, you need to remember one vital step: sealing. It’s the secret sauce to keeping your Picasso-esque masterpiece from chipping off, fading, or looking like it was hit by a monsoon.
So, buckle up as we guide you, step by step, on how to seal your acrylic paint on a water bottle. From beginners to seasoned artists, there’s something here for everyone. Who knows? You might just find yourself embarking on a new art adventure!
Why seal acrylic paint on a water bottle?
Ever looked at your water bottle and thought, “Hey, wouldn’t this be a whole lot cooler if I could jazz it up with some paint?” If you’ve been nodding your head, you’ve come to the right place. But, here’s the catch, you can’t just slap on some acrylic paint and call it a day. Nope, that’s when sealing comes into the picture. So, why is it so essential to seal acrylic paint on a water bottle? Let’s break it down.
Protection, my friend, protection. Think about all the wear and tear your water bottle goes through. It’s in your bag, it’s on your desk, it’s in your car – it’s practically everywhere! Acrylic paint, while sturdy, isn’t invincible. Sealing the paint offers an extra layer of protection, safeguarding your masterpiece from scratches and chips.
Ever heard of the saying, “Water and oil don’t mix”? Well, let’s tweak that a little – ‘Water and acrylic paint don’t mix’. You see, acrylic paint, when exposed to water for a long time, can start to peel off. And considering your water bottle is constantly in contact with water, you can see how this could be a problem. The sealant acts as a barrier, preventing water from making your artwork go kaput.
Lastly, let’s not forget about the pesky factor of discoloration. Over time, due to exposure to sunlight or general wear, your vibrant art could start to look a little dull. But, a sealant can help maintain the vibrancy of colors, ensuring your bottle looks as good as new for longer.
Remember, sealing your acrylic paint is like buying an insurance policy for your art – it’s there to protect your creative investment.
Alright, now that we’re clear on why sealing is important, let’s move on to the nitty-gritty of how to do it, shall we?
Choosing the right type of acrylic paint for your water bottle
So, you’ve decided to jazz up your water bottle with some acrylic paint, huh? Well, before you dive in headfirst with your paintbrush in hand, you need to consider the type of acrylic paint you’re going to use. Not all paints are created equal, my friend!
Quality matters, in the realm of acrylic paints. Yes, it’s tempting to go for the cheapest option, but remember, you get what you pay for. High-quality paints will give you better coverage, more vivid colors, and will generally be more durable.
Consider the finish of the paint too. Acrylic paints can have a matte, semi-gloss, or high-gloss finish. Now, this is where personal preference comes into play. Are you a fan of the sleek, shiny look? Or, do you prefer a more understated, matte finish? The choice is yours. There’s no right or wrong here, just different strokes for different folks.
Pro tip: High-gloss finishes can sometimes make scratches more noticeable, while matte finishes might be a bit more forgiving.
Types of Acrylic Paint
When it comes to the specific types of acrylic paint, you generally have two choices:
- Student Grade: Don’t let the name fool you, this isn’t just for the kiddos. Student grade acrylic paint is a more affordable option and is perfect for those of you who are just starting out or experimenting. However, it might require multiple layers for good coverage.
- Artist Grade: Ah, the crème de la crème of acrylic paints. Artist grade paints have a higher pigment concentration, providing richer colors and better coverage. But, all this comes at a higher price. So, if you’re thinking about going professional with your water bottle painting, this is the way to go.
So, there you have it. Choosing the right acrylic paint for your water bottle isn’t rocket science, but it does require a bit of thought. Remember, the most important thing is to have fun. After all, it’s not just about the destination, but the journey as well. Happy painting!
Preparing the surface of your water bottle for acrylic paint
Picture this: You’ve got your brushes, a rainbow of acrylic paints, and a clear, canvas-like water bottle that’s begging for a touch of creativity. But wait! Before you dive headfirst into your artistic endeavor, there’s one crucial step you can’t afford to overlook: Preparing the surface of your water bottle. It’s like laying the foundation for a house; without it, all your efforts might just come crashing down. So, how do you go about it? Buckle up, Picasso, we’re about to take you on a journey!
1. Clean Your Water Bottle
First things first, you wouldn’t paint on a dirty canvas, would you? The same logic applies to your water bottle. It’s time to roll up your sleeves and give that bottle a good scrub. Use warm soapy water and a soft cloth or sponge to clean the outer surface thoroughly. Rinse it well and make sure there’s no soapy residue left. Then, let it air dry completely. Any moisture left on the bottle can interfere with the paint adhesion.
2. Sand the Surface
Grab your sandpaper, it’s time for a bit of elbow grease! Why, you ask? Well, acrylic paint tends to stick better to a rough surface than a smooth one. Lightly sanding the water bottle with fine-grit sandpaper (think 220 grit or finer) will create tiny grooves that the paint can adhere to. Just remember, you’re not trying to sand down a piece of wood, so don’t go overboard. A light, even scuffing all over the bottle will do the trick.
3. Wipe Down the Surface
After sanding, there will be tiny dust particles on the surface that could mix with your paint and ruin the smoothness of your artwork. So, what’s the solution? Simple. Wipe down the bottle with a damp cloth to remove the dust, then let it dry completely again. Voila! You now have a clean, rough surface ready to show off your artistic prowess.
Remember, a well-prepared surface can make all the difference between a masterpiece that lasts and a disaster that peels off at the slightest touch. So, take your time, follow these steps, and you’ll be on your way to creating a beautiful, long-lasting piece of art on your very own water bottle.
Applying acrylic paint to your water bottle
So, you’ve got your water bottle in one hand and your acrylic paint in the other. You’re raring to go, but hold your horses! Before you dive in, there are a few key steps you need to follow for applying acrylic paint to a water bottle. This isn’t a spur-of-the-moment rodeo, my friend!
Step one: Prepping your water bottle
First things first, you need to prep your water bottle. This isn’t a quick slap-dash job. You can’t just start painting willy-nilly and hope for the best. Start by cleaning the water bottle thoroughly. You don’t want any grime or fingerprints ruining your masterpiece, do you?
Step two: Applying a base coat
Next, it’s time to apply a base coat. Trust me, you don’t want to skip this crucial step. The base coat is what will seal your design and make it last. Apply the base coat evenly all over your water bottle and let it dry. Remember, patience is a virtue!
Step three: Painting your design
Now, the moment you’ve been waiting for: painting your design! Let your creativity run wild. Whether you’re going for a bold, modern look or a soft, romantic style, the sky’s the limit. But remember, Rome wasn’t built in a day, so take your time and enjoy the process.
Step four: Sealing your artwork
Finally, once your acrylic paint is completely dry, it’s time to seal your artwork. You want your hard work to last, right? Apply a clear acrylic sealant over your design. This will protect your paint from chipping or fading. And voila! You’ve just transformed a plain water bottle into a work of art!
So there you have it. Who knew that painting a water bottle could be so simple and fun? I bet you can’t wait to get started on your next masterpiece. Happy painting!
Letting your acrylic paint dry properly
Alrighty then, let’s dive right into the art of patience – because that’s exactly what you need when you’re waiting for your acrylic paint to dry properly on your water bottle. Don’t worry, it’s not as painful as watching paint dry. Well, actually it is… but who said that couldn’t be fun?
So, why is this so important? Think about it. You’ve just unleashed your inner Picasso and created a masterpiece on your water bottle. You wouldn’t want your lovely art to smudge or peel off, would you? Of course not! That’s where the art of patience comes into play.
1. Let it Dry, Naturally
Drying acrylic paint isn’t rocket science. In fact, it’s as simple as doing nothing at all. Just let the paint dry naturally. But, beware of temperature and humidity, as acrylic paint loves to act up in extreme conditions. You don’t want your freshly painted bottle to feel like it’s in the Sahara desert or the Amazon rainforest. Room temperature is more its jam.
2. It’s Time to Wait
And now, the waiting game begins. Depending on the thickness of your paint layer, it could take anywhere from a few hours to a couple of days to dry completely. Remember, good things come to those who wait, especially in the world of acrylic paint.
3. The Touch Test
So, how do you know if your paint is dry? The touch test, of course! But hold your horses, you don’t want to smudge your beautiful art with a premature poke. Make sure to do the touch test gently, and only when you’re reasonably certain the paint is dry.
In the grand scheme of things, patience really is a virtue when it comes to sealing acrylic paint on your water bottle. So take a chill pill and let nature (and time) do its thing. Your masterpiece will thank you for it!
Protecting your acrylic paint with a sealant
Now that you’ve painted your water bottle to perfection, you might be thinking, “What’s next?” Well my friend, it’s time to protect that masterpiece of yours by sealing it with a high-quality acrylic paint sealant. This step is as important as the painting itself, if not more, because without it, your artwork would be as vulnerable as a lone deer in the open prairie.
Sealing your acrylic paint ensures that your designs are safe from the wear and tear of everyday use. It’s like a superhero’s shield, protecting the artwork from fading, cracking, or peeling. So, are you ready to make your water bottle art indestructible?
Step 1: Choose Your Sealant
There’s a sea of sealant options out there, each with its own pros and cons. You might feel like a kid in a candy store, but make sure you choose a sealant that’s suitable for acrylic paints and safe for use on water bottles. After all, you wouldn’t want to play Russian roulette with your artwork, would you?
Step 2: Apply Your Sealant
Applying your sealant isn’t as complicated as rocket science. But, it’s not as easy as a walk in the park either. Here’s a quick run-through:
- Clean your water bottle: Ensure your water bottle is clean and dry. Any dust or moisture can ruin the sealant application, making it as useless as a chocolate teapot.
- Apply the sealant: Use a soft brush or a sponge to apply the sealant evenly over your design. Imagine you’re painting a feather with the gentlest touch.
- Let it dry: Patience is a virtue, especially when it comes to letting your sealant dry. It’s like waiting for paint to dry, literally!
Step 3: Repeat (If Needed)
Depending on the sealant and your design, you might need to apply a second or even a third coat. It’s like making sure you’ve got enough layers on in winter – better safe than sorry!
Final Thoughts
Sealing your acrylic paint protects your design and ensures that your creativity lasts as long as possible. It might seem like a daunting task, but with the right sealant and a bit of patience, you’ll have a water bottle that not only looks fantastic, but can also withstand the test of time.
So, there you have it. You’re now a pro at sealing acrylic paint on a water bottle. Go ahead and seal your masterpiece. Picasso would be proud!
Different types of sealants for acrylic paint
Alright, let’s dive into the universe of sealants, shall we? Now, imagine you’re about to seal your newly painted, spectacular water bottle. You’re standing in the aisle of your local craft store, and you’re met with a dizzying array of sealants. Which one do you choose? Fear not, my friend, for we are about to embark on a thrilling exploration of the different types of sealants for acrylic paint.
First things first, let’s talk about acrylic sealant. This is your go-to, the bread and butter of sealants if you will. Why, you may ask? Well, acrylic sealants are water-based and they dry clear, making them a fantastic option for preserving the vibrancy and integrity of your acrylic paint.
Secondly, we have the urethane sealant. This bad boy is known for being incredibly durable and resistant to harsh conditions. If your water bottle is going to be thrown around, left in hot cars, or used by a toddler, this might be your sealant of choice. However, keep in mind that it can yellow over time, so it’s not always the best option for lighter color palettes.
Remember, the type of sealant you choose should depend on your specific needs and the conditions your water bottle will be exposed to.
Moving on, there’s the epoxy sealant. Epoxy sealants are strong, very strong. They’re like the Hulk of sealants. Not only are they durable, but they also provide a high-gloss finish that can really make your design pop. However, they can be a bit more challenging to apply and might not be the best fit for beginners.
The Table of Comparison
| Type of Sealant | Pros | Cons |
|---|---|---|
| Acrylic Sealant | Water-based, dries clear, preserves vibrancy. | Not as durable as some other options. |
| Urethane Sealant | Highly durable, resistant to harsh conditions. | May yellow over time. |
| Epoxy Sealant | Very strong, high-gloss finish. | More challenging to apply, not ideal for beginners. |
There you have it, folks. Those are some of the most popular types of sealants for acrylic paint. Choose wisely, and remember to always test your sealant on a small area first to ensure it’s the right fit for your project. Happy sealing!
How to apply sealant on your acrylic paint
So, your water bottle is looking like a masterpiece with all that beautiful acrylic paint, huh? Well done, Picasso! But wait, aren’t you forgetting something important? Yup, you guessed it – sealing the paint! It’s like putting a bow on a present, the finishing touch that makes all the difference. Now, let’s get that paint sealed and make your artistry waterproof.
Choosing the Right Sealant
First things first, you’ve got to pick the right sealant. It’s like choosing the right pair of shoes for an outfit, you want it to complement the paint, not clash with it. Acrylic Sealant is a fabulous choice for acrylic paint, surprising, huh? This transparent, waterproof hat for your paint comes in different finishes such as matte, semi-gloss, and high-gloss. Choose the one that tickles your fancy the most.
Prepping the Bottle
Before you start sealing, you need to ensure your bottle is clean, dry, and free of any dust. You wouldn’t lay a tablecloth on a dirty table now, would you? Make sure your painted designs are entirely dry as well, unless you want to create some sort of abstract, smeared art.
Applying the Sealant
Now, onto the main event. Applying the sealant is a piece of cake, so don’t sweat it. Here’s a simple step-by-step guide to help you through:
- Shake the Sealant: Like a good cocktail, your sealant needs a good shake before use. This helps mix the components well.
- Test Spray: Don’t go all guns blazing straight onto your bottle. Do a test spray on a scrap piece of paper to ensure the nozzle works fine and you’re comfortable with the spray pattern.
- Apply the Sealant: Hold the can about a foot away from your bottle and spray in a slow, even motion. It’s not a race, so take your time.
- Dry and Repeat: Let your bottle dry. Patience, my friend, is a virtue. Once dry, apply a second coat for that extra layer of protection.
Voila! You’ve sealed your acrylic paint on your water bottle like a pro. Now, go on, flaunt your bottle and make everyone green with envy!
Remember: Always use sealant in a well-ventilated area and protect your workspace from any overspray. Safety first, artistry second!
Tips and tricks for maintaining the quality of your acrylic paint on your water bottle
So, you’ve made a splash with your acrylic paint on your water bottle. Awesome stuff! But now, the million-dollar question – how do you maintain that jaw-dropping beauty? No worries, mate. I’ve got you covered. Just like a good bottle of wine, your artwork needs some tender loving care too.
Let’s dive right in, shall we?
1. Clean with Care
Remember, while your painted water bottle may be tough, it’s not invincible. When washing your water bottle, gentle is the name of the game. Think of it as washing a delicate piece of silk – not your mud-caked football jersey.
2. Be Wary of the Dishwasher
Contrary to popular belief, dishwashers aren’t the best friends of your painted water bottles. Sure, they may seem like the perfect solution for a quick clean-up, but they’re essentially a heated box of water jetting around at high speeds. Not exactly a day at the spa for your artwork, huh?
3. Use Mild Detergents
When it comes to cleaning solutions, mild is wild! Your painted water bottle will thank you if you use a gentle, non-abrasive detergent. Stay away from those heavy-duty cleaners; they’re overkill and can damage your bottle’s gorgeous exterior.
4. Regular Maintenance
Consistency is key to maintaining your painted water bottle. A quick cleaning routine after each use can do wonders for its longevity. Remember, good habits go a long way.
5. Avoid Prolonged Sun Exposure
Just like us, your painted water bottle isn’t a big fan of sunbathing. Excessive heat and sunlight can cause the acrylic paint to fade over time. So, let’s keep it cool, alright?
To sum it up, taking care of your painted water bottle is no rocket science. It’s all about giving it some love, treating it gently, and keeping it clean. Do this, and your bottle will continue being the showstopper it was meant to be!
Frequently asked questions about sealing acrylic paint on water bottles
So, you’ve decided to go Picasso on your water bottle with some acrylic paint? That’s awesome! But now, you might be wondering how to ensure your masterpiece sticks around. Let’s address some frequently asked questions about sealing acrylic paint on water bottles.
1. Can you really use acrylic paint on water bottles?
Oh, yes you can! Acrylic paint is versatile, meaning you can paint it on just about any surface, even your trusty water bottles. However, you need to pay attention to the finish. A glossy finish will make the colors pop, but a matte finish won’t reflect light, giving your artwork a different feel.
2. Do I need to seal the acrylic paint on my water bottle?
Absolutely, yes! Why, you ask? Well, unless you want your beautiful designs washing off after a few uses, you’ll need to seal your paint. Sealing your work protects it from the elements, wear and tear, and yes, even those accidental spills of your favorite beverage.
3. What can I use to seal acrylic paint on my water bottle?
There are a few popular options here. You could use a clear acrylic spray sealer, which is super easy to apply, or a dishwasher-safe mod podge if you plan on giving your bottle a scrub in the dishwasher. Then there’s the epoxy resin route – a little more complicated but oh-so-glossy and durable.
4. How long should I wait before sealing the acrylic paint?
Patience, my friend, is a virtue. You should let your acrylic paint dry completely before sealing, which typically takes 24 to 48 hours. Remember, rushing might result in smudging your hard work, and we wouldn’t want that, would we?
5. Can I still wash my water bottle after sealing the paint?
You better believe it! You can, and you should. Just remember to use a gentle hand wash method for your art-adorned bottle. If you’ve used a dishwasher-safe sealer, you can even pop it in the dishwasher, but remember: top rack only!
There you have it, folks! Your questions about sealing acrylic paint on water bottles, answered. Now, go forth and create your water bottle masterpiece with confidence!
