Have you ever wanted to add a personal touch to your water bottle? Vinyl decals are an easy and fun way to do just that! In this article, we’ll guide you step-by-step on how to put vinyl on a water bottle. Whether you want to create a unique gift, start a DIY project, or simply express your personal style, this guide has got you covered. Let’s get started!
Why vinyl is a great option for customizing your water bottle
Customizing your water bottle with vinyl decals is an excellent idea, and here’s why:
- Vinyl is durable: Vinyl decals are incredibly resistant to wear and tear, making them perfect for items like water bottles that are used regularly. They can withstand regular washing and the occasional drop without peeling or fading.
- Easy to apply: Adding a vinyl decal to your water bottle is a simple process that you can do yourself at home. All you need is a clean surface and a bit of patience to ensure your decal is positioned correctly.
- Personalization: Vinyl decals come in a wide range of colors, sizes, and designs, allowing you to create a truly personalized look for your water bottle. Whether you want your name, a favorite quote, or a unique design, vinyl decals make it possible.
- Cost-effective: Compared to other forms of customization, vinyl decals are relatively inexpensive. This means you can refresh the look of your water bottle as often as you like without breaking the bank.
So, why not grab a vinyl decal and give your water bottle a fresh new look? It’s a fun, easy, and affordable way to express your personal style.
Getting the right supplies: what you need to start your vinyl project
Starting your vinyl project requires a handful of specific supplies. By gathering the right tools, you ensure a smooth, hassle-free experience in applying vinyl to your water bottle.
- Vinyl: Quality matters. Opt for adhesive vinyl that is waterproof and durable, ensuring your design endures frequent use and washing.
- Water Bottle: Any smooth, non-porous water bottle will do. Stainless steel or plastic models are preferable. Avoid textured bottles as these can hinder the vinyl’s adherence.
- Weeding Tool: This tool helps remove excess vinyl from your design. It’s especially useful for intricate patterns.
- Transfer Tape: This adheres to your vinyl design, allowing you to apply it onto your water bottle with precision.
- Scraper or Squeegee: A tool to smooth out the vinyl and eliminate any potential air bubbles.
- Cutting Machine: While not strictly necessary, a cutting machine like a Cricut can make cutting your design from the vinyl much easier.
Once you have procured all the necessary supplies, you’re ready to start applying vinyl to your water bottle.
Preparing your water bottle: cleaning and drying tips for a successful vinyl application
Before you start the process of applying vinyl to your water bottle, it’s imperative that the surface is clean and dry. This ensures that the vinyl adheres properly and lasts longer. So, how should you go about preparing your water bottle?
Step 1: Clean your water bottle
Firstly, grab your water bottle and give it a good clean. Use warm soapy water for the initial cleanse to remove any dirt or oil. You can utilize a bottle brush to reach the nooks and crannies if needed.
Step 2: Dry your water bottle
Once thoroughly cleaned, it’s time to dry your water bottle. Air drying is the best approach here. Let it sit on a towel or a drying rack until completely dry. This may take some time, so plan accordingly.
Step 3: Wipe with rubbing alcohol
After your water bottle is dry, take a soft cloth and dampen it with a little rubbing alcohol. Wipe the entire surface where you plan to apply the vinyl. This step is crucial as it removes any remaining traces of oil or soap, allowing the vinyl to stick better.
Remember, a clean and dry surface is the key to a successful vinyl application. So, take your time in this preparatory phase and ensure that your water bottle is ready for its vinyl makeover!
Designing your vinyl: tips and tricks for creating the perfect design
Mastering the art of designing your vinyl for a water bottle requires a few tips and tricks. It’s all about creativity, precision, and a little bit of technical know-how.
Choosing the Right Design
First, you need to select a design that suits your personality and style. Remember, this is your water bottle, and the design should represent you. Choose something that makes you smile every time you take a sip.
Design Size and Placement
When it comes to sizing, keep in mind the curvature of your water bottle. Avoid designs that are too large. They may not adhere properly or could end up looking distorted. A design that fits comfortably on the bottle’s flat surface area is ideal.
Colors and Contrast
Color choice is crucial. You’re looking for contrast. A design that matches your water bottle’s color might not stand out as much as you’d like. Always opt for colors that pop!
Tools You’ll Need
Lastly, you will need vinyl, a weeding tool, a transfer tape, and a squeegee or a credit card to apply your design. Keep these on hand before you start the process.
Remember, vinyl designing is all about experimentation. Don’t be afraid to make mistakes or try something new. With a little bit of practice and patience, you will be a pro in no time.
Cutting your vinyl: a step-by-step guide to cutting your vinyl with precision
Putting vinyl on a water bottle involves a few critical steps, one of which is accurately cutting your vinyl. This section aims to guide you meticulously through this process to help you avoid any errors and achieve a perfect cut every time.
1. Gather Necessary Tools
You will need a cutting mat, a vinyl cutter or a craft knife, and a ruler. Make sure these tools are in good condition for precision and safety.
2. Prepare Your Design
Ensure you have your design ready and to scale. It’s imperative that it fits the surface area of your water bottle perfectly.
3. Cut Your Vinyl
- Place your vinyl on the cutting mat: Ensure it’s flat and secure.
- Align your ruler with the design lines: This will guide your cuts and prevent any discrepancies.
- Hold your vinyl cutter or craft knife at a 45-degree angle: This is the optimal angle for a smooth, clean cut.
- Apply consistent and firm pressure as you cut along the design lines: Be careful not to cut through your mat. Take your time to ensure precision.
4. Check Your Work
After cutting, examine your vinyl. Check for any jagged edges or discrepancies in your cuts. If anything seems off, don’t worry. Simply use your craft knife to trim any minor inaccuracies.
The process of cutting vinyl may seem daunting at first, but with practice, you’ll perfect your skills in no time. Remember, the key to a successful vinyl cut is precision, patience, and practice.
“The secret of getting ahead is getting started. The secret of getting started is breaking your complex overwhelming tasks into small manageable tasks, and starting on the first one.” – Mark Twain
So, start small, practice regularly, and soon you’ll be able to create beautiful vinyl designs for your water bottle with ease.
Weeding your vinyl: how to remove the excess vinyl and reveal your design
Once your design is cut on the vinyl, the next crucial step is weeding. Weeding, in the vinyl world, refers to the process of removing the excess vinyl from your design. This is how you reveal the true design that will eventually go onto your water bottle. In this section, we’ll guide you through the weeding process with precision and ease.
Step-by-step Weeding Process
- Start from the edges: Begin by peeling away the vinyl from the outer edges of your design. Be gentle and patient to avoid tearing or distorting the vinyl.
- Use a weeding tool: A weeding tool, or a fine point tweezer, can be incredibly helpful in removing smaller, intricate parts of your design. The sharp tip allows you to lift the vinyl without damaging the design.
- Work in good lighting: Ensure you’re working in a well-lit space. Good lighting can make a significant difference in the weeding process. It’ll be easier for you to identify the lines of your design and remove the excess vinyl accurately.
- Remove excess carefully: As you weed, ensure you’re removing the vinyl pieces away from your design to avoid them sticking back onto your project.
Remember, weeding is a meticulous process. Don’t rush it. Take your time to ensure every detail of your design is picked up correctly.
Now that you’re well-versed in weeding your vinyl, it’s time to move on to the next step – applying your design to your water bottle.
Applying your vinyl: a foolproof method for transferring your vinyl onto your water bottle
Applying vinyl to a water bottle can seem like a daunting task, but with the right steps and a little bit of patience, it can be incredibly straightforward. Let’s dive right into the foolproof method for transferring your vinyl onto your water bottle.
Step 1: Clean the Water Bottle
Before we begin, ensure your water bottle is clean and dry. This step is crucial to making sure the vinyl adheres correctly, so don’t rush it. Use a cloth dipped in rubbing alcohol to clean the surface where you intend to place the vinyl.
Step 2: Cut Out Your Design
Cut out your vinyl design carefully. For the best results, use a high-quality vinyl cutter or a sharp pair of scissors. Remember to be as precise as you can to ensure your design looks just the way you want it to.
Step 3: Apply Transfer Tape
Next, apply a piece of transfer tape to the front of your design. This will help you move the design to your water bottle without damaging it. Smooth out any bubbles using a credit card or similar object.
Step 4: Position Your Design
Now, position your design onto your water bottle. Take your time doing this, ensuring the design is exactly where you want it to be. Once you are satisfied with the position, apply some pressure to help the vinyl stick.
Step 5: Remove the Transfer Tape
Finally, carefully peel off the transfer tape. Do this slowly to prevent damaging your design. If any part of the vinyl starts to come off with the tape, simply put it back down and apply more pressure before trying again.
And you’re done! By following these steps, you should now have a perfectly adorned water bottle. Remember, the key to a successful vinyl application is patience and precision. So take your time, don’t rush, and you’ll have a water bottle that truly reflects your style.
Troubleshooting common issues: how to fix bubbles, wrinkles, and other vinyl mishaps
Even with the best of intentions, applying vinyl to your water bottle may not always go as smoothly as planned. You might encounter bubbles, wrinkles or other mishaps. Don’t despair! Here are some common issues and their solutions:
1. Bubbles Under the Vinyl
This is a common issue that can mar the look of your vinyl design. But don’t worry, it’s an easy fix!
- Use a pin: Use a very fine pin to prick the bubble. Be careful not to scratch the vinyl. Once you’ve made a small hole, gently press down on the bubble to release the trapped air.
- Use a hairdryer: Warm the vinyl with a hairdryer on a low setting. This makes the vinyl more pliable. Then, use a credit card or similar tool to smooth out the bubble.
2. Wrinkles in the Vinyl
Wrinkles can happen if the vinyl is not applied evenly. Here is how to fix it:
- Use a hairdryer: Similar to removing bubbles, you can use a hairdryer to warm up the wrinkled area. Once warm, use your fingers or a flat tool to smooth out the wrinkles.
- Peel and reapply: If the wrinkle is too large or the hairdryer doesn’t work, you may need to carefully peel off the vinyl and reapply it. Do this slowly to avoid tearing the vinyl.
3. Vinyl Not Sticking Properly
If the vinyl is not sticking to your water bottle, it could be due to a lack of surface preparation or a low-quality adhesive. Here is what you can do:
- Clean the surface: Ensure the water bottle is clean and free from any oils or residues. Use a mild detergent or rubbing alcohol for the best results.
- Try a different brand: If the vinyl still won’t stick, it might be because of a low-quality adhesive. Consider trying a different brand of vinyl with better reviews.
Note: Regardless of the issue, always remember to be patient and gentle in your attempts to fix it. Too much force or haste can lead to further damage.
Caring for your vinyl: tips for making sure your vinyl stays put and looks great
Now that you’ve successfully applied your vinyl to your water bottle, ensuring its long-term appeal and durability is paramount. Let’s delve into some tips that will help your vinyl stay put and look great.
Maintain Proper Cleaning Practices
While it’s important to keep your water bottle clean, be mindful of how you do it. Avoid immersing the bottle in water for prolonged periods, as this could adversely affect the adhesive on the vinyl. Instead, opt for gentle hand washing.
Limit Exposure to Extreme Temperatures
Extreme heat or cold can compromise the longevity of your vinyl. Thus, do not put your bottle in the freezer, dishwasher, or leave it in a hot car. Always strive to keep your bottle at moderate temperatures.
Do Not Scratch or Pick at the Vinyl
It may be tempting to fiddle with the edges of your vinyl, especially when it starts to peel. Resist this temptation. Picking at the edges can cause further peeling, reducing the lifespan of your vinyl decoration.
Use Quality Vinyl
Not all vinyls are created equal. Ensure that you’re using high-quality vinyl which is waterproof and durable. Quality vinyl will stick better, last longer and resist fading.
By following these tips, you can maintain the vibrance and longevity of your vinyl design, making your water bottle a standout piece for years to come.
Ideas and inspiration: creative ways to use vinyl to personalize your water bottle
Personalizing your water bottle with vinyl can turn an ordinary object into a unique accessory that speaks volumes about your style and personality. Here are some creative ways to use vinyl to customize your water bottle:
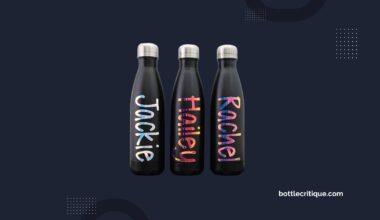
- Monograms: A classic and timeless choice. Use your initials or a loved one’s for a personal touch.
- Quotes: A motivational quote or a line from your favorite song can make your water bottle truly yours.
- Patterns: Geometric designs, floral prints, or abstract art can add a visually striking element to your water bottle.
- Logos: Show your love for your favorite sports team, band, or brand by featuring their logo on your water bottle.
- Pictures: With vinyl, you can even put a silhouette of your pet, a favorite cartoon character, or a memorable landscape on your water bottle.
Remember, vinyl customization is not just about adding aesthetic appeal; it’s also a way of expressing yourself and making a statement. So, why wait? Start exploring your creativity and personalize your water bottle to make it distinctly yours!