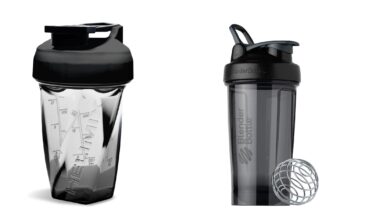
If you’ve ever been to a gym, or even just casually strolled through the fitness aisle of your local supermarket, chances are you’ve seen a blender bottle. These handy contraptions, often populated with a nifty little wire whisk ball, are essential for any fitness enthusiast looking to mix up a protein shake or a pre-workout supplement on the go. But, have you ever found yourself perplexed, scratching your head in confusion, wondering just how to open this modern marvel of beverage containment? Well, fret no more my friend, for this article is here to provide guidance on that very subject.
Now, you might be chuckling to yourself, thinking something along the lines of, “Opening a blender bottle can’t possibly be that complicated, right?”. Ah, dear reader, if only things were that simple. While Blender Bottles, much like ogres and onions, have layers. It’s not just a matter of popping off a lid. There’s a science to it – a method to the madness, if you will. And it’s that method we’ll be delving into today. So pull up a chair, grab your blender bottle, and prepare to become a master of bottle opening.
Why the Blender Bottle is the Perfect Accessory for Busy People
In today’s fast-paced world, it’s natural to crave for solutions that are not only efficient but also keep things simple. And this is where the Blender Bottle swoops in to be the hero. This ingenious accessory serves as a multifunctional tool, making it the quintessential companion for those who find themselves continually juggling between work, fitness routines, and healthy eating.
The Blender Bottle, a seemingly simple object, is a potent concoction of convenience, design, and practicality. With its unique wire whisk element, this wonder bottle delivers smooth shakes every single time, eliminating the hassles of lumpy, unappetizing protein shakes. It’s as if you have a tiny, tireless blender working full-time in your bottle, diligently ensuring every sip you take is nothing short of perfection.
But, what makes this bottle the go-to choice for busy bees around the globe? Why should you, dear reader, consider investing in one? Allow us to elucidate.
1. Time-Saving Convenience
One wonders, ‘How much difference can a bottle make?’ The answer lies in the Blender Bottle’s brilliant design. The integrated whisk gets to work the moment you shake the bottle, blending your ingredients smoothly. This means no more time wasted trying to stir stubborn lumps into submission or cleaning up the mess left by traditional blenders.
2. On-the-Go Nutrition
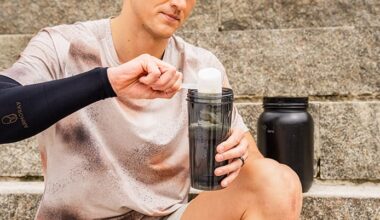
Whether you’re rushing to the office or hitting the gym, the Blender Bottle ensures your nutrition travels with you. This compact accessory is perfect for whipping up a quick protein shake or a healthy smoothie, serving as your personal, portable nutrition station.
3. Easy Cleaning
Any product that promises to make cleaning a breeze is a winner, and the Blender Bottle is no exception. It’s safe for the dishwasher, ensuring a thorough, hassle-free clean. A clean bottle equals a happy user!
So, there you have it! The Blender Bottle, in all its practical glory, is here to simplify your life, one shake at a time. Now, whenever you’re in a rush and your stomach is growling for nutrition, you know what to reach for. It’s time to blend it, shake it, and take your nutrition on-the-go!
Remember, in life, as with blending shakes, it’s not about the destination; it’s about the journey. And with the Blender Bottle, that journey is smooth and enjoyable. To life, health, and terrific shakes!
What You Need to Know Before Using a Blender Bottle
Before embarking on a fruitful journey that culminates in you successfully opening a blender bottle, there are some nuggets of wisdom that the wise would do well to heed. These are not just random thoughts cast into the wind, but rather well-honed pieces of advice that can make the experience of using a blender bottle as smooth as the protein shakes you’ll soon be concocting. So, let’s dive in!
Understanding Your Blender Bottle
All blender bottles are not created equal. Some possess a complexity that is fascinating while others are the epitome of simplicity. Understanding your particular blender bottle’s design and mechanism is the key that unlocks the door to its usage. Is it a twist-top or a snap-lock? Does it have a separate compartment for storing protein powder or supplements? Knowing these nuances intimately will save you from the frustration of wrestling with a container that refuses to yield.
Quality Matters
Remember, dear reader, that not all that glitters is gold. This is particularly true when it comes to blender bottles. A high-quality blender bottle can mean the difference between a smoothly mixed drink and a lumpy disaster. Moreover, superior quality bottles often come with leak-proof lids that will save you from the embarrassment of a protein shake shower. So, it’s worth investing in a good quality blender bottle.
Caring for Your Blender Bottle
Like a well-oiled machine, a blender bottle requires tender loving care to function at its best. This includes regular cleaning and careful handling. Over time, even high-quality blender bottles can wear down if not treated with care. Remember, a happy blender bottle leads to a happy user.
Know Your Ingredients
Lastly, it’s not just about the bottle, it’s also about what goes into it. Different ingredients may require different methods of mixing and blending. For instance, some powders might clump if not shaken vigorously enough while others might foam excessively if over-shaken. So knowing your ingredients and how they behave when mixed can help ensure a perfect drink every time.
Now that you’re armed with this knowledge, you’re ready to journey forth and conquer your blender bottle. Remember, true mastery lies not in the destination but in the journey itself. So grab your blender bottle with confidence, dear reader, and let the adventure begin!
How to Fill Your Blender Bottle the Right Way
Let’s turn our attention now to the art of filling your Blender Bottle the right way. Oh, it might sound simple enough; pour, shake, and drink, right? Ah, dear reader, if only it were so straightforward. Filling this little marvel of blending technology is a delicate dance that requires a certain level of finesse. But fear not, for we are about to demystify this process, transforming you from a Blender Bottle novice into a bona fide smoothie maestro. So, are you ready to take your Blender Bottle prowess to the next level? Let’s get started!
The Correct Sequence is Key
Ever heard the phrase, “There’s a place for everything, and everything in its place”? This saying holds true when filling your Blender Bottle as well. The sequence in which you add your ingredients can make or break the final result of your beverage. Neglect this simple rule and you might find yourself sipping on a lumpy, unappetizing concoction rather than the smooth, creamy delight you had in mind.
- Start with liquids: Begin by filling your Blender Bottle with your liquid of choice. This could be anything from water, milk, or juice, to more exotic options like coconut water or almond milk. Sounds easy enough, right? Well, hold your horses, we’re just getting started.
- Add your powders: Next, it’s time to introduce your powders into the mix. Whether it’s protein powder, meal replacement mix, or a dash of your favorite superfood blend, make sure to add it after the liquid. This simple step helps prevent the powder from clumping at the bottom of the bottle, ensuring a smoother blend.
- Finish with solids: Finally, it’s time to add any solid ingredients you might fancy. Think pieces of fruit, nuts, or even a sprinkling of chia seeds. Just remember to chop them small enough so they don’t clog the bottle’s spout when you’re taking a sip.
Don’t Overfill
Another important aspect to consider when filling your Blender Bottle is volume. While it might be tempting to cram as many ingredients as possible into your bottle, resist this urge. Overfilling could impair the functionality of the BlenderBall, leading to a less-than-perfect blend. Instead, follow the age-old wisdom of ‘less is more’ and aim to fill your Blender Bottle up to the recommended fill line only. That way, you provide ample space for the BlenderBall to do its magic.
“Remember, a well-filled Blender Bottle is not necessarily an overfilled Blender Bottle. Show restraint, dear reader, and your tastebuds will thank you.”
And there you have it! Fill your Blender Bottle in the right sequence, and don’t overfill it. Keep this in mind, and the world of smooth, perfectly blended beverages is yours for the taking. Ready to give it a go? Of course, you are! Happy blending!
Shake It Up: How to Mix Your Ingredients with the Blender Ball
Have you ever marvelled at how smoothly your protein shake or meal replacement mixed in your Blender Bottle? The secret magician behind this seamless blending experience is none other than the Blender Ball. This small, whisk-like gadget is a game-changer for both avid gym-goers and everyday users alike. But, how does one truly harness the power of the Blender Ball, you might ask? Let us embark on this enlightening journey together!
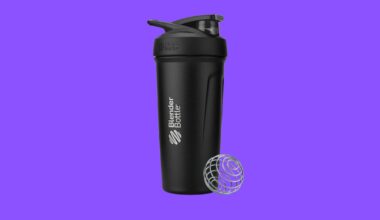
Introducing the Blender Ball
The Blender Ball is a spherical, wire device that whisks and blends ingredients efficiently once the bottle is shaken. Imagine having a miniaturized kitchen whisk within your bottle – it’s like having a tiny sous chef assisting you in your culinary adventures, but in this case, for your shake or drink. Now, let’s understand how to get the best out of this handy little tool.
Steps to Use the Blender Ball
The method to use the Blender Ball is as straightforward as pie, yet the outcome is as impressive as a well-executed soufflé. So, here are the steps to make the most of your Blender Ball:
- Remove the Blender Ball: Begin by taking the Blender Ball out from the bottle. For this, unscrew the cap of the Blender Bottle and set it aside.
- Add the Ingredients: This is your canvas – add whatever your heart desires. Be it protein powder, a meal replacement mix, or even fresh fruits, pour them into the bottle. Don’t forget to add liquid, such as water, milk, or juice to facilitate blending.
- Reintroduce the Blender Ball: Once your ingredients are inside the bottle, place the Blender Ball back in. It’s ready to show off its mixing skills.
- Secure the Cap: Screw the cap back onto the bottle. Ensure it’s tight to prevent any unwanted leaks during the blending process.
- Shake It: This is where the magic happens. Vigorously shake the bottle up and down for about 20-30 seconds. The Blender Ball will move freely inside, mixing and blending your ingredients into a smooth concoction.
“The Blender Ball: Your pocket-sized sous chef, stirring up perfection every time.”
And voila! You now have a perfectly blended drink at your disposal. Remember, the key to an impeccably mixed concoction lies in the vigour of your shake. The more energetic your shake, the smoother your drink. A word of advice though: always keep a firm grip on your bottle. We wouldn’t want any accidental shake showers, now would we?
Conclusion
With these steps, you’re well on your way to becoming a Blender Bottle maestro. The Blender Ball, with its simple yet effective design, makes blending a breeze, saving you both time and energy. So, whether you’re making a protein shake after a rigorous workout or whipping up a quick meal replacement drink during a busy day, the Blender Ball has got you covered. Shake it up, folks!
Avoiding Lumps and Clumps: Tips for Blending Smooth Shakes
Picture this: you’ve just returned from a grueling workout, muscles aching for a replenishing protein shake. You reach for your blender bottle, toss in your powder of choice, add a splash of milk or water, and give it a hearty shake. Expecting a smooth, creamy beverage, you take a hearty gulp, and… ew! A chunky, lumpy mouthful greets your taste buds instead. Not exactly the refreshing experience you were hoping for, was it? But fret not, dear reader! Here’s your comprehensive guide to banishing those unsightly lumps and clumps from your blender bottle concoctions once and for all.
Preparation is Key
Before we dive into the nitty-gritty details, let’s set the stage with some essential pre-blending tips. First, always add your liquid before the powder. This prevents the powder from sticking to the bottom of the bottle and forming an impenetrable clump. Secondly, ensure your blender bottle is clean and dry to avoid any residual particles from your last blending session causing havoc. Lastly, use the right amount of liquid. Too little, and you risk a thick, clumpy mess. Too much, and you’ll end up with a thin, watery disappointment.
The Art of Shaking
Once the stage is set, it’s time to shake things up. But this isn’t just some haphazard arm flailing exercise. Oh no, there’s a method to the madness. Start by holding the bottle firmly with both hands and shake vigorously up and down for at least 20 seconds. The trick here is to create a whirlpool effect, which helps dissolve the powder. Then, give the bottle a few lateral shakes for good measure. This helps disperse any stubborn clumps that might be clinging to the sides.
Blender Ball to the Rescue
If your blender bottle comes with a blender ball (and let’s be honest, why wouldn’t it?), use it! This handy little device is specifically designed to break up clumps of powder and blend them into a smooth, lump-free shake. Simply toss it in with your ingredients before shaking. It’s like having a tiny whisk working tirelessly to ensure your shake is as smooth as silk.
Patience, Young Grasshopper
If all else fails, a little patience can work wonders. Let the blended concoction sit for a minute or two, then give it another good shake. This allows the powder more time to dissolve, making it easier to break up any remaining clumps.
With these tips at your disposal, lumpy shakes will be a thing of the past. So, go forth, blend, and enjoy your smooth, delicious protein shakes. Your taste buds (and muscles) will thank you.
How to Open Your Blender Bottle without Spilling a Drop
It is the bane of many a health enthusiast to spill precious protein shake while trying to open their blender bottle, especially after an arduous workout. Yet fear not, dear reader, for this guide will illuminate the path to opening your blender bottle without spilling a droplet of your much-needed post-workout potion. Let’s dive into the specifics, shall we?
1. Ensure the Lid is Secured Properly
Before you get your hands on the task of opening your blender bottle, you need to make sure the lid is secured properly. This might seem counterintuitive, but trust me when I say that a properly fastened lid will prevent your drink from spilling when you ultimately unscrew it. Twist it until it won’t budge any further. Now you’re ready for the next step.
2. Maintain a Firm Grip
Maintaining a firm grip on your blender bottle is key in our quest to avoid accidental spillage. Hold your blender bottle in such a way that the lid faces you and the base rests comfortably in your palm. Your fingers should be wrapped tightly around the body of the bottle. The key here is control; you control the bottle, not the other way around.
3. Slow and Steady
Remember the old adage, ‘Slow and steady wins the race’? Well, it couldn’t be more applicable here. When you’re ready to unscrew the lid, be slow and gentle. Turn the lid counterclockwise with a steady hand. An abrupt or hasty action might cause the contents to spill.
Imagine you’re defusing a bomb in a spy movie; the fate of your protein shake hangs in the balance!
4. Tilt and Sip
Once the lid is off, it’s time to enjoy your well-deserved drink. But we’re not out of the woods yet! Tilt the bottle slowly and sip cautiously, especially if you’ve filled it to the brim.
5. Cleaning and Storage
Now that you’ve enjoyed your protein shake, it’s time for cleaning and storage. Rinse the bottle thoroughly with warm water and mild dish soap, paying special attention to the lid and the blender ball. Once clean, store your blender bottle with the lid off to prevent any funky smells from developing. Remember, a clean bottle is a happy bottle!
With these steps, you’ll be a master at opening your blender bottle without spilling a drop. So, go ahead, flex those muscles and enjoy your protein shake, fearlessly!
Cleaning Your Blender Bottle: Tips and Tricks for Keeping It Fresh
Let’s dive into the deep end of cleanliness, my friends. Cleaning your blender bottle should not be a daunting task that lurks in the back of your mind. Rather, with the right tips and tricks in your arsenal, it can be a swift and satisfying process, I assure you. Indeed, maintaining your blender bottle in pristine condition is not only about aesthetics, but also about your health. A clean blender bottle equals a clean, healthy drink. So, let’s roll up our sleeves and get down to the nitty-gritty details, shall we?
The Essential Steps to a Sparkling Blender Bottle
Having a systematic approach can work wonders when it comes to cleaning your blender bottle. Here’s a simple yet effective step-by-step process that will make your blender bottle shine like a new penny:
- Empty the Contents: Anything left in the blender bottle needs to go. Pour it out, people! This action is elementary, yet crucial.
- Rinse Thoroughly: A quick rinse under warm running water can dislodge any stubborn residues and make the subsequent steps easier. Rinsing is like a prelude to a beautiful symphony, setting the tone for the performance that follows.
- Soak, if Necessary: If your bottle has been sitting around for a while or if it has stubborn residues, a good soak in warm, soapy water will do the trick. Picture it as a luxurious spa session for your blender bottle.
- Scrub with Adequate Tools: A bottle brush should be your weapon of choice here. Reach into every nook and cranny, leaving no stone unturned. This step is where the magic happens, transforming your dirty bottle into a sparkling beauty.
- Rinse Again and Dry: Once the scrubbing is done, give your bottle another rinse to ensure no soap is left. Then, air dry your bottle upside down. This last step is like the final flourish, the dramatic conclusion to a well-performed concerto.
Pro Tips for an Extra Shine
While the aforementioned steps should suffice for most scenarios, sometimes your blender bottle may need a little extra TLC. In such cases, these pro tips can come in handy:
- Use Baking Soda: For stubborn stains and odors, a paste made from baking soda and water can be a great ally. Rub it onto the problem areas, let it sit for a while, then rinse. It is like a secret potion that comes to the rescue when all else fails.
- Vinegar to the Rescue: Vinegar’s acidic nature makes it fantastic for removing stains. A mixture of equal parts vinegar and water, left to soak in the bottle overnight, can work wonders.
- Dishwasher Safe: If your blender bottle is dishwasher safe, feel free to use this option for a thorough cleaning. After all, who doesn’t love a good shortcut?
Remember, a clean blender bottle is a happy blender bottle. And a happy blender bottle leads to a happier you. So, invest a little time and effort into cleaning your bottle, and reap the rewards of fresh, delicious drinks without any unpleasant surprises.
In conclusion, maintaining a sparklingly clean blender bottle is not rocket science. It simply needs a systematic approach, the right tools, and a dash of dedication. With these tips and tricks up your sleeve, you are all set to keep your blender bottle as fresh and clean as the day you bought it. Happy cleaning, folks!
Storing Your Blender Bottle: How to Keep It Safe and Ready to Use
the joy of using a blender bottle, you’ll want to ensure it’s always at the ready. Proper storage is essential to maintaining the functionality and longevity of your blender bottle. Keeping your blender bottle safe, clean, and ready for your next protein shake or smoothie demands some attention and care. It’s not exactly rocket science, but following these instructions will ensure your blender bottle is always at peak performance.
Prioritize Proper Cleaning
Before considering storage, you must ensure your blender bottle is properly cleaned. Leftover protein powder residue, if not appropriately cleaned, can lead to a foul smell and even bacterial growth. A clean, dry bottle is the first step towards effective storage. Let’s break it down:
- Empty: Empty the bottle immediately after consuming your drink. This prevents any residue from drying and sticking to the surfaces of the bottle.
- Wash: Use warm water and mild dish soap to clean the bottle and its parts. Some models are dishwasher-safe, but hand washing is recommended for retaining the longevity of the bottle.
- Dry: It’s crucial to dry the blender bottle thoroughly before storing it. Moisture can promote bacterial growth. Air-drying the bottle and its parts separately ensures complete drying.
Choose the Right Location
When it comes to the actual storage of the blender bottle, the location is key. A cool, dry place is the ideal spot. Some prefer a dedicated cupboard, while others stash it right next to their protein powder for easy access. Either way, ensure the location is free from moisture and extreme temperatures, which could potentially damage the bottle.
Avoid Stacking
While it might be tempting to stack your blender bottles if you have more than one, resist the urge. Stacking can lead to warping and potential damage to the lid mechanism. Instead, store each bottle individually. This allows for ample air circulation and prevents any unwanted pressure or stress on the bottle.
In conclusion, properly caring for and storing your blender bottle ensures it remains ready for action whenever you need it. Remember the golden rules: clean thoroughly, store in a cool, dry place, and don’t stack. Treat your blender bottle with the respect it deserves, and it will happily keep mixing your favorite drinks for years to come.
Blender Bottle Hacks: Creative Ways to Use Your Bottle Beyond Shakes
With an air of joviality and an unmistakable whiff of authority, allow me to introduce you to an exciting new world – the world of Blender Bottle Hacks! This handy contraption you’ve probably been using solely for protein shakes or smoothies is, in fact, an incredibly versatile tool with a multitude of unforeseen uses. Let’s embark on this adventure and find out some creative ways to utilise your Blender Bottle beyond the realm of shakes.
1. A Handy Snack Container
Anyone who has ever endured a grumble of hunger in the middle of a strenuous hike or a taxing workout session will appreciate this hack. Your Blender Bottle can double as a portable snack container. Thanks to its intricate design, you can conveniently carry a variety of snacks such as nuts, fruits, or granola. Simply fill it up, screw the lid back on, and voila! You have a snack container that can withstand the rigors of even the most adventurous expeditions.
2. A Savvy Salad Dressing Shaker
For all the salad lovers out there, this one’s for you. The Blender Bottle can become your best ally in the quest for the perfect salad dressing. Just add your favorite ingredients, give it a good shake, and unleash the delectable goodness onto your fresh greens. The results? A well-emulsified, restaurant-grade dressing every time!
3. A Pancake Batter Maker
Why wrestle with a whisk and a bowl, when you can simply use your Blender Bottle to make smooth, lump-free pancake batter? It’s as simple as adding the ingredients into the bottle and giving it a vigorous shake. Not only does this save you time, but it also significantly reduces the clean-up. Now, who wouldn’t appreciate that on a lazy Sunday morning?
4. Instant Iced Coffee
Unleash your inner barista with this innovative hack! Your Blender Bottle can help you whip up a frothy, chilled coffee in a jiffy. To make this, add some instant coffee, sugar (if desired), milk, and a few ice cubes to the bottle. Give it a hearty shake and your invigorating iced coffee is ready to serve. A perfect hack for coffee lovers on the go!
So there you have it, dear reader, a few innovative ways to repurpose your Blender Bottle. These are simple yet effective hacks that not only extend the utility of your bottle but also bring a dash of fun and creativity to your everyday tasks. Unleash the full potential of this versatile tool and transform the mundane into the magnificent!