Are you tired of spending your hard-earned dough on expensive blender bottles? Well, worry no more because we’ve got something that will make you shout, “Why didn’t I think of that before?” Yes, you’re about to become the MacGyver of the beverage world. Get ready to roll up your sleeves and learn how to make your own blender bottle. Trust us, this DIY project is as exciting as binge-watching your favorite Netflix series.
Before we dive in, you might be wondering, “Why on earth would I want to make my own blender bottle?”. Well, first off, it’s economical. You know what they say, a penny saved is a penny earned. Secondly, it’s super fun. Who doesn’t like a good DIY project? And lastly, it’s customizable. You could decorate it with your favorite superhero stickers or even your dog’s photo – who are we to judge?
“The best things in life are the ones you build yourself!”
So, are you ready to channel your inner Bob the Builder? Let’s get started!
Get Creative: Make Your Own Blender Bottle Today
Are you tired of paying through the nose for one of those fancy blender bottles? Maybe you’re just a DIY enthusiast who enjoys creating your own gadgets and utilities. Either way, you’ve come to the right place. Today, we’ll guide you on how to create your very own blender bottle. Pretty cool, huh?
Before we dive in, let’s make sure we’re on the same page. A blender bottle, also known as a shaker bottle, is typically used to mix protein shakes, smoothies, and supplements. It’s a handy tool for fitness enthusiasts and health-conscious individuals, but anyone can benefit from having one. Plus, there’s the extra satisfaction that it’s homemade. So, are you ready to become a blender bottle artisan? Let’s get to it!
Materials Needed:
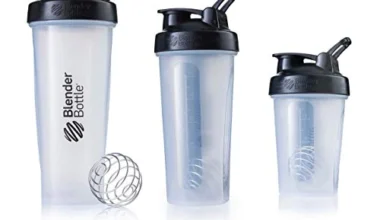
- A water bottle: Any standard water bottle will do, but make sure it has a tight lid to prevent any unwanted leaks and protein shake catastrophes. We’ve all been there, right?
- A wire ball/metal spring: This will act as the blending mechanism inside your bottle. You can repurpose a wire whisk or buy a cheap spring from the hardware store.
- Adhesive: You’ll need some strong glue to secure the wire ball or spring inside the bottle.
Steps to Create Your Blender Bottle:
- Prepare the materials: Clean your water bottle and make sure the metal spring or wire ball is the right size.
- Attach the blender mechanism: Apply some adhesive to one end of the wire ball or spring, and attach it to the inside of the bottle lid. Ensure it’s right in the center.
- Let it dry: Give it ample time to dry. We don’t want your protein shake to turn into a glue shake!
- Test it: Once it’s dry, add some water and give it a shake to test. If it blends well, you’ve successfully created your own blender bottle. Congratulations!
Remember, the key here is creativity. Feel free to add personal touches to your blender bottle such as stickers, paint, or whatever tickles your fancy. After all, this is your creation. Be proud of it. Happy blending!
“Creativity is inventing, experimenting, growing, taking risks, breaking rules, making mistakes, and having fun.” – Mary Lou Cook
DIY Blender Bottles: Why Buy When You Can Make Your Own For Less!
So, you’ve decided to take the plunge and make your own blender bottle. Bravo! You’re about to save yourself a few bucks and have a blast in the process. But why would someone want to make their own blender bottle, you ask? Well, the answer is as unique as you are. Maybe you’re a DIY enthusiast who loves nothing more than a good project, or perhaps you simply enjoy the satisfaction of using something you’ve made with your own two hands. Whatever your motivation, we’re here to guide you every step of the way.
Benefits of DIY Blender Bottles
The process of crafting your own blender bottle isn’t just rewarding but also offers a few unexpected perks.
- Cost-effective: Buying ready-made blender bottles can get pricey, especially if you’re hunting for a high-quality one. In contrast, making your own is often a more budget-friendly option.
- Customizable: When you’re in control, you can customize your blender bottle to suit your preferences. From the size to the color to the design, the world is your oyster!
- Eco-friendly: By crafting your own blender bottle, you’re cutting down on single-use plastics and contributing to a greener planet. Now, that’s a win-win situation!
Steps to Make Your DIY Blender Bottle
Now, let’s roll up our sleeves and get to work. Here’s a simple step-by-step guide on how to make your very own blender bottle.
- Choose Your Materials: You’ll need a sturdy bottle, a tight-fitting lid, and a blender ball. Look for something that can withstand the rigours of your workout routine and daily use.
- Customize Your Bottle: Want a neon-pink bottle? Go for it! Prefer a sleek, minimalist design? That’s cool too. Remember, this is your project, so make it reflect your personality.
- Insert the Blender Ball: Place the blender ball into the bottle. This is what will mix your supplements, protein powders, or whatever concoction you’re whipping up.
- Secure the Lid: Ensure the lid is screwed on tightly. The last thing you want is a protein shake explosion in your gym bag, right?
And there you have it! In just a few simple steps, you’ve created your very own blender bottle. It’s high time to celebrate your DIY success. So go ahead, whip up your favorite shake, and toast to your crafting prowess. Cheers!
Upcycle Your Water Bottles: Turn Trash Into Treasure With This Simple Blender Bottle DIY
Wait a minute, don’t throw away those old water bottles! Did you know you could repurpose them into a handy blender bottle? Yes, we’re serious. It’s easy, cost-effective, and eco-friendly. So, put down that trash bag and let’s get started.
What You’ll Need:
- Empty plastic water bottle: Clean and dry, preferably with a wide mouth. The bigger, the better!
- Small wire whisk: The kind used for stirring eggs or pancake batter.
- Hot glue gun: Or a waterproof adhesive that works with plastic.
- Drill with small bit: To make a hole in the bottle cap. Be careful with this one!
Got everything you need? Fantastic! Now, let’s turn that trash into some smoothie-making treasure!
Step-by-Step Guide:
- First, take your drill and carefully make a hole in the center of the bottle cap. The hole should be slightly smaller than the handle of your whisk. You don’t want it to be too loose, or your smoothie might make a run for it!
- Next, take your whisk and insert the handle through the hole in the bottle cap. Check the fit. It should be snug, but if it’s too tight, don’t force it. Make the hole a little larger if needed.
- Time to bring out the hot glue gun. Apply a generous amount of glue around the area where the whisk handle enters the bottle cap. Be sure to cover the inside and outside for a watertight seal.
- Let the glue dry completely. Once it’s dry, give your bottle a little shake to make sure everything is secure. If the whisk wobbles or the glue leaks, you might need to apply a little more glue.
- Finally, you’re ready to blend! Pour your ingredients into the bottle, screw on the cap, and shake away. You’ve just created your very own blender bottle! Way to go, you eco-friendly smoothie master, you!
“One man’s trash is another man’s… blender bottle?”
Who knew upcycling could be this fun and practical? So, the next time you’re about to toss an old water bottle, think again. You might just be throwing away your next kitchen gadget. Happy blending!
Materials You Need: The Ultimate Guide To Crafting Your Own Blender Bottle
So, you’re ready to take the plunge and craft your own blender bottle? Fantastic! This is like the adult version of arts and crafts, but instead of ending up with a glitter-glued macaroni picture, you’ll have a handy, homemade blender bottle. But before we pull out the scissors and start painting, let’s gather up all the materials we need, shall we?
Essential Materials:
- Plastic water bottle: Start with a sturdy, BPA-free plastic bottle that can hold at least 20 ounces. You may select a larger bottle if you like your shakes extra-large or if you’re secretly a superhero.
- Blender ball: These nifty devices help mix your protein powders or supplements evenly. You can find these online or in stores that sell protein powders. Just make sure the ball is dishwasher safe, and you’re good to go.
- Permanent Marker: For marking the measurements or just to unleash your inner Picasso on the bottle.
- Measurement Ruler: To ensure your protein shake isn’t too weak or too strong, it’s crucial to get the measurements right. And for this, you need a good old-fashioned ruler.
- Sealable Lid: This is to prevent your hard work from ending up on your shirt or all over your gym bag. No one likes a protein shake shower, trust me.
Optional Materials:
- Paint: If you want to add a touch of color or personality to your bottle, feel free to break out the paint. Just make sure it’s non-toxic and safe for use on plastic.
- Stickers: Another fun way to jazz up your blender bottle. Go wild and express yourself!
Now that you’ve got your materials ready, put on your DIY hat, and let’s get to building this blender bottle! Oh, and remember – creativity is key, and there’s no such thing as mistakes, just happy accidents.
“Creativity is allowing yourself to make mistakes. Art is knowing which ones to keep.” – Scott Adams
So, what are we waiting for? Let’s start this fun DIY project and create a blender bottle that would make even Martha Stewart proud!
Step-By-Step: A Foolproof Guide To Making The Perfect Blender Bottle
Who said you need to be a master craftsman to make your own blender bottle? Certainly not me! Let’s dive right into the nitty-gritty of your DIY blender bottle project.
Materials You’ll Need
- Transparent water bottle: Look for one that has a capacity of at least 20 oz (600 ml). Just make sure it’s sturdy enough to handle those muscle-building protein shakes.
- Stainless steel ball whisk: You can easily find these online or at your local kitchen supply store. Trust me, it’ll give your shakes that perfectly smooth consistency.
- Measuring tape: For those of us who are detail-oriented and want our DIY project to be precise and perfect.
- Strong adhesive: Because we wouldn’t want our creation to fall apart midway through a vigorous shake, now would we?
- Marker (optional): To add that personal touch and make your blender bottle truly your own.
Steps to Create Your Perfect Blender Bottle
Alright, folks! The moment you’ve all been waiting for. Let’s roll up our sleeves and get to work.
- Measure and Mark: Using your measuring tape, determine the center point of your bottle’s lid. Mark it for the next step.
- Glue the Ball Whisk: Apply a generous amount of adhesive to the center of the lid where you marked. Then, carefully place the ball whisk on top of the adhesive. Give it a good press to ensure it’s secure.
- Let it Dry: Allow the adhesive to dry completely. This could take a few hours or even overnight, depending on the type of adhesive you use. This step is crucial, so don’t rush it!
- Seal the Deal: Once the adhesive is dry, close the lid tightly on the bottle. Give it a few shakes to make sure the ball whisk is secure and not going to fly off mid-shake.
- Personalize (Optional): Use your marker to add any designs or labels you want on your bottle. Make it truly yours!
Remember, the key to a successful DIY project is patience and precision. Don’t rush the process. Take your time and enjoy crafting your personal blender bottle.
There you have it – your very own blender bottle, ready to whip up some delicious and smooth protein shakes. Now, who says you’re not a DIY genius?
Personalize Your Bottle: Add Your Own Unique Style To Your DIY Blender Bottle
Now, let’s get down to the fun part – personalizing your blender bottle! This is where your creativity gets to shine. Your DIY blender bottle should be a reflection of you, so don’t be shy to infuse a bit of your personality into it!
Here are a few ways you can add your personal touch to your DIY blender bottle:
- Stickers: Who doesn’t love stickers? They’re a fun and easy way to add some color and personality to your bottle. Plus, they’re easily changeable if you ever get bored of your current design.
- Paint: If you’re artistically inclined, why not paint your bottle? You can go for a simple design or create a detailed masterpiece – it’s totally up to you.
- Engraving: For a more permanent personal touch, consider engraving your bottle. You could engrave your name, a favorite quote, or even a design.
- Tape: Colored or patterned duct tape can be a fun addition to your blender bottle. Plus, it adds a layer of protection to your bottle.
Remember, the key here is to have fun and make it yours! After all, who wants a blender bottle that looks like everyone else’s?
“Express yourself with your blender bottle and let it be an extension of who you are!”
No matter your style, there’s a way to customize your blender bottle that’s perfect for you. So go ahead, let your imagination run wild and start creating your unique blender bottle today!
Experiment and Have Fun!
One of the best parts about making your own DIY blender bottle is the freedom to experiment. Don’t be afraid to mix and match different personalization techniques. Maybe you want to paint a design on your bottle and then cover it with protective tape, or maybe you want to layer different stickers to create a collage. The possibilities are endless, so don’t limit yourself!
Just remember, the most important thing is that you’re happy with your creation. So whether you’re a Picasso in the making or someone who just loves stickers, go ahead and personalize your DIY blender bottle. You’ll be sipping your protein shakes in style in no time!
Reusable And Eco-Friendly: The Benefits Of Making Your Own Blender Bottle
Hey there, eco-warrior! Ever considered how many plastic bottles you might save from the landfill by making and using your own blender bottle? Spoiler alert: it’s a lot. Not only is creating your own blender bottle a fun DIY project, but it also has a plethora of benefits that make it a no-brainer. Tread lightly on the planet while blending up your favorite smoothies or shakes – let’s dive into these benefits.
Reducing your carbon footprint
Did you know that around 8 million tons of plastic waste enter the ocean each year? That’s a scary number, isn’t it? By making your own blender bottle, you’re taking a stand against this environmental crisis. Each time you whip up a protein shake or blend a breakfast smoothie, you’re essentially saving a plastic bottle from ending up in our oceans. You eco-hero, you!
Cost-effective in the long run
Ever caught yourself bemoaning the cost of disposable blender bottles? Well, making your own blender bottle is not only environmentally-friendly, but it’s also wallet-friendly. Sure, there might be an initial cost for materials, but think about the long-term savings! No more shelling out for expensive disposable bottles every week.
“Remember, every dollar you save on disposable bottles is a dollar you can spend on more delicious ingredients for your shakes and smoothies.”
Express your personal style
Who says being eco-conscious can’t be fashionable? Another perk of making your own blender bottle is the ability to customize it to your liking. Do you fancy bold colors? Or perhaps you lean towards minimalist designs? The power is in your hands to create a bottle that screams “you”.
Quality control is in your hands
Ever bought a blender bottle, only to have it break or leak after a few uses? When you craft your own, you control the quality of materials used. It’s like being an artisan, but for blender bottles. Choose sturdy, long-lasting materials, and you’re setting yourself up for a blender bottle that will stand the test of time.
So, are you ready to become a blender bottle artisan? These benefits certainly make a compelling case for why you should give it a try. Not only will you be saving money and expressing your personal style, but you’ll also be contributing to a healthier, cleaner planet. So go on, channel your inner DIY guru, and start making your own blender bottle today!
Exploring Different Designs: Create A Blender Bottle That Suits Your Needs And Style
Ever thought about concocting your own blender bottle? You know, something that screams “you” while also doing a top-notch job of mixing your shakes and smoothies? Well, you’re in the right place! Let’s dive into the exciting world of DIY blender bottles and explore different designs that can match your needs and personal style.
Step 1: Decide on the Type of Blender Bottle
First things first, you need to decide on the type of blender bottle you want. There are plenty of options out there, from classic shaker bottles to electric blender bottles. Start with a question: Do you want something manual or electric? Are you looking for simplicity, or do you want a high-tech gadget that does all the work for you?
Step 2: Choose Your Material
Next, let’s talk about materials. Plastic is a common choice for blender bottles because it’s lightweight and durable. But if you’re worried about BPA and other chemicals, you might prefer a stainless steel or glass bottle. Keep in mind, though, that these options will be heavier and potentially more fragile.
Step 3: Size Matters
Yes, size does matter! Blender bottles come in various sizes, so think about what you’ll be using yours for. If you’re a gym-goer whipping up protein shakes, you might want a larger bottle. But if you’re just mixing up a quick smoothie for breakfast, a smaller bottle could do the trick.
Step 4: Customization for a Personal Touch
Ready to let your personality shine? Personalizing your blender bottle is where the real fun begins. Maybe you want your favorite quote on the bottle or a funky pattern that reflects your unique style. Or how about your initials or nickname? The sky’s the limit!
Step 5: The Mixing Mechanism
Don’t forget about the all-important mixing mechanism. This could be a simple whisk ball, a built-in agitator, or even an electric motor. Again, think about your needs. Do you need something that can crush ice or handle chunky ingredients, or are you mostly mixing liquids?
Remember, designing your own blender bottle is all about making something that suits your needs and style. So take some time to think about what you really want and need, and then go forth and create!
Cost-Effective And Convenient: Make Your Own Blender Bottle And Save Money And Time
Why shell out your hard-earned dollars for a fancy blender bottle when you can easily make your own? Take it from us, it’s not only cost-effective but also a fun and engaging DIY project. Plus, it adds a personalized touch to your health regimen. Ready to save some cash and time? Let’s get started, folks!
Step 1: Gather Your Materials
You don’t need a lot. In fact, you might already have most of these items lying around your home. If not, a quick trip to your local store or a brief online shopping spree should do the trick. Here’s what you need:
- An empty, clean water bottle (preferably with a wide mouth)
- A small, stainless-steel wire whisk ball
- A drill with a bit the same size as your whisk ball
Step 2: Start Drilling
Now comes the fun (or scary, depending on how you feel about power tools) part. It’s time to drill a hole in the cap of your bottle. But why drill a hole, you ask? Well, this will allow the whisk ball to move freely inside the bottle when you shake it, efficiently blending your drink. Remember to handle the drill with care!
Step 3: Insert the Wire Whisk Ball
Once the hole is drilled, pop in your wire whisk ball through the mouth of the bottle. It might be a bit of a squeeze, but with a little finesse and some patience, you’ll get it in there. Trust us, it’s worth the effort. And voila! You’ve got yourself a homemade blender bottle.
Pro tip: Clean your homemade blender bottle thoroughly after each use to keep it in top-notch condition.
Benefits of Making Your Own Blender Bottle
Aside from the obvious cost savings, there are other great reasons to make your own blender bottle. Let’s list them down, shall we?
- Personalization: You can choose the color, size, and design of your bottle.
- Quality Control: You know exactly what materials are used to make your bottle.
- Environmental Impact: By reusing an existing bottle, you’re reducing plastic waste.
So, there you have it! With a little creativity, a few household items, and some elbow grease, you can make your own blender bottle. Not only will you save money, but you’ll also have the satisfaction of knowing you created something useful with your own two hands. Pretty cool, huh?
Say Goodbye To Plastic Waste: How To Make A Blender Bottle From Glass Containers
Are you tired of contributing to the wall of plastic, or maybe you just love a good DIY project? Either way, you, my friend, are in luck. We’re about to dive into how to make your very own blender bottle from glass containers. This isn’t just a money-saving hack; it’s a step towards a greener planet. How cool is that?
What You’ll Need
- Glass jar: Have an old mason jar or jam jar lying around? Perfect. These work great as they are sturdy, reusable, and come with a lid.
- Plastic ball or whisk: This is the secret to getting everything mixed up nicely. You can recycle a plastic Easter egg or a small whisk.
- Glue gun: To secure everything in place.
- Marker: For marking the spot where we’ll make a hole in the lid.
- Drill: To make the hole in the lid.
Steps to Create Your Blender Bottle
- Mark the Lid: Place the plastic ball or whisk on the center of the lid and mark around it with a marker.
- Drill the Hole: Drill a hole in the lid where you marked. Make sure the hole is big enough for your plastic ball or whisk to fit through.
- Secure the Ball or Whisk: Push the ball or whisk through the hole so that it sits in the jar when the lid is screwed on. Use a hot glue gun to secure it in place.
- Let it Dry: Let the glue dry completely before using the bottle.
Remember, safety first! Always be cautious when using tools like drills, and make sure your workspace is clear and well-lit.
And there you have it, your very own, environmentally friendly, DIY blender bottle. Isn’t it amazing what you can do with a bit of creativity and some spare time? But this DIY journey doesn’t need to stop here. Why not try making more eco-friendly products at home? It’s a win-win situation. You’re saving money and protecting the environment at the same time.
Customize Your Blender Bottle: Add Your Favorite Colors, Patterns, And Stickers
Alright, folks! The moment you’ve all been waiting for is finally here. The time to let your creative juices flow! It’s time to customize your very own blender bottle. You can make it as flashy or as simple as you want. Add your favorite colors, patterns, stickers, or even your nickname. The sky’s the limit!
Create a Colorful and Vibrant Blender Bottle
First things first, let’s talk about adding a splash of color to your bottle. Who said blender bottles have to be boring?
- Choose Your Colors: Pick your favorite colors. Whether you’re a fan of vibrant pinks, cool blues, or earthy greens, the choice is entirely up to you. And if you’re a fan of all colors, why not go for a rainbow-themed bottle?
- Paint Your Bottle: Grab some non-toxic paint suitable for plastic and start painting your bottle. Make sure to let each layer dry before applying the next. Patience is key here!
Remember: Using a sealant after painting is a good idea to prevent the colors from fading away. Plus, it adds a glossy finish.
Pattern It Up
Now, if you’re someone who loves patterns, this part is for you. Stripes, polka dots, chevrons – you name it! Here’s how you can achieve this:
- Choose Your Pattern: Decide on the pattern you want. It could be anything from simple stripes to intricate geometrical designs.
- Use Tape: To create neat and clean patterns, use painter’s tape. It’s easy to apply, and peels off without leaving any residue.
Sticker Mania
Stickers can add a fun, playful touch to your blender bottle. Plus, they’re super easy to apply!
- Buy Stickers: Purchase a pack of waterproof stickers that reflect your personality. Love cats? Get cat stickers. A fan of superheroes? There are countless superhero stickers out there.
- Stick ‘Em On: Once you’ve got your stickers, peel off the backing and apply them to your bottle. Simple as that!
And there you have it! By following these simple steps, you’ll have a blender bottle that’s not only practical, but also a reflection of your unique personality. Happy blending!
From Hobby To Business: How To Start Selling Your Handmade Blender Bottles
Alright, you’ve been playing around with making your very own blender bottles, and guess what? It turns out, you’re a natural! Your friends are all clambering for one, and your significant other has been hinting at starting a side hustle. So, why not turn your newfound hobby into a small business? Let me guide you through the process.
First, there’s an important question you need to ask yourself:
Are you ready to take the plunge and start selling your handmade blender bottles?
Now, if the answer is a strong, resounding ‘YES!’, then let’s dive right into your entrepreneurial journey. But if you’re still teetering on the edge, don’t worry! It’s normal to have doubts. Just remember, the first step is often the hardest. Once you’ve made the decision, the rest, as they say, is a smoothie… err… I mean, smooth sailing!
Step 1: Understand Your Target Market
Before you start selling, you need to understand who your customers are. Are they fitness enthusiasts who need a blender bottle for their protein shakes? Or are they busy professionals who want a quick and easy way to blend their healthy smoothies? Understanding your target market will help you design and sell your blender bottles effectively.
Step 2: Develop Your Unique Selling Proposition (USP)
What makes your blender bottles stand out from the crowd? Is it the unique design? The high-quality materials? Or perhaps, it’s the fact that they’re handmade and not mass-produced. Whatever it is, make sure you emphasize it in your selling strategy. Your USP is what will make your customers choose your blender bottles over others.
Step 3: Set Your Pricing
Let’s talk about money, honey! How much will you charge for your blender bottles? While you want to make a profit, you also don’t want to scare away potential customers with sky-high prices. Research what similar products are selling for, take into account your production costs, and then set a competitive price that reflects the quality and uniqueness of your blender bottles.
Step 4: Market and Sell Your Blender Bottles
Now, for the fun part – marketing your products! Utilize social media platforms, build a website, or leverage online marketplaces like Etsy or Amazon. Remember, the key to successful marketing is consistency and creativity. So, keep your marketing messages clear, compelling, and most importantly, true to your brand.
Going from hobby to business might seem intimidating at first, but with a little bit of planning, a dash of creativity, and a whole lot of passion, you’ll be blending your way to success in no time. So, are you ready to start selling your handmade blender bottles?