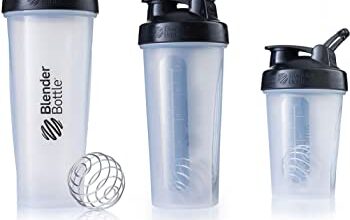
Hey there, sportsmen and sportswomen! Have you ever found yourself in a pickle, needing a protein shake but there’s not a blender bottle in sight? You’re pumped and primed post-workout, and the only thing missing is that delicious, muscle-building concoction. But alas! No blender bottle. Before you start panicking and consider slurping protein powder straight from the tub, read on. This is your go-to guide on “How to Make a Protein Shake Without a Blender Bottle”.
If you think that a quality protein shake requires a blender bottle or some fancy machinery, then we’re about to rock your world. We know, we know, a blender bottle is a handy tool. It’s quick, it’s efficient, and it makes us feel like we’re part of a secret club of shake-making professionals. But sometimes, life happens. You forget your bottle at home, or it grows legs and walks away. Whatever the case, it’s not the end of the world. In fact, it’s just the beginning of a new adventure in protein shake land. Ready to dive in? Let’s get shaking!
Fear not, for in this guide, we will explore:
- Why a blender bottle isn’t the only way to make a protein shake.
- Simple and effective alternatives to a blender bottle.
- How to make a protein shake that’s still delicious and lump-free without the use of a blender bottle.
So put on your imaginary aprons and prepare to become the MacGyver of protein shakes. Are you ready to change the way you see your post-workout fuel forever? Let’s roll!
Introduction: Why Make a Protein Shake Without a Blender Bottle?
Whoa, hold it right there, sports enthusiast! So, you’re telling me you want to make a protein shake but don’t have a blender bottle? Now, that’s quite a pickle! But don’t sweat it; we’ve got you covered. This is where creativity steps in. After all, in this world of fast-paced sports and fitness, adaptability is king, right? So, let’s get down to business and see how you can whip up a protein shake without the convenience of a blender bottle.
But first, let’s chat about why this approach might even be necessary. There are a few reasons you might find yourself in this situation:
- Unforeseen circumstances: Picture this. You’re in the gym, and you’ve just finished a grueling workout. You reach for your blender bottle, only to realize – uh oh – you left it at home. Now what?
- Travel limitations: Traveling light for a weekend getaway or a business trip? You might not have the space to pack your bulky blender bottle, but your body still needs its protein fix.
- Versatility is your middle name: You enjoy the challenge and revel in demonstrating that you can make a protein shake with just about anything!
- Blender bottle M.I.A: Your blender bottle has decided to play hide and seek, and you are losing. No worries – we’ve got your back!
Whatever the reason, we’re here to prove that you can make a protein shake with minimal equipment and maximum determination. So, let’s roll up our sleeves and get mixing, shall we?
Note: While using a blender bottle might seem like the most convenient way to make a protein shake, improvising with other tools can yield an equally delicious and nutritious result. The key is to be open-minded and ready for a mini-adventure in your quest for protein power!
Ready, Set, Shake!
Alright, now that we’ve established the whys, let’s move on to the hows. Rest assured, the process is simpler than you might think. In the following sections, we’ll break down the steps to make your protein shake without a blender bottle. Grab your shaker cup, mason jar, or even a water bottle, and let’s get shaking!
Benefits of Shake Preparation Without a Blender Bottle
Hey there, Sportsmen! Ever thought about the benefits of making your protein shake without a blender bottle? Sure, that nifty gadget might be sitting there on your kitchen counter, flashing its shiny, metallic grin at you, but hold up! Do you really need it? Could there possibly be some advantages to going old-school? Let’s dive in and find out, shall we?
First off, simplicity is the name of the game. Without a blender bottle, you get to go back to basics and still achieve that creamy, divine concoction of yours. It’s a no-fuss, no-muss approach.
“Simplicity is the ultimate sophistication.” – Leonardo da Vinci
Next up, portability. We all know how bulky those blender bottles can be. Ditching them means you’re carrying less gear, making your gym bag lighter and your life easier. Who wouldn’t want that?
Lastly, let’s talk about cleaning. Anyone who’s ever tried to scrub the remnants of a protein shake from the nooks and crannies of a blender bottle knows what a chore it can be. Without a blender bottle, cleaning is a breeze. Just rinse and you’re done!
- Simplicity: No blender bottle? No problem, just go back to basics.
- Portability: Less gear to carry means a lighter gym bag.
- Cleaning: Say goodbye to the tedious task of scrubbing your blender bottle.
So there you have it, folks! A few pretty compelling reasons to leave that blender bottle on the shelf next time. Remember, the protein shake game isn’t only about the shake itself, it’s about the entire process – from preparation to cleaning up. And sometimes, less really is more!
Alternative Methods for Making a Protein Shake Without a Blender Bottle
Now, let me spill the ‘protein’ beans, as they say. You don’t always need a blender bottle to whip up a protein shake. Can you believe it? Yes, there are several other methods available to get that frothy, creamy, and protein-loaded shake. So, buckle up, sportsmen, because we’re about to dive into the world of blender-less protein shake mixing.
The Good Old ‘Shake It Up’ Method
Alright, my fellow gym warriors, let’s dive into the good old ‘Shake It Up’ method. Who needs a blender bottle when you have sheer muscle power, right? This method is as straightforward as it sounds, but let’s break it down for clarity’s sake.
Step 1: Gather Your Ingredients
First and foremost, you’ll want to assemble all your protein shake ingredients. That typically includes a protein powder of your choice, a liquid (like water, milk, or a non-dairy alternative), and any additional mix-ins such as fruit, yogurt, or a sweetener.
Step 2: Find a Suitable Container
Next, you’ll need a container with a secure lid. A mason jar works perfectly for this, but you could also use a tumbler with a tight-fitting lid, or even a water bottle. The key is to ensure nothing will escape when you start shaking!
Step 3: Add Ingredients to the Container
Start by pouring your liquid into the container. Following that, add your protein powder and any other ingredients. This particular order will help prevent the powder from clumping at the bottom.
Step 4: Secure the Lid and Shake!
Now for the fun part. Secure the lid on the container, making sure it’s tight. Then, use those muscles you’ve been working so hard to build, and shake that container like your life depends on it! Or at least, like your post-workout recovery does.
Voila! You’ve just made a protein shake without a blender bottle. Not only is it a great way to make use of those gains, but it also saves you from cleaning up a blender. Now, that’s what I call a win-win!
Now, the question on everyone’s lips will be, “But what if my shake ends up lumpy?” Well, dear readers, have no fear. Here’s a handy tip:
If you find your shake is a bit on the chunky side, try shaking it a little longer. If you’re still not getting that smooth consistency, try adding a bit more liquid and give it another good shake. Persistence is key!
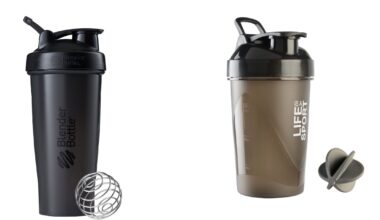
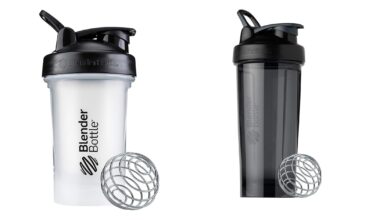
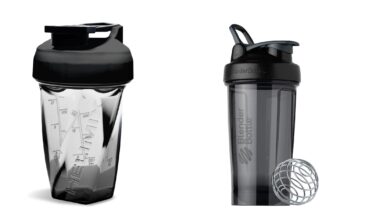
Shaker Cup Alternative: The Mason Jar Method
Now, let’s get into the nitty-gritty of making protein shakes without a blender bottle. You might be wondering, how is that possible? Well, my friends, let me introduce you to the humble Mason jar — a real game-changer for those who are blenderless or just want to change things up.
This common, unassuming kitchen item is about to become your new gym buddy. The Mason jar method is not only economical and effective, but it’s also an excellent conversation starter. Picture yourself, a muscular, health-conscious athlete, shaking up your protein shake in a Mason jar. It’s practically a scene from an indie film!
Step-by-Step Guide: Protein Shake in a Mason Jar
Here’s the deal: it’s as simple as shake, rattle, and roll. But let’s break it down into a step-by-step guide for those who prefer a bit more detail:
- Pick Your Mason Jar: Any standard Mason jar will do. Just make sure it has a tight-fitting lid. We wouldn’t want your protein shake becoming abstract art on your kitchen floor, would we?
- Put in Your Protein Powder: Add your desired amount of protein powder into the jar. Is it chocolate-flavored? Vanilla? Cookies ‘n cream? The world is your protein-packed oyster!
- Add Your Liquid: Now, pour in your liquid of choice. This could be milk, water, or even a bit of cold coffee for those early morning gym sessions. Stir it up a bit to get the party started.
- Shake it Up: Secure the lid tightly — and I mean really tighten it. Then, shake that Mason jar like it owes you money. A good, vigorous shake for about 30 seconds should do the trick.
- Enjoy: That’s it. You’re done. Unseal your Mason jar and savor the fruits of your minimal labor. Doesn’t that taste like success?
In all seriousness, the Mason jar method is a convenient, effective way to make a protein shake without a blender bottle. It’s perfect for those on-the-go, no-nonsense athletes who don’t have time to mess around with blender bottles and cleanup.
Remember, the key to a great shake is in the shake itself. Channel your inner maraca player and give it your all!
So, the next time you find yourself blenderless and in need of protein, fear not. Grab that Mason jar, your protein powder, and shake your way to gains.
No Shaker Cup? No Problem: Try the Ziploc Bag Method
So, you find yourself in a protein predicament. You’re in dire need of your post-workout protein fix, but alas, there’s no shaker cup in sight. Don’t sweat it, champ! There’s a quick and easy solution that’ll have you guzzling down your liquid gains in no time. And it involves a household item you probably have stashed away in your kitchen cabinet. Enter, the humble Ziploc bag. Yes, you heard it right. A Ziploc bag!
Here’s How You Do It
First things first, you’ve got to gather your materials.
- Protein Powder: It’s a protein shake we’re making after all!
- Ziploc Bag: The star of our show. Make sure it’s a sturdy one, we don’t want any protein spillage, do we?
- Water or Milk: Whatever floats your protein boat.
Got everything? Great! Now let’s get down to the nitty-gritty.
Step 1: Prepare Your Bag
First off, make sure your Ziploc bag is clean and dry. The last thing you need is your precious protein powder getting all clumpy before it even hits the water. So, swab that bag down if you need to.
Step 2: Add Your Ingredients
Pour your desired amount of protein powder into the Ziploc bag. Remember, it’s better to start with less than more. You can always add, but you can’t take away! Next, pour in your water or milk. Give the bag a little shake to make sure everything’s well mixed.
Step 3: Seal It, Shake It!
Here comes the fun part. Zip that bag up real tight, and then…shake it! Shake it like you’re trying to win a dance-off. Shake it like it’s full of winning lottery numbers. Shake it like it owes you money. You get the idea. The more you shake, the better your protein shake will be. Just make sure it’s sealed tight so you don’t end up with a protein explosion!
Note: If you notice any clumps, open the Ziploc bag, add a little more liquid, reseal, and shake again. Repeat until you achieve your desired consistency.
And voila! There you have it. A perfectly blended protein shake, made without a shaker cup. Who knew a simple Ziploc bag could be such a game-changer, huh? Now, go on and enjoy that well-deserved protein punch!
Mastering the Art of Hand Mixing: The Spoon and Bowl Method
Okay, sportsmen, let’s get real. Who among us hasn’t found themselves in need of a protein shake but without the trusty blender bottle at hand? Fear not. There’s a solution, all it requires is a bit of elbow grease: The Spoon and Bowl Method.
Be prepared to channel your inner chef because you’re about to embark on a culinary adventure. You’ll be taking the simple, humble spoon and bowl, and transforming them into a protein shake producing powerhouse. Sounds fun, right? So, let’s roll up our sleeves and get down to business.
Step 1: Choose Your Ingredients
Selecting the right ingredients is the first step. You’ll need your protein powder, of course, and a liquid. Milk, water, juice – whatever floats your boat. Maybe you want to add a touch of flavor with some fruit or a dab of honey. It’s your shake, so you make the rules.
Step 2: Mix Like a Pro
Now, onto the fun part. Pour your liquid into the bowl first. Then, slowly add your protein powder while stirring. Stirring slowly will prevent clumps from forming, so don’t go too fast. This isn’t a race, folks.
Step 3: Check and Adjust
How’s it looking? If it’s too thick, add a bit more liquid. If it’s too thin, sprinkle in some more protein powder. No pressure, it’s just like tweaking your Aunt Betty’s famous chili recipe. She won’t mind.
Step 4: Taste Test
Give your concoction a taste. If it’s not hitting the spot, feel free to add more flavorings. Remember, this is a protein shake, not a punishment – it should taste good!
Step 5: Enjoy Your Hard Work
And voila! There you have it. Your very own, hand-mixed protein shake. No blender bottle required. Take a moment to admire your handiwork before chugging it down. After all, you’ve earned it.
Remember, practice makes perfect. Don’t be discouraged if your first few attempts aren’t quite up to par. With a bit of patience and persistence, you’ll be a hand-mixing pro in no time.
So, there you have it sportsmen. The Spoon and Bowl Method – a simple, effective way to make a protein shake without a blender bottle. Who knew that a spoon and bowl could be such versatile tools, right?
Protein Shake Recipes You Can Make Without a Blender Bottle
Alright, sportsmen and women, you’re in the gym, muscles pumped, adrenaline flowing, and now you need to whip up that protein shake. But wait, what’s this? You can’t find your blender bottle? Fear not, for I bring you solutions. Here are some great protein shake recipes you can prepare without a blender bottle. We’ve got you covered!
The Mason Jar Shake
When you hear ‘Mason Jar,’ you probably think of grandma’s homemade jam or Pinterest-worthy home decor. But did you know it’s also the perfect tool for blending your protein shake? It’s simple, really.
- Fill the mason jar halfway with your preferred liquid. We’re talking water, milk, or maybe even a bit of juice if you’re feeling frisky.
- Add your protein powder. Remember, more powder, more power!
- Seal the jar, and channel your inner Shakira by shaking it like you mean it. The result? A well-blended protein shake, ready in no time.
The Water Bottle Workout
Who knew your humble water bottle could double up as a protein shake mixer? This method delivers a decently mixed shake, and a mini-workout to boot! Here’s how to do it:
- Fill your water bottle about halfway with your chosen liquid.
- Add your protein powder.
- Close the lid tightly and shake, shake, shake. Consider this your cool-down routine!
The Fork Whisk
Don’t laugh. A fork isn’t just for eating salad or twirling spaghetti. It can be a surprisingly effective tool for mixing your protein shake. Ready to give it a try? Here’s how:
- Fill a glass or cup halfway with your liquid of choice.
- Add your protein powder.
- Use the fork like a mini whisk, stirring briskly until everything is well combined. Voila, you have your protein shake!
So there you have it, folks. Making a protein shake without a blender bottle isn’t just possible; it’s downright easy! With these methods, you can ensure you’re never without your post-workout fuel, blender bottle or not. Happy shaking!
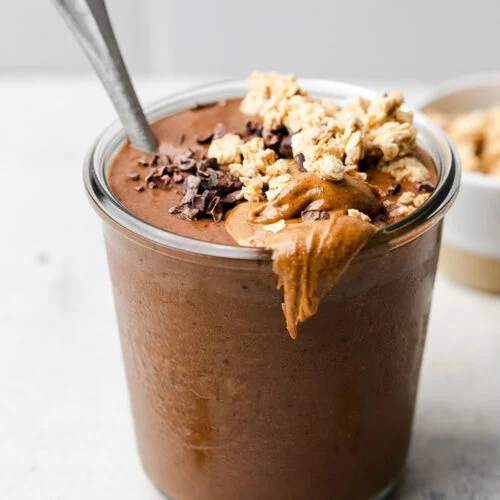
Chocolate Banana Protein Shake Recipe Without a Blender Bottle
Alright, sporty spice! So you’re in need of a protein-packed punch, but you can’t find your blender bottle? No problem! Who says you need a fancy bottle to create a delicious Chocolate Banana Protein Shake? Not us. With some creativity and a little elbow grease, you can whip up a lip-smacking, muscle-building shake in no time. So, ready to shake things up? Here we go:
Ingredients:
- 1 ripe banana
- 1 cup of milk (your choice, cow’s, almond, soy, you pick!)
- 1 scoop of chocolate protein powder
- A handful of ice cubes (optional, but recommended for a cool, refreshing shake)
Steps:
- Peel that banana. Fun fact: did you know you’re supposed to peel it from the bottom, not the top? Try it. It’s a game changer.
- Mash your banana. Use a fork, a potato masher, or if you’re feeling extra adventurous, your hands. Don’t be shy, get in there!
- Add your protein powder to the mashed banana. Mix until you get a thick, chocolaty paste. This is the base of your shake. Looks weird, tastes amazing.
- Pour your milk into a jar with a tight-fitting lid. A mason jar works great. If you’re a true gym rat, a cleaned, empty protein powder tub will do the trick.
- Add your banana-chocolate mixture to the milk, screw that lid on tight, and shake it like you’re doing a one-handed dumbbell snatch.
- Drop in some ice cubes, give it another shake, and voila! You’ve created a bona fide protein shake without a blender bottle. High-five to you, my friend.
Note: This shake is best enjoyed immediately after a sweaty workout session. So, drink up, you’ve earned it!
Now, wasn’t that easy? With just a few everyday items and some arm strength (which we know you have, you protein shake drinker, you), you can prepare a delicious, nutritious Chocolate Banana Protein Shake sans blender bottle. And remember, the key ingredient in any recipe is love. Well, love and protein. Mostly protein. So, keep shaking things up, stay strong, and keep smiling!
Strawberry Vanilla Protein Shake Recipe Without a Blender Bottle
Alright, sportsmen! You’ve been asking, and I’ve been listening. So today we’re going to ditch the blender bottle, but keep the gains, as we whip up a Strawberry Vanilla Protein Shake. No gizmos, no gadgets, just good, old-fashioned “elbow grease”.
First things first, let’s gather the necessary ingredients. You won’t need much:
- A cup of fresh strawberries
- 1 scoop of your go-to vanilla protein powder
- A cup of almond milk (or any milk of your choice, really)
- A handful of ice cubes
Now, here’s the fun part — making the shake. Ready, set, go!
- Wash and hull your strawberries. Yes, even if they’re “ready to eat”. Trust me, a little extra washing never hurt anybody.
- Throw your strawberries, protein powder, and almond milk into a jar with a tight-fitting lid. We’re going old school here, guys.
- Seal the jar and shake it like you’ve never shaken anything before. Channel your inner Beyoncé if you have to. Do this for about a minute or until the ingredients are well combined.
- Add the ice cubes to the jar and give it another good shake. Your muscles might be screaming, but think of it as a bonus workout. Plus, you’ll appreciate the chill in your shake.
And there you have it, folks. A Strawberry Vanilla Protein Shake, sans blender bottle. Simple, right? And you thought this was going to be some kind of rocket science.
Remember, the joy is in the journey, not just the destination. In this case, the journey involves shaking a jar, and the destination is a delicious, protein-packed shake. So keep shaking, and keep making those gains!
Next up, we’ll tackle a chocolate peanut butter protein shake. But until then, happy shaking!
Vanilla Blueberry Protein Shake Recipe Without a Blender Bottle
Alright, sportsmen, here’s a secret. You don’t need a fancy blender bottle to whip up a top-notch protein shake. That’s right, you can make your shake right in your favorite drinking glass. Don’t believe me? Allow me to demonstrate with a delightfully simple and scrumptious Vanilla Blueberry Protein Shake recipe. Prepare to have your protein-packed world rocked!
To start with, you’ll need these ingredients:
- 1 cup of milk (Almond, soy, or regular cow’s milk – your choice, champ!)
- 1 scoop of vanilla protein powder (Trust me, it’s the secret to that smooth, creamy taste)
- 1/2 cup of blueberries (Frozen or fresh – either will make your shake berry delicious)
Now, let’s get shaking!
- Step 1: Pour the milk into your glass.
- Step 2: Add the scoop of vanilla protein powder. At this point, you might be thinking, “But wait, won’t that just sit on top of the milk?” Ah, well spotted, my friend! But don’t worry, we’re coming to that.
- Step 3: Now, here’s the trick. Using a fork, begin to stir the milk and protein powder together. Yes, a fork! This is the secret weapon in our no-blender-bottle arsenal. The tines of the fork act like a mini whisk, breaking up the powder and mixing it smoothly into the milk.
- Step 4: Once your protein powder is smoothly mixed in, add the blueberries. Continue stirring with your trusty fork until the blueberries are evenly distributed.
And voila! You’ve just made a protein shake without a blender bottle. Who needs fancy equipment when you’ve got good old-fashioned ingenuity?
Remember, not having a blender bottle isn’t an excuse for skipping your protein shake. It’s a challenge to shake things up!
Enjoy your Vanilla Blueberry Protein Shake, sportsmen. Here’s to fueling your body, nourishing your muscles, and proving that where there’s a will, there’s a way – even without a blender bottle.
Conclusion: Enjoy Your Protein Shake Anywhere, Anytime
Well, there you have it, sportsmen! You’re no longer tethered to your blender bottle to make your beloved protein shake. With a little creativity and elbow grease, you can whip up your protein-packed beverage anywhere, anytime. And let’s face it, nothing screams “macho” quite like shaking your protein shake in a water bottle, right?
Remember:
- Shaking: It might require a bit more effort than your usual blender bottle, but hey, consider it a mini workout. Just make sure your lid is tightly secured. We wouldn’t want a protein shake shower, now would we?
- Stirring: A good ol’ spoon or fork can be your ally in the quest for the perfect blend. It’s all about the wrist action, folks!
- Whisking: If kitchen tools were superheroes, the whisk would be the Superman of protein shake mixing. Get that frothy, well-blended drink without a blender bottle in sight.
Don’t let the lack of a blender bottle hold you back. Remember, when there’s a will, there’s a way…and now you know the way!
Protein shakes are not just about the protein; they’re about the journey, the creativity, and the power of you. So go on, get out there and start shaking!
Quick Recap:
Here’s a quick summary of what we’ve covered:
- No blender bottle? No problem! All you need is a secure bottle or jar, your protein powder, and a liquid of your choice.
- Shake, stir, or whisk your way to a perfectly blended protein shake.
- Enjoy the freedom of making your protein shake anywhere, anytime.
So sportsmen, go ahead, grab your protein powder, choose your mix-ins, and show that blender bottle who’s boss. You’ve got this!