Hey there, smoothie lover! Ever taken a whiff from your blender bottle, only to be greeted by a smell that’s… let’s just say, less than fresh? If you’re nodding away, then you’re at the smoothies, and other blended beverages. But, fear not! With a few simple tips and tricks, you can keep that bottle smelling like a daisy—or at least, not like a science experiment gone wrong. So buckle up, it’s time to dive into the wonderfully aromatic world of blender bottle cleanliness.
The Stinky Blender Bottle Problem: Causes and Solutions
Imagine being at the gym, you’ve just finished a killer workout and you’re feeling absolutely fab… until you take a swig from your blender bottle. Suddenly, your nostrils are assaulted by a smell that’s a cross between rotten eggs and a swamp monster’s underarm. Not exactly the refreshing moment you were expecting, right?
So, what causes that god-awful stench lingering in your blender bottle, you ask? Well, it’s a lovely mix of trapped moisture, protein residue, and bacteria growth. Sorry if I just ruined your appetite, but hey, knowledge is power, right? Now that you know the cause let’s talk solutions.
Keeping Your Blender Bottle Fresh as a Daisy
Alright, let’s get down to the nitty-gritty and learn how we can keep you from wearing a gas mask every time you need a sip of water. Here’s a step-by-step guide:
- Wash after use: I know, I know, it sounds obvious. But you’d be surprised how many people just rinse their bottle and call it a day. Not even Superman’s rinse could get rid of all the protein residue. So, get in there with some dish soap and warm water, and work your magic!
- Let it air dry: Never put the cap back on a damp bottle. That’s like inviting bacteria to a free, all-you-can-eat buffet. Let your bottle air dry completely before you put the cap back on.
- Use baking soda: Sometimes, dish soap isn’t enough to get rid of that persistent odor. When this happens, baking soda is your best friend. Just add a tablespoon of it to your bottle, fill it with warm water, shake it like you’re at a Taylor Swift concert, and let it sit overnight. Rinale in the morning, and voila! No more funky smell.
By following these steps, you’re stepping into the ring fully equipped to knock out any blender bottle odor that dares to challenge you. But what if you’re dealing with a smell that’s more stubborn than a mule in mud?
For Those Stubborn Smells
If you’ve tried everything and your blender bottle still smells like a skunk’s living room, it might be time to bring in the big guns. Here’s how:
- Vinegar: It’s not just for salads anymore! Fill your blender bottle with a mixture of white vinegar and water, let it sit for a few hours, and then rinse. The acidity in the vinegar will take care of the bacteria causing the smell.
- Denture tablets: Bet you didn’t see this one coming, huh? Drop a couple of denture cleaning tablets into your blender bottle filled with warm water, and let it do its thing. It’s a cheap and easy way to get your bottle smelling fresh again.
Now you’re armed with the know-how to keep your blender bottle smelling like a spring morning, rather than a horror movie set. Next time you’re at the gym, you can focus on your gains, not your blender bottle’s name in the ‘Hall of Shame’.
Say Goodbye to the Smell in Your Blender Bottle with These Tips
Ever had your nose assaulted by a rancid smell from your blender bottle? Yep, we’ve all been there. No need to hang your head in shame, my friend. The culprit is probably just leftover protein shakes or smoothies getting funky in there. So, how do we tackle this noxious nuisance? Well, sit tight, because here comes a parade of fabulous tips on how to keep your blender bottle from smelling like a forgotten gym sock.
Regular Cleaning is Key
First and foremost, regular cleaning is the cornerstone of a smell-free blender bottle. You wouldn’t wear your gym clothes for a week without washing them, would you? (If you answered “Well, maybe…” to that, we might need to have a different conversation). Same goes for your blender bottle. Clean it immediately after each use. And yes, that means even if you’re dead tired after your workout, resist the urge to just rinse it out and call it a day.
- Tip: Use hot water and a mild dish soap for the cleaning. Don’t skimp on the soap; those suds are your secret weapon against stinky protein residue.
Deep Clean Once a Week
While regular cleaning helps, it’s also crucial to give your bottle a deep clean once a week. This is like the spring cleaning of the blender bottle world. It’s where you get down and dirty with the scents that have been stubbornly clinging to your bottle.
- Fill the bottle halfway with a mixture of vinegar and warm water.
- Shake it like you’re on the dance floor, then let it sit for about 15 minutes.
- Rinse thoroughly. Vinegar is excellent for killing odors, but unless you’re a fan of the salad dressing aftertaste, you’ll want to make sure you rinse it well.
Store it Properly
After cleaning, always make sure your blender bottle is completely dry before you store it. Moisture is a breeding ground for bacteria and, you guessed it, funky smells. Store your bottle with the lid off to allow air circulation.
Remember, a clean blender bottle is a happy blender bottle. And a happy blender bottle means a happier you!
Now, armed with these tips, you’re ready to banish those offensive odors from your blender bottle forever. So, go ahead, whip up that protein shake and enjoy it without the fear of dealing with a smelly aftermath.
Cleaning 101: The Best Way to Clean a Blender Bottle
Hey there, it’s blender bottle cleaning time! Now, we know it’s not everyone’s favoriteime, but it’s an essential task if you want to avoid olfactory unpleasantness. So, how about we make it less of a chore and more of an adventure? Ready? Let’s dive right in.
The best way to clean your blender bottle involves a few simple steps that even the busiest person can manage, and hey, you might even have some fun in the process. After all, cleanliness is next to godliness, right?
Step 1: Rinse it Out
As soon as you’re done using your blender, give it a good rinse. This prevents any leftover residue from settling in and starting to smell. Think about it, would you want to hang out with old, crusty protein shake? We didn’t think so.
Step 2: Soak to the Rescue
Here’s a tip for you! Fill your bottle halfway with warm water, add a few drops of dish soap, secure the lid, and give it a good shake. Let the soapy mixture do its magic for about an hour. This, my friend, is the perfect time to catch up on that episode you missed last night.
Step 3: Scrub-a-dub-dub
Now, roll up your sleeves, it’s time to get a little dirty to get things clean. Using a long-handled brush, give the interiors a thorough scrub. Don’t forget the lid and the cap. And remember, the tougher the scrub, the better the result.
Step 4: Rinse and Repeat
Once you’re done with your scrubbing session, rinse the bottle thoroughly under warm water. And when we say thoroughly, we mean it. If there’s any soapy residue left, you’ll be tasting it in your next smoothie. Not a flavor you want, trust us.
Step 5: Air it Out
Post rinse, leave the bottle to air dry upside down. This helps to keep any lingering odors at bay. Plus, it’s also a pretty cool way to display your blender bottle. So, you see, it’s a win-win.
And there you have it! A squeaky-clean, odor-free blender bottle. This might not be as exciting as finding a lost city, but hey, it’s definitely a victory in our books.
One last piece of advice though, if you’re dealing with a stubborn smell that simply won’t quit, a vinegar soak might just be your ticket to success. Mix equal parts of water and white vinegar, fill the bottle, and let it soak overnight. Rinse it out in the morning, and voila, you’ve got yourself a fresh-smelling blender bottle.
Top 5 Natural Ways to Get Rid of Blender Bottle Odors
Ever felt like your blender bottle was auditioning for a role in the next zombie movie? You know, that atrocious smell that hits you right in the nostrils, making you wonder if something crawled in there and died. Yeah, that one. Well, it’s time we kick that stench to the curb. Here are five natural ways to get rid of those pesky blender bottle odors.
1. Use Baking Soda
Meet the superstar of odor neutralizers: Baking Soda. This wonder ingredient isn’t just for making your pastries rise. It’s also a fantastic odor absorber. Here’s how to use it:
- Empty your blender bottle: I mean, unless you enjoy drinking chunks of last week’s protein shake, dump out whatever’s left in there.
- Rinse it out: Give it a quick rinse under running water. No need to break out the rubber gloves and scrub brush yet.
- Add baking soda: Toss in about a teaspoon of baking soda. It won’t bite, I promise.
- Fill with warm water: Fill the bottle up to the brim with warm water, screw the lid on tight and give it a good shake. Let it sit for several hours, or better yet, overnight.
- Rinse and enjoy: Give it a final rinse, and voila! Your blender bottle is now fresher than a pillow with a mint on it!
2. Vinegar To The Rescue
Vinegar might actually be a superhero in disguise. It’s known to pack a punch when it comes to banishing bad smells. Here’s the game plan:
- Fill your blender bottle halfway with warm water.
- Add a few tablespoons of white vinegar.
- Close it tightly and shake it like you’re at a Taylor Swift concert.
- Leave it to soak for a few hours, then rinse it out thoroughly.
3. The Good Old Lemon Trick
When life gives you lemons, use them to deodorize your blender bottle!
A squeeze of lemon, a dash of water, let it sit, and then a rinse! Simple as that!
4. Soak in Saltwater
Not just for sore throats, a good saltwater soak can do wonders for your smelly blender bottle.
- Create a saltwater solution: Mix 1-2 tablespoons of salt in warm water.
- Soak your bottle: Allow your blender bottle to bathe in this solution for a few hours.
- Rinse well: Rinse it out, ensuring no salt residue remains.
5. Coffee Grounds
Our beloved morning fuel can also help to neutralize smells. Just add a few tablespoons of coffee grounds in your bottle, fill it with warm water, and let it sit overnight. A rinse in the morning and your bottle is ready for action!
There you have it, folks! Five natural ways to transform your blender bottle from stinky to sensational. Ready to take your bottle from a monster movie extra to a fresh-smelling superstar?
Prevention is Key: How to Keep Your Blender Bottle Smelling Fresh
Let’s dive right in, shall we? Not every time you use your blender bottle, you’ll be blending sweet-smelling strawberries and mint. Sometimes, it’s going to be filled with protein-filled concoctions that, while they’re great for your muscles, aren’t so great for your blender bottle’s aroma. But, have no fear! There are steps you can take to prevent your blender bottle from smelling like a forgotten gym sock.
Stop the Stink Before it Starts
Prevention, my friends, is the best medicine. And it’s not just for your health. It applies to your blender bottle too. The trick is to clean your blender bottle immediately after use. Sounds simple, right? But, how many times have you said, “I’ll clean it later,” only to find a stinky surprise waiting for you the next day? Oh, don’t act so innocent; we’ve all been there.
- Clean Immediately: Washing your blender bottle right after use doesn’t give nasty smells time to set in. A quick rinse with warm soapy water will do the trick.
- Dry Thoroughly: After cleaning, make sure to dry your blender bottle thoroughly. Moisture can breed bacteria, which surely contributes to the stink.
- Store Properly: Don’t just toss your blender bottle in a gym bag or a dark cupboard. Store it in a well-ventilated area. And, leave the lid off! This allows air to circulate and prevent any residual dampness from turning smelly.
What to Do When the Smell Lingers
But what if you’ve followed all the steps above, and your blender bottle still smells like a swamp creature’s lair? Don’t worry, we got some tricks up our sleeve for you.
Pro tip: Vinegar and baking soda can be your blender bottle’s best friends when it comes to combatting odors.
- Vinegar: Fill your blender bottle with a solution of equal parts vinegar and warm water. Let it sit for a few hours, then rinse thoroughly. The acidity of the vinegar will help to neutralize any lingering smells.
- Baking Soda: If the vinegar didn’t do the trick, try baking soda next. Add a few tablespoons to your blender bottle, fill it with warm water, and let it sit overnight. In the morning, give it a good rinse. Baking soda is known for its odor-absorbing properties.
So there you have it, folks. Keep these tips in mind, and your blender bottle will always smell as fresh as a daisy. Or at least, it won’t make your nose crinkle in disgust. Either way, I’d call that a win.
The Dos and Don’ts of Storing Your Blender Bottle
Ever opened your blender bottle only to be met with a smell so funky it could wake the dead? Alright, maybe not that bad, but you get the picture. Poor storage of your beloved blender bottle can lead to unpleasant odors that can turn your protein shake experience from “Yum!” to “Yuck!” in a heartbeat. But fear not, dear reader, here are some dos and don’ts that will ensure your blender bottle stays as fresh as a daisy.
Do’s
- Do Rinse Immediately: Finished downing that protein shake? Don’t just chuck your blender bottle into your gym bag and forget about it. Rinse it out immediately. The longer those remnants stay, the more they start to smell.
- Do Use Warm Soapy Water: Nothing deters those stinky odors like a good old scrub with warm, soapy water. Added perk? It leaves your blender bottle looking as good as new!
- Do Dry Properly: Remember that bacteria, the primary culprit behind those funky smells, thrives in moisture. Proper drying is crucial. Leave your bottle and its parts to dry separately and thoroughly before storing.
- Do Use Baking Soda: This is the secret weapon in your arsenal to combat odors. Soak your blender bottle in warm water and a scoop of baking soda for an hour or two. You’d be amazed at the results.
Don’ts
- Don’t Store Your Blender Bottle Closed: This is a rookie mistake! Storing your bottle sealed traps moisture and creates a perfect environment for bacteria to party. Store it open and let the air do its thing.
- Don’t Leave it in the Sun: While you might think the sun’s heat would kill bacteria, it can actually warp your bottle and its lid, potentially making it harder to clean in the future. Better to store it in a cool, dry place.
- Don’t Use Harsh Cleaning Tools: A blender bottle is not a pot or a pan. Abrasive tools can scratch the surface and create tiny nooks for bacteria to hide. Stick to soft sponges or brushes.
Remember, a clean blender bottle is a happy blender bottle. By following these simple dos and don’ts, you’ll be ensuring your blender bottle stays odor-free and ready for use whenever you need it. No more holding your nose while you chug down your favorite shake!
Common Mistakes That Make Your Blender Bottle Smell Worse
Now, let’s get down to brass tacks. You’ve been using your blender bottle for a while, and yet, every time you crack it open, your nostrils are greeted by an odor that could peel paint. What gives? Often, it’s not about what you’re doing but what you’re not doing. Or, more accurately, what you’re doing wrong. Here are some common blunders that could be turning your blender bottle into a stink bomb:
- Not Cleaning Immediately: Listen up, folks! Procrastination is not your friend when it comes to cleaning your blender bottle. Letting it sit around with remnants of your protein shake or smoothie is like sending an open invitation to bacteria. And believe me, they throw a heck of a party!
- Ignoring the Lid and Cap: Pay attention here! The lid and cap can harbor just as many germs as the bottle itself. So, don’t give them the cold shoulder. A good scrub is all they need to stay fresh and clean.
- Favoring the Dishwasher: Now, don’t get me wrong. Dishwashers are great and all, but sometimes, they just can’t reach those nooks and crannies. If you’re relying solely on your dishwasher to do the job, your blender bottle might not be getting the thorough clean it needs.
- Using the Wrong Cleaning Materials: Not all cleaning agents are created equal, people! Using one that’s too harsh can degrade the material of your blender bottle, which can create tiny cracks for bacteria to hide in. On the flip side, if your cleaning agent is too mild, it might not be efficient enough to get rid of all the stubborn residue.
Remember folks, cleanliness is next to godliness… And it also keeps your blender bottle from smelling like a moldy gym sock!
Alright, it’s not all doom and gloom. By avoiding these common pitfalls, you’re already halfway to a fresh-smelling blender bottle. So, let’s move on to the next section, where we’ll cover some top-notch cleaning tips and tricks.
The Benefits of Using Stainless Steel Blender Bottles
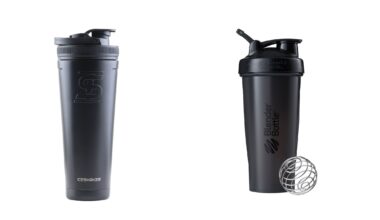
There’s something quite sexy about stainless steel blender bottles, isn’t there? That polished, sleek exterior that gleams under the light, and the promise of a cold smoothie even after an intense workout session. However, these bottles aren’t just eye candy, they come packed with several benefits that make them a fantastic choice for your blending needs.
Stay Cool, Buddy
Stainless steel is an ace at temperature regulation. Whether you’re sipping on a chilled protein shake or a hot soup, your stainless steel blender bottle has got you covered. It can maintain the temperature of your drinks for hours, unlike plastic alternatives. How cool is that?
Strength is its Middle Name
Did you drop your bottle? No worries! The stainless steel blender bottle is not a drama queen. It’s incredibly durable and resistant to dents and cracks. Plus, it can withstand high temperatures without a hiccup. It’s like the superhero of blender bottles!
Keeping Things Clean
One of the biggest perks of stainless steel is its non-porous nature. This means it doesn’t harbor bacteria or retain odors. A quick wash and it’s as good as new. No more stinky bottle syndrome. Thank you, stainless steel!
Eco-friendlier Choice
By choosing a stainless steel blender bottle, you’re not just doing yourself a favor, but also Mother Earth. Stainless steel is recyclable and doesn’t leach harmful chemicals into your drink like some plastics can. Win-win!
Now, aren’t these reasons enough to make you want to get a stainless steel blender bottle for yourself? Remember, a happy blender bottle means a happy you!
Quick Fixes: Emergency De-Stinking Your Blender Bottle
Picture this: You’re running late for work, you grab your blender bottle off the counter and take a big swig, only to be greeted by a stench that could wake the dead. Yikes! But worry not, friends, because even in such dire circumstances, there are some quick fixes that can help de-stink your bottle pronto. Don your superhero cape, because we’re about to perform some emergency blender bottle rescue!
The Quick Rinse Method
Nothing beats simplicity, right? Our first quick fix is the good old rinse and repeat. Here’s how:
- Empty the bottle: Pour out any remaining liquid. If it’s starting to form its own ecosystem, it’s time to say goodbye.
- Rinse with hot water: Fill the bottle with hot tap water. Caution! It should be hot, but not scorching. We’re cleaning a blender bottle, not brewing tea.
- Shake it up: Put the lid back on and shake vigorously. Imagine you’re a bartender at a fancy cocktail party.
- Empty and repeat: Empty the bottle, then repeat the process a few times until the smell starts to fade.
The Vinegar Method
Our second quick fix calls for vinegar, the unsung hero of home cleaning. Ready to get vinegary?
- Fill with vinegar: Fill about one fifth of the blender bottle with white vinegar.
- Add warm water: Fill the rest of the bottle with warm water.
- Let it sit: Let the bottle sit for a few minutes. Maybe watch a funny cat video while you wait.
- Rinse it out: Rinse the bottle thoroughly. Now, breathe in that fresh, clean smell. Ahhh!
Note: Remember, vinegar has its own distinct smell. Make sure to rinse the bottle well so your next protein shake doesn’t taste like a salad dressing.
The Baking Soda Method
Last, but not least, our third quick fix involves baking soda, another household superstar.
- Spoon in baking soda: Add a teaspoon of baking soda to your blender bottle.
- Add warm water: Fill the bottle with warm water.
- Shake it: Close the lid and give it a mighty shake. Think of it as a mini workout.
- Let it sit: Let it sit for a few minutes, then rinse well.
So, there you have it. Three quick fixes to get your blender bottle from ‘eww’ to ‘new’ in no time. Remember, a clean blender bottle is a happy blender bottle!
How Often Should You Wash Your Blender Bottle?
So, you’re wondering, “How often should I wash my blender bottle?” Well, let’s get down to the nitty-gritty of blender bottle hygiene. Spoiler alert: it’s more often than you think!
Just like your favorite coffee mug or water glass, your blender bottle needs regular cleaning. But, oh dear reader, it’s not just about washing it every now and then. It’s about washing it properly and frequently. After all, a clean blender bottle is a happy blender bottle!
Rule of thumb: Wash your blender bottle after every use.
Yes, you read that right. Every. Single. Use. Think of it this way — would you reuse a dirty dish without washing it first? Hopefully not. And it’s the same with your trusty blender bottle. Each time you use it, you’re leaving behind remnants of whatever delicious shake, smoothie, or drink concoction that was previously in there. And trust me, those remnants aren’t aging like fine wine.
Remember, a good rinse is not enough. You’ve got to give it a good scrub to keep the stink away!
For those of you who use your blender bottle multiple times a day, you might be thinking, “But that’s so much washing!” Don’t fret. I’ve got a solution for you too.
- Pre-rinse: After each use, give your bottle a good rinse with warm water as soon as possible. This will prevent any leftover residue from hardening or sticking to the bottle.
- Deep clean: At the end of the day, give your bottle a thorough cleaning. Use a bit of dish soap, scrub the insides, rinse it out, and let it air dry. For an extra clean, you can even use a bottle brush to get into those hard-to-reach places.
So, there you have it. The secret to a fresh-smelling blender bottle is regular and thorough washing. It might seem like a chore, but trust me, your nose (and health) will thank you!

