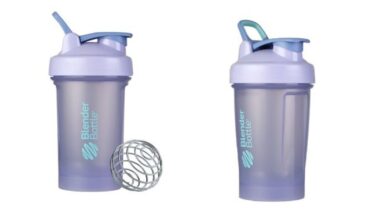
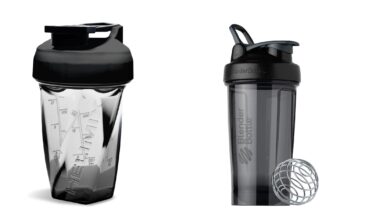
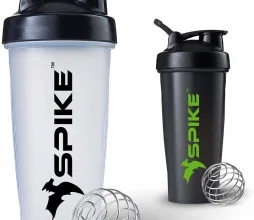
Blender bottles have become an indispensable item in many households. They make whipping up protein shakes, smoothies, or any blended beverage a breeze. However, the caveat to enjoying these easy-to-make, delicious drinks is the subsequent cleaning of the blender bottle. It can sometimes feel like a Herculean task, particularly if you let your concoction dry out before washing. But fret not! This article is here to provide an easy-to-follow guide on How to Clean Blender Bottle adequately and efficiently.
Though it may initially seem like a daunting task, the process of cleaning a blender bottle is not as complex as one might think. With the right information and a few household items, anyone can transform their grimy, stained blender bottle into a spotless, odor-free tool ready for the next round of blending. This informative guide will break down the process, step-by-step, ensuring the task is as palatable as the protein shakes you love.
Before diving into the nitty-gritty of the cleaning process, it’s essential to understand why a properly cleaned blender bottle is crucial. A dirty blender bottle can harbor harmful bacteria, leading to potential health risks. Furthermore, dried residues can affect the taste of your beverages, and let’s be honest, no one enjoys a protein shake with a hint of yesterday’s banana-strawberry blend. So, without further ado, let’s embark on this cleaning journey together, shall we?
Why cleaning your blender bottle is important
If one were to anthropomorphize the humble blender bottle, it could be said that it lives a rather tumultuous existence, from being filled to the brim with all sorts of concoctions, violently shaken, and then emptied, only to repeat the cycle again. Understandably, this cycle can leave the blender bottle feeling a little under the weather, a state that is not only visually off-putting but also poses potential health risks. This section delves into the importance of maintaining your blender bottle in tip-top shape, not merely for aesthetic appeal, but more crucially, for your health and overall wellness.
Prevention of Bacterial and Fungal Growth
Imagine, if you will, the blender bottle left unwashed after use. What may look like an innocent leftover smear of smoothie or protein shake is, in fact, an all-you-can-eat buffet for bacteria and fungi. The warm, moist environment inside the bottle combined with the organic residue of your drinks creates an ideal breeding ground for these microorganisms. Hence, the importance of cleaning your blender bottle cannot be overstated.
Maintaining the Taste of Your Drinks
Ever taken a sip of your freshly made smoothie only to be greeted by a stale, off-taste? That, dear reader, is the vengeful ghost of smoothies past, haunting your taste buds because of a blender bottle not adequately cleaned. Unattended remnants of previous drinks can ferment and affect the taste of your new concoctions, leading to less than pleasant gastronomic experiences. Thus, regular cleaning ensures that each drink tastes exactly as it should – pristine and delicious.
In conclusion, while cleaning your blender bottle might seem like a mundane chore, the benefits it reaps are far-reaching. Regular cleaning prevents the growth of harmful microorganisms, ensures the taste of your drinks remains untainted, and prolongs the life of your blender bottle. So grab that sponge and dish soap, and give your blender bottle the spa treatment it deserves!
Materials needed to clean your blender bottle
Commencing the mission to rescue your beloved blender bottle from the clutches of dried up protein powder and the remnants of yesterday’s fruit smoothie? Brace yourself, dear reader, because an array of household items will be your trusted allies in this noble endeavor. The goal? To return your blender bottle to its original, squeaky-clean glory. Fear not, for this task, while it may seem Herculean, is within your grasp.
The Mighty Tools of Purification
Have you ever peered into the murky depths of an unwashed blender bottle, shuddered, and wondered how on earth you’re going to tackle this Herculean task? Fear not, dear reader! The good news is that the tools for this undertaking are likely already within your grasp. Yes, you heard that right – your everyday household items can transform into mighty tools of purification, ready to wage war on those pesky blender bottle stains and odors.
The first weapon in your cleaning arsenal is the humble dish soap. This everyday warrior, armed with its grease-cutting prowess, can slice through the stubborn blender gunk like a hot knife through butter. But mind you, it isn’t a lone ranger in this cleaning crusade. It needs the aid of its trusty companions, warm water and a soft sponge or brush.
Remember, dear reader, that a good, long soak in warm, soapy water can often do the heavy lifting, leaving you with minimal scrubbing duties. It’s like a relaxing spa day for your blender bottle, washing away the stress of all those protein shakes and smoothies.
Next in line is the resourceful baking soda. When paired with vinegar, this dynamic duo unleashes a volcano of cleaning power that can make even the most stubborn stains surrender. It’s a good, old-fashioned science experiment right in your kitchen, and you’re the master chemist!
And finally, for those remaining stubborn, stuck-on bits hiding in hard-to-reach corners, you have the versatile pipe cleaner. Its nimble, bendy form can reach the secret nooks and crannies of your blender bottle, ensuring a clean sweep.
- Dish soap, warm water, and a soft sponge or brush – for a gentle, thorough cleanse
- Baking soda and vinegar – for attacking stubborn stains with a fizzy vengeance
- Pipe cleaner – for those hard-to-reach spots and hidden corners
But remember, while these tools are simple, they are mighty. Use them wisely, dear reader, and you’ll soon witness the transformation of your blender bottle from ‘grubby’ to ‘glorious’!
Step-by-step guide to cleaning your blender bottle
Embarking on the path to pristine blender bottles is a journey best taken one step at a time, my friend. No need to feel overwhelmed. So, let’s dive into this step-by-step guide to cleaning your blender bottle. Here, you’ll discover the wisdom of the ages – or at least, the wisdom of those who’ve faced the daunting task of removing the stench of old protein shake from a blender bottle.
Step 1: Gather Your Cleaning Arsenal
Before you roll up your sleeves and get down to business, it’s imperative to assemble the tools of the trade. This may feel like preparing for battle, and in a way, it is. But fear not, brave warrior, the enemies you face are just stubborn stains and lingering smells. Your cleaning arsenal should include the following:
- Dish soap: Your good old, trusty dish soap plays a vital role in this epic cleaning saga. It has the power to cut through the grime and break down the grease.
- Warm Water: This is the elixir of life for your blender bottle, as warm water helps to loosen and dissolve any deposits clinging desperately to the sides of your bottle.
- Small brush: A bottle brush is the weapon of choice for this task. It is especially useful for reaching those challenging nooks and crannies that are otherwise inaccessible.
- Baking soda and Vinegar: When the going gets particularly tough, these two come to your rescue, acting as a powerful duo to tackle stubborn stains and odors.
Step 2: Initial Rinse
Begin the cleaning process with an initial rinse. Empty any leftover contents from your blender bottle, then fill it with warm water. Add a few drops of dish soap and give it a good shake. This will help to dislodge any residue clinging to the sides and bottom of the bottle.
Step 3: Get Scrubbing
Now comes the elbow grease part. Using your bottle brush, scrub the interior of the bottle, paying special attention to the corners and the bottom. If your blender bottle has a lid or a ball, make sure you give those a good scrub too.
Step 4: The Power Duo
If your blender bottle is still looking a bit grimy, or smelling less than fresh, it’s time to call in the big guns. Rinse the bottle with warm water again, then make a paste with baking soda and a small amount of water. Apply this paste to the stained or smelly areas and let it sit for about 15 minutes. Rinse the bottle, then fill it halfway with warm water and add 1-2 tablespoons of vinegar. Secure the lid and shake the bottle well. Let it sit for another 15-20 minutes and then rinse thoroughly.
Step 5: The Final Rinse
Give your blender bottle one last rinse and inspect it for any remaining stains or smells. If it passes your inspection, congratulations! You’ve successfully cleaned your blender bottle. Allow it to air dry completely before using it again to avoid moisture build-up.
And there you have it! An easy, step-by-step guide to banishing the gunk and funk from your blender bottle. With a little perseverance and the right tools, you’ll have your blender bottle looking (and smelling) as good as new in no time. Remember, cleanliness is next to godliness, especially when it comes to blender bottles!
Tips for cleaning hard-to-reach areas of your blender bottle
If you’ve ever gazed into your blender bottle and noticed an uninvited guest–a stubborn, hard-to-reach residue that’s taken up residence in a remote corner of your container–you’re not alone. It’s a universal truth that blender bottles, while practical and versatile, can be a bit of a chore to clean, especially when it comes to those hard-to-reach areas. But fear not, dear reader, there is hope yet for those stubborn stains and lurking leftovers, and in this section, we’ll explore how to evict them with grace, precision, and perhaps a dash of elbow grease.
Firstly, let’s establish this fact: the task of cleaning hard-to-reach areas of a blender bottle doesn’t have to resemble a Herculean labour. If done right, it can be as easy as pie, or at least, easier than trying to teach a cat to play fetch. Here are some tips that not just do the trick but also protect your bottle from scratches and damages.
- Soak it up: Try filling your blender container with warm soapy water and let it sit for a while. You’ll be surprised how much grime a good soak can dislodge. This is the cleaning equivalent of a spa day for your blender bottle, so don’t rush it. Let that soap work its magic.
- Shake, rattle, and roll: Put a little water, a squirt of dish soap, and a handful of rice in your blender bottle, then cover it and shake vigorously. The rice acts as mini scrubbers, giving those hard-to-reach areas a thorough going-over. It’s like a mini tornado in a bottle, only less scary and far more useful.
- Brush it off: If the soapy soak and rice shake haven’t fully done the trick, it’s time to break out the big guns–or, more accurately, the little brushes. Bottle brushes, toothbrushes, or even pipe cleaners can help you reach those tricky spots. The trick here isn’t brute force, but persistence and precision. It’s a bit like tooth brushing, but for your blender bottle.
Now, these tips should serve you well for most blender bottle cleaning scenarios. However, for those particularly stubborn cases, you might need to bring out the heavy artillery.
- Dish soap: Your everyday dish soap will serve magnificently in this battle against grime. It cuts through the oil and effectively breaks down Ladies and gentlemen, with a dash of humor and a generous dollop of wisdom, we embark on a thrilling culinary adventure! An escapade that doesn’t involve cooking up a storm, but rather, the aftermath. Yes, that’s right. We’re talking about cleaning your blender bottle. But fear not, for this seemingly mundane task can be transformed into an engaging endeavor with just the right tools and a dash of enthusiasm. Before you dive headfirst into scrubbing and rinsing, it’s crucial to have all the required materials at your disposal. After all, a carpenter wouldn’t attempt to build a house without his trusty hammer and nails, would he? Similarly, cleaning your blender bottle efficiently demands a certain toolkit. So, what exactly are the essential tools in this cleaning arsenal? The Necessary Cleaning Troop
- Warm water: This is your first line of defense. Warm water, not too hot, mind you, helps loosen up any stubborn residue left behind from your last smoothie or protein shake.
- Dish Soap: The knight in shining armor to your damsel in distress, dish soap plays a key role in purging your blender bottle of any lingering smells or stains.
- Nylon Brush: A good old nylon brush is your trusty sidekick in this cleaning saga, reaching the nooks and crannies your fingers just can’t.
- White Vinegar: A household staple, white vinegar is the unsung hero when it comes to removing mineral deposits and leaving your blender bottle squeaky clean.
- Baking Soda: Another home remedy superstar, baking soda is excellent for deep cleaning and neutralizing those tenacious odors.
Consider this list as your ‘Avengers’ squad, each item bringing a unique strength to the table, ensuring your blender bottle is thoroughly cleaned. Now that you’ve got your cleaning materials assembled, you’re all set to tackle those stains and odors head-on. Remember, every culinary superhero needs to keep their tools clean, and your blender bottle is no exception.
How to remove stubborn stains from your blender bottle
Alas, dear reader, we’ve all been there — remnants of last week’s kale and banana smoothie firmly plastered to the interior of your beloved blender bottle, refusing to budge despite your most valiant scrubbing efforts. Fear not, for we are about to embark on a cleaning quest to vanquish these stubborn stains and restore your blender bottle to its former glory.
Beneath the veneer of those unsightly stains lie tales of nutritional shakes, post-workout protein mixes, and perhaps a few daring attempts at homemade salad dressings. No shame there, amigo. In fact, these stains are a testament to your commitment to health and well-being. However, it’s time to bid adieu to these unwelcome squatters and welcome back your squeaky-clean blender bottle.
The Soaking Method
The first method in our stain-fighting arsenal is what I like to affectionately refer to as ‘the soak.’ The name of the game here is patience.
- Fill your blender bottle with hot, but not scalding, water. The heat will kickstart the stain-ousting process.
- Add a few drops of mild dish soap to the water and swirl to create suds. This, my friend, will be your first line of defense against those stubborn stains.
- Now, soak the bottle for at least a few hours, or overnight if possible. During this time, the soap will work its magic, breaking down the stain particles.
- After the soaking period, scrub the inside of the bottle with a long-handled brush. If the stains are still there, repeat the soaking process.
The Baking Soda Method
If the soaking method doesn’t cut it, we turn to our trusty friend, baking soda. This household staple is a natural abrasive that’s perfect for tackling tough stains.
- Mix a couple of tablespoons of baking soda with just enough water to form a paste. This paste, dear reader, is the secret weapon you didn’t know you needed.
- Smear the paste on the stubborn stains and let sit for about 15 minutes. During this time, the baking soda will break down the stain.
- Once the time is up, scrub the paste into the stains with a brush. As you scrub, you’ll notice the stains starting to fade.
- Rinse the bottle thoroughly to remove all traces of the baking soda paste.
In conclusion, whether it’s a hardened protein shake residue or a stubborn smoothie stain, the right combination of patience, mild dish soap, and baking soda can restore your blender bottle to its sparkling clean state. So, strap on those rubber gloves and reclaim your bottle, one scrub at a time!
How often should you clean your blender bottle?
the grand dance of life, the blender bottle is an often underappreciated partner. Yet, it plays a pivotal role in our daily routines, helping us whip up delicious smoothies, invigorating protein shakes, or even frothy coffee drinks. Just as you wouldn’t neglect your dance partner, your blender bottle deserves regular attention too. But how often should you be cleaning your blender bottle, you might wonder? Well, let’s delve into the foxtrot of bottle hygiene.
As a golden rule, you should clean your blender bottle after each use. This might seem excessive, especially for the busy bees amongst us, but trust us, it’s for the best. Neglecting to clean your blender bottle immediately after use can lead to the build-up of bacteria and mold, transforming your health-enhancing device into a veritable petri dish of unwanted microorganisms. The exact timing, however, might vary based on several factors.
Frequency Based on Use
- Everyday Use: If you use your blender bottle daily for protein shakes or smoothies, it’s imperative to clean it after each use. This not only ensures your next drink is as fresh as possible, but it also prevents any remaining bits of your previous concoction from spoiling and creating unpleasant odors.
- Occasional Use: If you only use your blender bottle infrequently, it’s still critical to clean it immediately after use. However, you might also want to give it a good rinse before using it again, just to remove any dust or other particles that might have settled in.
Frequency Based on Bottle Material
Interestingly, the material of your blender bottle can also influence your cleaning routine.
Plastic bottles, for instance, are more prone to retaining odors and stains, necessitating frequent and thorough cleaning. Stainless steel bottles, on the other hand, are generally more resistant to such issues but should still be cleaned after each use to maintain their shiny veneer and prevent bacterial build-up.
Frequency Based on Storage Conditions
Lastly, where and how you store your blender bottle can impact the frequency of cleaning.
- If you leave your bottle in a warm, damp environment (like your gym bag), you’ll need to clean it more frequently to prevent bacteria and mold growth.
- Conversely, if you store your bottle in a dry, cool place, it might not require as rigorous a cleaning schedule, but cleaning after each use is still recommended.
In conclusion, while the frequency of cleaning your blender bottle can depend on various factors, cleaning it after each use is a good practice to follow. After all, your blender bottle is a faithful companion, always ready to mix up a healthy treat for you. It’s only fair that you show it some love and keep it squeaky clean!
Alternatives to using dish soap for cleaning your blender bottle
Lo and behold, fair blender bottle owners, for there exist alternatives to the typical dish soap method for cleaning your precious vessel! While dish soap is undeniably a powerful ally in the war against protein shake residue and smoothie remnants, it’s not the only weapon at your disposal. Let’s explore some other formidable options, each with their own unique strengths and strategies.
Vinegar and baking soda: The Dynamic Duo
You might know vinegar and baking soda as the culprits behind that explosive volcano science project in fifth grade. However, when not launching lava (or a reasonable facsimile thereof), these two household staples can provide a potent clean for your blender bottle.
- First, fill about half of your blender bottle with vinegar.
- Then, add about a tablespoon of baking soda. Beware, dear reader, this will cause a bit of a fizz – a mini volcano in your kitchen, if you will.
- Next, seal your bottle and give it a good shake, allowing the chemical reaction to do its job.
- Finally, after letting it sit for a few minutes, rinse thoroughly and dry.
Note: Be advised, though this method provides a deep clean, it may leave your bottle reeking of vinegar. Fear not, a quick rinse with warm water and mild dish soap should rectify this olfactory offense.
Denture tablets: Not just for Grandpa anymore
Have you ever considered the possibility of denture tablets making their way into your cleaning routine? No, we’re not suggesting you start wearing dentures, just that you leverage their cleaning power for your blender bottle. It’s a surprisingly effective method, as those effervescent tablets are designed to tackle tough stains and odors.
- Start by filling your blender bottle with warm water.
- Drop in a denture cleaning tablet and replace the lid.
- Let it do its magic for about 15-30 minutes, or until the water is clear and bubbles have subsided.
- Finally, rinse out your bottle thoroughly. Ta-da! Your blender bottle is now sparkling clean with a fresh minty scent to boot.
Remember: Whichever method you choose, always ensure that your blender bottle is properly dried after cleaning to prevent any potential buildup of mold or bacteria. A clean bottle is a happy bottle!
How to properly dry your blender bottle after cleaning
Water lurking in hidden corners, unbeknownst to the innocent smoothie enthusiast, is a breeding ground for insidious bacteria. Not to sound too alarmist, but properly drying your blender bottle post-cleaning is crucial to maintain its longevity and your health. A good drying technique is the unsung hero of a well-maintained blender bottle. So, let’s dive right in and see how this hero works its magic!
The Perfect Drip-Dry Technique
Imagine you’re leaving a pool, soaking wet. Sure, you could just stand there until nature takes its course, but you’re more likely to grab a towel and get drying, aren’t you? The same principles apply to your blender bottle. Airing it out is a nice thought, but we’re going to take it a step further.
- Shake it off: Give your blender bottle a good shake post-washing to rid it of any excess water. Channel your inner Taylor Swift and really give it a good shake!
- Bottom’s up : Place the blender bottle upside down on a clean, dry towel or a drying rack. This position encourages the water to drain out, rather than pooling at the bottom.
- Air and time : Allow the bottle to air-dry completely before reassembling it. This might take a few hours or even overnight, depending on the humidity levels in your kitchen.
Quick-Dry Hacks for the Impatient
We’ve all been there. You want your protein shake now, but your blender bottle is still wet from the last wash. Fear not, we’ve got some quick-dry tricks up our sleeve:
- Paper towel roulette: Roll up a piece of paper towel and insert it into the bottle, spinning it around to soak up the excess moisture. Be sure to discard the paper towel afterwards, as it has done its duty and served you well.
- Fan-tastic rescue: Point a fan at the blender bottle to speed up the drying process. Just make sure the bottle is secure and won’t go rolling off the counter in the breeze.
Whether you’re the patient type who can wait for the perfect drip-dry, or an impatient soul in need of a quick-dry hack, remember that a dry blender bottle is a happy blender bottle. Now, go forth and blend with confidence, knowing your blender bottle is as clean and dry as can be!
How to prevent odors from developing in your blender bottle
At times, a blender bottle may develop a disagreeable aroma that, like an uninvited guest at a dinner party, persists and lingers long after it has overstayed its welcome. This malodorous problem is usually the result of leftover protein shake residue or other food particles that have settled into the crevices of your bottle. Fear not! This section will guide you through the labyrinth of odor prevention, arming you with the knowledge and techniques to keep your blender bottle as fresh as a daisy.
Regular Cleaning
Regular cleaning of your blender bottle is the most effective way to prevent the onset of unwanted odours. This might seem like a tiresome undertaking, but consider this: Would you rather spend a few minutes after each use cleaning your bottle, or hours trying to remove a stubborn, nose-curling stench? The choice, dear reader, is yours.
Immediate Cleaning
It is best to clean your blender bottle immediately after use. To quote an old adage, “A stitch in time saves nine”. In this case, a quick rinse could save you from a long battle with odors. This simple step prevents residue from settling into the bottle and making itself at home.
Rinse with Warm Water and Soap
Warm water and dish soap make a formidable team when it comes to preventing odors. After emptying your blender bottle, fill it with warm water and a few drops of dish soap. Close the lid tightly and shake the bottle vigorously. The soapy water will help to dislodge any residue clinging to the sides of the bottle. A thorough rinse under running water will then send any lingering particles down the drain.
Careful Attention to Lid and Seals
No stone should be left unturned in your quest to prevent odors, and this includes paying careful attention to the lid and seals of your blender bottle. These areas can be a refuge for stubborn food particles. A detailed cleansing of these parts is the key to ensuring that no unwanted guests remain hidden.
Drying your Blender Bottle
Once the cleaning process is completed, it is crucial that the blender bottle is dried properly. Any remaining moisture can create a breeding ground for bacteria which, as we all know, can be a veritable party planner for unpleasant odors. The bottle should be left open to air out and dry completely before being stored away.
As you can see, preventing odors from developing in your blender bottle is quite straightforward. It all boils down to regular and thorough cleaning, immediate attention after use, and proper drying. Armed with these strategies, you can look forward to a future filled with refreshing, odor-free beverages. Cheers to that!
What to avoid when cleaning your blender bottle
As much as it’s important to be adept with the “dos” of cleaning your blender bottle, it’s equally crucial to be aware of the “don’ts”. After all, they say that forewarned is forearmed. So, let’s take a whimsical journey into the realm of blender bottle care, where we’ll explore the treacherous pitfalls that you should avoid when giving your trusty blend buddy a bath.
Mistake #1: Using Rough Scrubs
While it may seem like a wise idea to unleash your inner Hercules and scrub your blender bottle with the might of a thousand suns, this approach might not be the best one. The blender bottle, in all its glossy glory, isn’t a fan of rough treatment. Using steel wool or other aggressive scrubbing materials can lead to unsightly scratch marks on the bottle’s surface, compromising its aesthetic appeal.
Mistake #2: Neglecting the Lid and the BlenderBall®
These components may seem minor, but in the grand scheme of things, they’re as important as the bottle itself. The lid and BlenderBall® can harbor bacteria and remnants of your previous concoctions. Ignoring them is a bit like cleaning your living room but leaving the kitchen a mess. So, don’t forget to include them in your cleaning routine.
Mistake #3: Using Harsh Chemicals
Turning your blender bottle into a chemical soup isn’t a good idea. Harsh cleaners, such as bleach or ammonia, can not only damage the bottle but also leave a residue that may mix with your future drinks. Stick to milder, food-safe cleaning solutions instead.
Mistake #4: Skipping Regular Cleaning
Imagine waking up one morning to discover that your blender bottle has taken on a life of its own, spawning a miniature ecosystem of mold and bacteria. Not exactly the most appetizing thought, is it? Regular cleaning is vital to prevent such undesirable occurrences. Make it a habit to clean your bottle after every use.
Remember, the key to a long-lasting and hygienic blender bottle lies in regular, careful cleaning. Avoid the mistakes discussed here, and you’ll be well on your way to becoming a blender bottle cleaning virtuoso!
