Friend, have you been eyeing that decadent dollop of whipped cream on your favorite dessert with a twinkle in your eye, but find yourself without a hand mixer or electric whisk? Do you feel like your blender bottle is judging you from the corner, silently mocking your whipped cream-less existence? Well, you’re not alone. Many of us have been there, stuck in this culinary conundrum. But, here’s the million-dollar question: Can you actually make whipped cream in a blender bottle?
Fear not, your whipping woes are about to be a thing of the past! With a touch of patience, a dash of arm strength, and a pinch of know-how, you’ll be whipping up cream like a pro in no time. So, roll up your sleeves and get ready to transform your blender bottle from a protein shake machine into a whipped cream wizard!
Let’s dive right in, shall we?
Whipping cream without a whisk: Is it possible?
Alright, folks, let’s cut to the chase. The whisk is missing, vanished, nowhere to be found – possibly kidnapped by those pesky kitchen elves. So, you’re standing there, cream in hand, and a dessert that’s screaming for a fluffy, white topping. The question is: can you still whip that cream without a whisk? Let’s find out!
Whipped cream without a whisk? It sounds almost as ridiculous as a movie without popcorn, or pizza without cheese. Yet, dare we say it, it might just be possible! Let’s explore this wild notion together.
The Blender Bottle Method
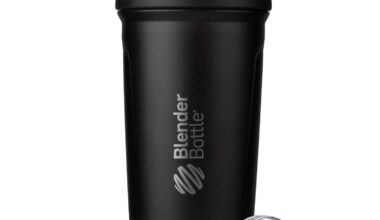
Ever heard of a blender bottle? No, it’s not some mythical kitchen device from a futuristic movie, it’s real and it’s sitting in your kitchen cabinet right now. You know, that bottle with a wire ball inside, which you usually use for your protein shakes or smoothies? Yep, that’s the one!
And guess what? That humble blender bottle might just be your knight in shining armor when the whisk goes AWOL. That’s right, folks, you can make whipped cream in a blender bottle. Let’s see how!
- Step 1: Pour your heavy cream into the blender bottle. Be careful not to fill it more than halfway. Cream needs room to breathe, just like we do after a good meal.
- Step 2: Securely close the lid. We can’t stress this enough – nobody wants a cream explosion in their kitchen, no matter how delicious that sounds.
- Step 3: Shake it! Shake the bottle like you’re at a dance party, and your favorite song just came on. Physical effort is required here, but hey, think of it as a mini workout!
- Step 4: Keep shaking until the cream thickens to your desired consistency. Be patient, Rome wasn’t built in a day, and neither is whipped cream.
- Step 5: Open the lid, taste your creation and add sugar or vanilla if needed. Remember, you’re the boss of your kitchen!
There you have it, a step-by-step guide to making whipped cream without a whisk! This won’t be as quick as using a mixer, but it’s a fun and engaging way to whip cream if you find yourself whisk-less. Plus, who knows, you might just discover a new arm workout in the process!
So, the next time your whisk goes missing, don’t panic. Just grab that blender bottle and shake, shake, shake your way to a delicious whipped cream topping.
Exploring alternatives: How to whip cream without a mixer?
Ever found yourself in a sticky situation, wanting to whip up some cream for a dessert but realized you’re all out of mixers? Fear no more, brave dessert warrior, because we have the solution right here! Let’s talk about whipping cream without a mixer, specifically using a blender bottle. Yes, you read that right. A blender bottle. Bet you never thought of that, did you?
First things first: a blender bottle is not just for your protein shakes anymore. This handy little gadget can help you whip up some delightful whipped cream in no time. But you’re probably wondering, “Is it even possible? Can I really make whipped cream in a blender bottle?”
Steps to Make Whipped Cream in a Blender Bottle
- Pick the Right Cream: Start by choosing a high-fat cream, like heavy whipping cream. This stuff is the crème de la crème, quite literally, and will give you the best results.
- Chill the Cream: Make sure your cream is well chilled before you start. Cold cream whips up faster and better. The process is not unlike going out on a chilly day; you’ll perform better if you’re cool and refreshed!
- Add Cream to the Blender Bottle: Now, pour the chilled cream into the blender bottle. No need to overfill it; half-full will do the trick.
- Shake It Like a Polaroid Picture: Channel your inner OutKast and give that bottle a good shake. It might take a bit of muscle and a few minutes, but keep at it until you see the cream thickening.
- Check the Consistency: Open the bottle and check if your cream has reached the desired consistency. If it hasn’t, shake it some more. Yes, your arms might get a workout, but think of the delicious whipped cream waiting at the end!
And voila! You have just made whipped cream in a blender bottle. Not only did you solve your mixer problem, but you also got a mini workout. Talk about multitasking!
So, the next time you find yourself mixer-less, remember this nifty trick. After all, who said a blender bottle is only good for protein shakes? Certainly not us!
Remember, the best part about making whipped cream is getting to lick the spoon – or in this case, the blender bottle!
Blender Bottle: A game-changer for whipping cream?
Ever wondered if your trusty blender bottle could step up to the plate and whip up something as decadent as whipped cream? Well, dear reader, you’re not alone in this culinary curiosity. Is your blender bottle just a one-trick pony limited to protein shakes and smoothies? Or could it be a secret weapon in your dessert-making arsenal? Hold on to your spatulas, because we’re about to dive in!
Blender Bottle: More Than Meets the Eye
Before we get to the nitty-gritty, it’s important to understand what your blender bottle can do. This handy little gadget, often seen in the hands of fitness enthusiasts, isn’t just for blending protein shakes. Oh, no! It’s a versatile tool that can mix up a variety of concoctions, from salad dressings to pancake batter. But can it whip? Can it transform a humble cup of cream into a fluffy cloud of deliciousness? Let’s find out.
Whipping Cream: The Traditional Way vs The Blender Bottle Way
Traditionally, whipped cream is made with a whisk or an electric mixer. The cream is beaten until it forms soft or stiff peaks, depending on your preference. It’s a simple process but can be a bit labor-intensive, especially if you’re doing it by hand.
Enter the blender bottle. With its wire whisk ball, it seems like it could give the traditional methods a run for their money. And let’s face it, the thought of whipping up cream with a few vigorous shakes is pretty appealing, especially when the alternative is standing over a bowl for what feels like an eternity, right?
Note: Making whipped cream in a blender bottle may not work for everyone. The success of this method can depend on various factors such as the fat content of the cream, temperature, and even the vigor of your shaking. Practice makes perfect!
How to Make Whipped Cream in a Blender Bottle: A Step-by-Step Guide
- Pour the cream: Start by pouring your cream into the blender bottle. Don’t fill it all the way to the top – you’ll need some room for the cream to move around.
- Shake it up: Now comes the fun part. Seal the lid tightly and start shaking. And we mean really shaking – don’t be shy! This is where the magic happens.
- Check the progress: After a minute or so of shaking, open your blender bottle to check on your cream. If it’s not whipped to your liking, close the lid and keep going.
- Add sugar and vanilla: Once your cream has reached the desired consistency, you can add sugar and vanilla for some extra flavor. Give it another shake to combine everything.
- Serve and enjoy: Your blender bottle whipped cream is ready to be dolloped on your favorite dessert. Bon appétit!
So, can you make whipped cream in a blender bottle? The answer, friends, is a resounding “yes!” With a bit of elbow grease, a blender bottle could indeed be a game-changer for whipping cream. Next time you find yourself craving a dollop of the good stuff, why not give this method a whirl?
Using a Blender Bottle to make whipped cream: Step-by-step guide
Are you ready for a fun kitchen experiment? What if I told you that you can use a humble blender bottle to whip up some creamy goodness? Yes, you read that right! You can indeed make whipped cream in a blender bottle, and I’m going to guide you through the process, step by step. So, buckle up and let’s do this!
Step 1: Gather Your Ingredients
You will need only two simple ingredients – heavy cream and sweetener. If you’re feeling adventurous, you can also add a dash of vanilla extract for some extra flavor.
- Heavy cream: 1 cup
- Sweetener: 2 tablespoons of sugar or your preferred sweetener
- Vanilla extract: 1/2 teaspoon (optional)
Step 2: Pour the Ingredients into the Blender Bottle
Start by pouring the heavy cream into your blender bottle. Add the sweetener and the vanilla extract, if using. Make sure the lid is tightly secured before you move on to the next step.
Step 3: Shake, Shake, Shake!
Now comes the fun part. It’s time to shake! Shake the bottle vigorously for about 5 to 7 minutes. By now, your cream should begin to thicken and form soft peaks. This is a mini workout for your arms, isn’t it?
“Remember, the key to perfect whipped cream is vigorous shaking. Channel your inner fitness guru and consider it your arm workout session for the day!”
Step 4: Check Your Whipped Cream
After about 5 to 7 minutes of shaking, open the blender bottle and check your whipped cream. It should be thick and fluffy, with soft peaks that hold their shape. If it’s not there yet, just close the lid and shake a little more. You’re nearly there!
Step 5: Enjoy Your Homemade Whipped Cream
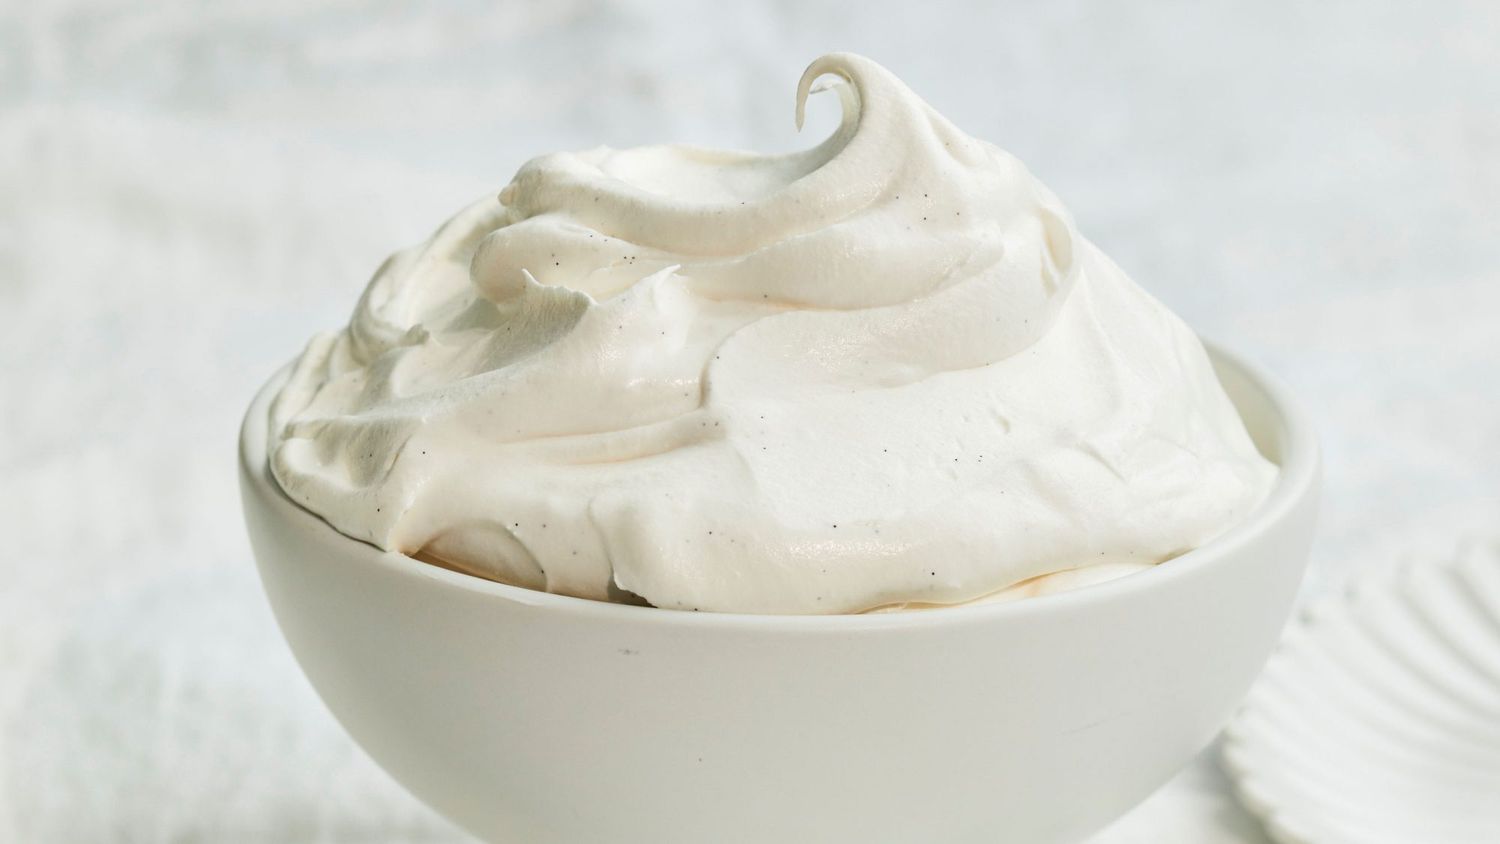
And there you have it, folks – homemade whipped cream using a blender bottle! Serve it over a hot cup of cocoa, a piece of pie, or just eat it straight from the bottle (we won’t judge).
So the next time you’re in the kitchen, why not try this fun and easy method? Making whipped cream in a blender bottle might just become your new favorite party trick!
Tips for perfect whipped cream using a Blender Bottle
around. It’s time to learn how to whip up some cloud-like, luscious whipped cream using a blender bottle. Sounds impossible, you say? Well, guess what? It’s not! With the right technique, a bit of patience, and a dash of humor, you’ll be making your own fluffy whipped cream in a jiffy. So, without further ado, let’s get started, shall we?
Step up Your Chill Game
First things first, make sure everything’s ice cold. And by everything, I mean everything – the cream, the blender bottle, your hands, your soul… well, maybe not the soul, but you get the point. The colder your kit, the better your results. Pop your blender bottle in the freezer for about 15 minutes before you get started. Trust me, it’ll make a world of difference.
Shake it ‘Til You Make it
Once you’ve got your chilled blender bottle, it’s time to get shaking. But hold on! Don’t go shaking like there’s no tomorrow. Your whipped cream needs some tender loving care. Start with slow, gentle shakes. As the cream thickens, you can intensify your shakes. Remember, Rome wasn’t built in a day, and neither is whipped cream.
Patience is a Virtue
Alright, I can hear you asking, “How long do I have to shake this thing?” Well, dear reader, patience is a virtue. Generally, it should take you about 3-5 minutes of shaking, depending on the thickness of the cream and your shaking skills. Feel free to take breaks if your arms start to ache, we’re making whipped cream, not training for a boxing match.
Know When to Stop
Knowing when to stop shaking is key. You’re aiming for soft peaks that hold their shape. If you continue shaking, you’ll end up with butter, and while butter’s not a bad thing, it’s not what we’re going for here. So, be vigilant, and remember, it’s better to under-whip than over-whip!
Flavor to Taste
Once you’ve achieved your desired consistency, feel free to add your desired flavorings. A splash of vanilla extract, a sprinkle of cinnamon, or even a dash of bourbon (for the adults) can elevate your whipped cream to new heights. But don’t forget to give it a gentle stir (not shake!) to incorporate the flavors without deflating the cream.
And there you have it, a step-by-step guide on how to whip up some heavenly whipped cream using a blender bottle. Now, go forth and whip, my friends!
Whipping cream in a Blender Bottle: Pros and cons
Alright, folks. So, you may be asking yourself, “Can I whip up some cream in a blender bottle?” Well, you’ve come to the right place. We’re about to dive into the exciting world of blender bottle whipped cream and discuss its pros and cons. So, buckle up, cream enthusiasts!
Pros of Whipping Cream in a Blender Bottle
- Convenience: Who doesn’t love the idea of making whipped cream in a blender bottle? It’s as simple as adding the cream, shaking it, and voila! You’ve got yourself a fluffy mound of dessert heaven.
- Minimal clean-up: With a blender bottle, you’re eliminating the need for an electric mixer and a bunch of extra dishes. Just rinse your bottle out when you’re done, and your work here is finished.
- Portability: Heading to a potluck or a friend’s house? You can bring your blender bottle and show off your whipping skills. You can whip up something delightful wherever you are!
Cons of Whipping Cream in a Blender Bottle
- Time-consuming: Shaking a blender bottle until the cream turns into whipped cream can take a bit of time and a whole lot of energy. If you’re short on time, this might not be the best method for you.
- Inconsistency: The texture of your whipped cream might not always turn out the way you want. It could be lumpy or not as fluffy as you’d like. Consistency is key in whipped cream land, folks!
- Limited quantity: A blender bottle can only hold so much. If you need a large quantity of whipped cream, it’s going to take multiple rounds of shaking that blender bottle.
So, there you have it. Using a blender bottle to make whipped cream is a bit like going on a culinary adventure. It can be fun and convenient, but it also takes time and might not always deliver your desired results. But hey, nothing ventured, nothing gained, right?
Common mistakes to avoid while making whipped cream in a Blender Bottle
There’s always a certain thrill of doing things the unconventional way, isn’t there? Picking up your trusty Blender Bottle and attempting to make whipped cream – quite the maverick move! But, as with any daring culinary endeavor, there are potential pitfalls to sidestep. Here are some common mistakes to avoid while making whipped cream in a Blender Bottle.
- Overfilling the bottle: Remember, you’re not stuffing a Thanksgiving turkey here. Whipping cream needs room to move and froth up. So, when filling your Blender Bottle, keep it to one-third or at most half-full. Anything more than that, and you’re heading for a creamy catastrophe.
- Not chilling your cream and your Blender Bottle: Whipping cream is like that fancy friend who only likes hanging out in cool places. You know, the one who’s always “just chilling”? Yeah, be like them. Before starting, make sure both your cream and Blender Bottle are well-chilled. It’ll make your life so much easier, promise.
- Under-whipping or over-whipping: And here we hit the Goldilocks principle of whipping cream – it has to be just right. Under-whipping leads to a limp, liquidy cream, while over-whipping can turn your cream into butter. Neither of these are optimal outcomes, unless you’re planning on serving soup or spreading butter on toast.
Now, we’ve got a few more tricks up our sleeves. Let’s steer clear of these common pitfalls, shall we?
- Skipping the sweetener: Unless you have an aversion to sweets, add that sweetener! It won’t just make your cream taste sweeter, it’ll also help stabilize it. Sugar, honey, maple syrup – pick your poison, but don’t skip it!
- Not sealing the Blender Bottle properly: This one’s a no-brainer. Unless you want to redecorate your kitchen with a Pollock-esque cream painting, always make sure your Blender Bottle is sealed tight before you start shaking.
So, there you go! Avoid these missteps and you’ll be on your way to whipping up the perfect cream in your Blender Bottle. Ready to give it a go?
Surprising uses of Blender Bottle beyond protein shakes: Whipped cream edition
Alright folks, it’s time to let you in on a little secret. You know that Blender Bottle you’ve been using exclusively for protein shakes? Well, it’s not just a one-trick pony. This versatile little bottle can do so much more. Let’s dive into the surprising world of Blender Bottle hacks, shall we? Today’s special: Whipped cream edition. Ready? Set. Blend!
Step-by-step guide to Blender Bottle Whipped Cream
Making whipped cream in a Blender Bottle is a piece of cake…or should I say, the perfect topping for a piece of cake? Here’s how:
- Pour in the Heavy Cream: Start by pouring about one cup of heavy cream into your Blender Bottle. A word to the wise, don’t fill the bottle too full. You’ll need room for the magic to happen.
- Add the Sweet Stuff: Next, add two tablespoons of powdered sugar. This is where things start to get sweet – literally.
- Time for Flavor: Now, add a teaspoon of vanilla extract for a bit of flavor. If you’re feeling adventurous, you could even try different flavors like almond or mint.
- Let’s Shake Things Up: Now, seal your Blender Bottle and shake it like there’s no tomorrow. This is where the magic happens. You’ll need to shake for about 3-5 minutes, or until the cream thickens to your liking.
And there you have it, folks. Whipped cream in a Blender Bottle. Who would’ve thought?
Note: The consistency of your whipped cream may vary depending on how long you shake the bottle. For a thicker consistency, shake a little longer. If it’s too thick, don’t be afraid to shake a little less next time.
Why Whipped Cream in a Blender Bottle?
Now you might be wondering, “Why on earth would I want to make whipped cream in a Blender Bottle?” Well, the answer is simple: Convenience, my friends.
- Portability: Blender Bottles are portable, which means you can make whipped cream anywhere. Camping trip? No problem. Random whipped cream craving at the office? Sorted.
- Easy Clean Up: With a Blender Bottle, there’s minimal mess. Just pour, shake, and enjoy. Then rinse and repeat for the next culinary adventure.
- Perfect for Single Servings: Making a small batch of whipped cream for one? The Blender Bottle is your answer. No need for a big mixer for a little indulgence.
So go ahead, give it a whirl. You might just find that your Blender Bottle is your new favorite kitchen tool. And if you do, don’t forget to share your whipped cream victories (and maybe even a few hilarious fails) with us. Happy blending!
Experimenting with flavored whipped cream using a Blender Bottle
Who said whipped cream could only be vanilla? Not me! So, grab that Blender Bottle of yours and let’s create some flavor magic. Whether you’re a chocoholic, a minty freshness fan, or a fruit flavor fanatic, there’s a whipped cream version ready to be made.
Dare to experiment and let’s take your desserts, hot chocolate, or even your coffee to the next level. This is not just about the creamy texture we love so much, but about creating a symphony of flavors that will make your taste buds dance. Ready to get started? You’re in for a tasty ride!
Chocoholic’s Dream
Let’s start with an all-time favorite: chocolate. Here’s a quick recipe to make your chocolate whipped cream:
- Step 1: Pour 1 cup of heavy cream into your Blender Bottle.
- Step 2: Add 2 tablespoons of unsweetened cocoa powder and 2 tablespoons of powdered sugar.
- Step 3: Shake it like you mean it! The power is in your hands (literally), so give it a good shake until the cream is whipped to your preferred consistency.
Refreshing Mint
Now, let’s freshen things up a bit with a cool mint flavored whipped cream. Follow these steps and you’ll be minty fresh in no time:
- Step 1: Into your Blender Bottle goes 1 cup of heavy cream.
- Step 2: Add 2 tablespoons of powdered sugar and 1 teaspoon of mint extract. If you’re feeling adventurous, add a few drops of green food coloring for that extra minty look.
- Step 3: You know the drill – shake, shake, shake! Keep going until you get the perfect whipped cream consistency.
Fruity Delight
If you’re craving something fruity, this strawberry whipped cream is just what you need. Here we go with the steps:
- Step 1: Pour 1 cup of heavy cream into your Blender Bottle.
- Step 2: Add 2 tablespoons of powdered sugar and 2 tablespoons of strawberry syrup.
- Step 3: Give it your best shake until the cream gets whipped and fluffy.
Remember, this is just the start of your flavor adventure. Feel free to invent your own flavors or tweak these recipes to your liking. Who knows, you might find your signature whipped cream flavor. The most important thing is to have fun and enjoy the process. And of course, enjoy your delicious whipped cream!
Whipped cream in a Blender Bottle: Is it worth the extra effort?
So, you’ve been eyeing that Blender Bottle on your countertop, wondering if it can be your secret weapon in creating luscious, homemade whipped cream. But hold your horses – is it worth the extra effort? Let’s find out.
The answer to whether you can make whipped cream in a Blender Bottle is a resounding yes. However, before you start dancing with joy, there’s a little more to it. It’s not as simple as dumping in heavy cream and shaking till your arms fall off. There’s a method to the madness.
“Making whipped cream in a Blender Bottle is like a mini workout. You shake, rest, shake, rest, and repeat until you have fluffy clouds of cream. But hey, at least you can indulge guilt-free knowing you’ve burned some calories.”
Pros and Cons of Whipped Cream in a Blender Bottle
Everything comes with its own set of pros and cons, and making whipped cream in a Blender Bottle is no exception. Here’s a quick rundown:
| Pros | Cons |
|---|---|
| – No need for electricity | – It’s a heck of a workout |
| – Perfect for small batches | – Not ideal for large quantities |
| – Great for on-the-go whipping | – Requires patience and muscle power |
Weighing the pros and cons, it seems the Blender Bottle method is ideal for those who enjoy a little arm workout and don’t mind waiting a bit. So, if you’re all about that ‘no pain, no gain’ life, give it a shot. Who knows, you might just find a new favorite way to whip up your cream!
The Process
But how exactly do you make whipped cream in a Blender Bottle, you ask? Let’s break it down step by step:
- Chill Your Ingredients: Cold cream whips better. So, put your heavy cream in the fridge at least an hour before you plan to whip it.
- Fill Your Bottle: Pour the cold heavy cream into your Blender Bottle, filling only up to one third. This leaves enough space for the cream to move around and get whipped.
- Shake It: Start shaking. And yes, it’s going to take a while, so put on some tunes and get into the groove. When the sound of the liquid sloshing around starts to diminish, you’re close to whipped cream bliss.
- Check Consistency: Open the bottle and give your cream a quick check. If it’s not peaked to your liking, keep shaking. Remember, overbeating can turn your cream into butter (unless that’s what you’re going for).
So, there you have it. Making whipped cream in a Blender Bottle may require a bit of effort, but hey, who said the best things in life come easy? Plus, think of the bragging rights when you serve up your homemade whipped cream. Go on, give it a try!