Hey there, smoothie enthusiasts! You’re probably curious and asking, “Can a Blender Bottle blend fruit?” Well, you’re not alone. We’ve been wondering the same thing too! So, we did a little experimenting in the name of science and smoothies, and we’re here to spill the juicy details. Brace yourself for some pulpy truths.
Before we dive into the fruity depths, let’s get our blending jargon straight. A Blender Bottle, for those who don’t know, is a popular shaker bottle designed to mix protein shakes, supplements, and other powdered mixtures. It’s lightweight, portable, and pretty handy for a quick shake on-the-go. But can this underdog stand up to the real deal – fresh fruits? Let’s find out!
Note: Remember, folks, not all heroes wear capes, and not all blenders blend fruits. But hey, that’s why we’re here, right? To separate the fruit ninjas from the mere pretenders. So, buckle up and let’s get blending!
Blender Bottle Basics: What is a Blender Bottle and How Does it Work?
Ever find yourself scratching your head, wondering what on Earth a Blender Bottle is? Well, you’re in the right place, my friend. It’s about time we demystify this modern marvel for you.
A Blender Bottle, or as some like to call it, a shaker bottle, is a portably convenient contraption designed to mix your protein shakes, nutritional supplements, and even a variety of kitchen concoctions. Interestingly, it works on a pretty simple principle.
“Think of it as a handheld, manual blender. No electricity, no fuss, just you, the bottle, and a whole lot of shaking!”
So, how does this shaking wizardry work in practice? Allow me to break it down for you:
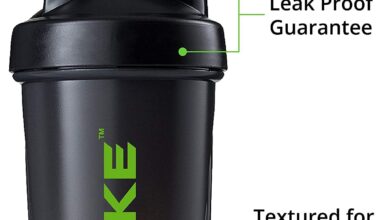
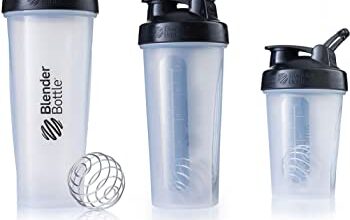
- The Bottle: The container part of the Blender Bottle is just like any other bottle you might drink from, except that it has a secure, screw-on lid and a wide mouth for easy adding of ingredients and cleaning.
- The BlenderBall: This is the magic element, folks! A whisk-like ball made from surgical-grade stainless steel, it’s designed to bounce around and mix up your drink when you shake the bottle. Think of it as the stirring spoon’s more energetic cousin.
- The Shake: Once you’ve added your ingredients into the bottle and secured the BlenderBall, it’s time for the fun part – the shake! A vigorous shake is all it takes for the BlenderBall to do its thing and whip up your drink into a smooth, lump-free delight.
So, there you have it, the Blender Bottle in all its glory. It’s simple, it’s effective, and it’s about as high-tech as a manual kitchen gadget can get. But, we’ve yet to answer the question: can it blend fruit?
Expert Tips for Blending Fruits in a Blender Bottle
Ever gazed at your humble Blender Bottle and wondered, “Can this unassuming little contraption actually blend fruits?” Well, you’re not alone. Many have asked the same question. The short answer is yes, but with a few caveats and tips to consider. Fear not! We’re here to guide you through this fruity endeavor. Few things are as refreshing as a freshly blended fruit smoothie, and your Blender Bottle can get you there. So, let’s dive in, shall we?
1. Chose Your Fruits Wisely
Not all fruits are created equal, particularly when it comes to blending in a Blender Bottle. Opt for softer fruits such as bananas, mangoes, and peaches. They are your smoothie’s best friends, making your blend thick and creamy.
Remember, hard fruits like apples or pears may not blend as smoothly, especially if you don’t chop them into tiny pieces first. And please, forget about blending nuts or ice, unless you fancy a workout!
2. Prep Your Fruits
Blender Bottles aren’t as powerful as full-size blenders. Do them a favor and prep your fruits well. Peel and cut them into small pieces. Your Blender Bottle will thank you, and your smoothie will be smoother than a jazz saxophone solo.
3. Layer Smartly
Order matters, not just in a court of law but also in a Blender Bottle. Start with liquid first (water, juice, yogurt, or milk), then add your sliced fruits, and finally, if you’re using them, protein powder or supplements. This helps the blending process and prevents any powder from clumping at the bottom.
4. Shake, Don’t Just Stir
Once you’ve got all your ingredients in, secure the lid tightly. Then, channel your inner Taylor Swift and shake it off! A vigorous shake for about 30 seconds should do the trick.
5. Keep It Clean
Don’t let your Blender Bottle turn into a science experiment. Rinse it immediately after use and then, when you get a chance, give it a good cleaning with hot water and dish soap. You’ll thank yourself later.
So, there you have it, folks! With these tips, your Blender Bottle can be more than just a protein shake mixer. It can be your ticket to refreshing, nutritious, fruit-filled smoothies to enjoy on the go. Happy blending!
Blender Bottle vs. Traditional Blender: Which is Better for Blending Fruits?
Now that’s the question, isn’t it? Which one takes the trophy when it comes to blending fruits? Your trusty old traditional blender or the sleek new entrant, the Blender Bottle? Well, hold onto your fruit baskets, folks, because we’re about to lay down the juicy details.
Traditional Blender:
- Power: With its robust motor, traditional blenders can pulverize just about anything into a smoothie, including tough fruits like apples and pears.
- Versatility: Fancy a frozen margarita after your healthy smoothie? Your traditional blender has your back. It can handle ice and even make soup.
- Cleaning: However, it comes with a price. Cleaning it can be a chore, especially if you’ve made a sticky concoction.
Blender Bottle:
- Power: The Blender Bottle relies on your manual force instead of a motor. So, tough fruits may not blend as smoothly, but it can do a decent job with softer ones like bananas and berries.
- Versatility: It’s primarily designed for blending protein shakes. So, it might struggle with ice and definitely can’t whip up a hot soup.
- Cleaning: On the upside, cleaning it is a breeze! No blades or hard-to-reach corners.
So, which one’s for you? It depends on your needs. If power and versatility are top priorities, a traditional blender might be your best bet. But if you’re looking for easy cleaning and portability, the Blender Bottle might just tickle your fruit fancy.
“Choose your blender based on your lifestyle, cooking habits, and the types of food you frequently prepare.”
Remember, the goal is to consume more fruits, and both can help with that. The best blender for you is the one that you’ll use the most. So, whether you’re team traditional or team bottle, as long as you’re blending fruits and upping your nutrition game, you’re a winner!
Choosing the Best Blender Bottle for Your Fruit Blending Needs
Ever found yourself staring blankly at the blender bottle aisle in your local store, completely overwhelmed by the dizzying array of choices? Well, fear not, dear reader, because we’re going to guide you through this jungle of blender bottles with utmost care. Selecting the perfect blender bottle for your fruit blending needs doesn’t need to be as complicated as a calculus equation.
Consider the Material
First things first, let’s talk about material. Not all blender bottles are created equal, and the material they are made from can have a significant impact on their performance. You’ve got plastic, stainless steel, and glass to choose from, each with its unique pros and cons.
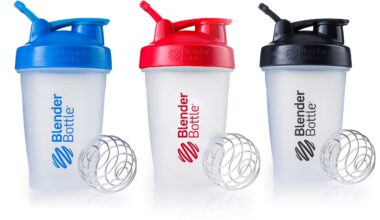
- Plastic: Lightweight and often dishwasher safe, plastic blender bottles are a popular choice. But beware of cheap plastics that can contain harmful BPA! Always opt for BPA-free options.
- Stainless Steel: These are the Arnold Schwarzeneggers of the blender bottle world. Durable, rust-resistant, and often insulated, stainless steel bottles can handle the most rigorous blending tasks. But, they can be a bit on the heavy side.
- Glass: The divas of the blender bottle realm. Glass bottles are elegant, don’t retain odors or tastes, and are perfect for those who prefer a more eco-friendly option. However, they can be prone to breakage.
Size Does Matter
Now that we’ve sorted out materials, let’s move on to size. Are you a minimalist who prefers a compact and portable blender bottle, or do you like to go big with your fruit blending endeavors? The size of your blender bottle should cater to your specific needs. Keep in mind, though, that bigger isn’t always better!
Blend-Ability and Convenience
But can a blender bottle really blend fruit? This is where the rubber meets the road. The blend-ability of these bottles can vary widely. Some models come equipped with powerful motors that can pulverize even the most stubborn of fruits, while others might struggle with anything tougher than a banana. Look for a blender bottle with a good reputation for blend-ability.
Finally, let’s not forget convenience. A blender bottle that’s a nightmare to clean is about as useful as a chocolate teapot. Opt for models that are easy to disassemble and clean, ideally dishwasher-safe. After all, the less time you spend cleaning, the more time you have to enjoy your delicious fruit blends!
Remember, the best blender bottle for your fruit blending needs is the one that checks all your boxes – not necessarily the one with the most bells and whistles!
So there you have it, folks! Keep these considerations in mind, and you’ll be a blender bottle connoisseur in no time. Happy blending!
Common Mistakes to Avoid When Blending Fruits in a Blender Bottle
about some common mistakes people can make when blending fruits in a blender bottle. You know, those little missteps that can turn your delicious fruit smoothie into a chunky mess? Yeah, those. Let’s dodge those mishaps and keep our smoothies, well, smooth!
Mistake #1: Not Chopping the Fruits into Small Pieces
When you’re using a blender bottle, size does matter. If you’re trying to blend an entire apple or banana without chopping it up first, you’re going to have a rough time. The correct approach is to chop your fruits into small, manageable pieces before adding them to your bottle.
Mistake #2: Overloading Your Blender Bottle
Remember that time you tried to stuff too many clothes into your suitcase, and the zipper broke? Don’t let that be your blender bottle. Overloading can cause the motor to overheat and even break. A good rule of thumb is to fill your blender bottle no more than two-thirds full.
Mistake #3: Adding All Ingredients at Once
Here’s a little blending 101 for you: it’s best to add your ingredients in stages. Start with the softer ingredients first, like bananas and yogurts. Then, add the harder ingredients, like frozen fruits and ice last. This way, your blender bottle can handle the blending process more effectively.
Mistake #4: Not Using Enough Liquid
Ever tried to make a smoothie and ended up with a fruit paste? Yeah, not fun. The trick is to add enough liquid to create a smooth mixture. Whether it’s water, milk, or juice, don’t skimp on the liquid!
Mistake #5: Ignoring the Cleaning
Let’s face it, no one likes cleaning. But if you ignore the cleaning process of your blender bottle, you’re asking for trouble. Rinse it out immediately after use to prevent any stubborn fruit residues from sticking around.
Note that these are common mistakes, but you’re not alone! We’ve all been there, done that. Just remember, practice makes perfect – and that includes blending!
Healthy and Delicious Fruit Smoothie Recipes You Can Make with a Blender Bottle
Ever looked at a blender bottle and wondered if you could whip up a fruit smoothie? I mean, the name says blender, so it should blend, right? Well, you’re in the right place! Say goodbye to those complicated kitchen appliances and hello to convenient, quick, and delicious fruit smoothies.
1. Simple Banana Berry Smoothie
For those who want to keep things simple, this one’s for you. With just some bananas and berries, you’re good to go.
- Banana: 1-2 ripe ones
- Berries: 1 cup (you can use strawberries, blueberries, or raspberries)
- Water: As needed
Simply slice your bananas, toss in your berries, add water, and shake it like you mean it.
2. Tropical Delight Smoothie
Feeling tropical? This Tropical Delight Smoothie will take your taste buds on a journey to paradise.
- Mango: 1 medium-sized
- Pineapple: 1 cup slices
- Coconut water: As needed
Peel and cut your mango, add in your pineapple slices, pour in some coconut water, and blend away.
3. Green Warrior Smoothie
For those who like to sneak in some veggies into their diet, this Green Warrior Smoothie is perfect for you.
- Spinach: 1 cup
- Green apple: 1
- Banana: 1
- Water: As needed
Pack in your spinach, add in your sliced green apple and banana, add water, and you’re all set.
So there you have it, folks! Three healthy and delicious fruit smoothies you can make with just a blender bottle. Remember, the key here is to shake well. That’s right, put those arm muscles to work and blend away!
Note: While blender bottles can make simple smoothies, they can’t handle harder fruits like apples or pears unless they are very ripe or pre-softened. And just to be clear, a blender bottle won’t replace your blender. It can only do so much. But hey, it’s an easy way to get those fruits in when you’re on the go!
The Benefits of Using a Blender Bottle for Fruit Blending in Your Daily Routine
Ever wondered about the benefits of using a blender bottle for your daily fruit blending? Or perhaps you’re just curious about how a simple bottle could possibly compete with the big, burly kitchen blender? Well, hold on to your juicing hats, folks, because you’re in for a fruity ride!
The magic of a blender bottle lies in its simplicity and versatility. This handy, portable device is designed to make your fruit blending experience as fun, easy, and hassle-free as possible. Here are some of the top benefits of using a blender bottle for fruit blending in your daily routine:
- Convenience: Unlike traditional blenders, blender bottles are lightweight and easy to carry around. You can take them with you on the go, ensuring you’ll never miss out on your daily dose of fruity goodness.
- Quick and Easy Cleaning: Blender bottles are incredibly easy to clean. Rinse it out, give it a quick scrub, and voila! You’re ready for your next smoothie adventure.
- No Electricity Needed: Blender bottles do not require any electricity. Just shake it up, and you’re good to go. This feature makes them perfect for camping trips, power outages, and other situations where electricity may not be readily available.
- Portability: Thanks to their compact design, blender bottles can fit conveniently in your backpack, gym bag, or car cup holder. This makes it easy to enjoy a fresh fruit smoothie or protein shake anytime, anywhere.
But wait, there’s more! Not only are blender bottles a fantastic tool for blending fruits, but they can also be used for a variety of other purposes.
- Mixing Protein Shakes and Supplements: Blender bottle is not just a one-trick pony. It can easily mix your protein shakes, supplements, and even pancake batter. Talk about multitasking!
- Making Salad Dressings and Marinades: Need to whip up a quick salad dressing or marinade? A blender bottle can help with that too.
- Blending Eggs for Fluffy Omelettes and Pancakes: Who needs a whisk when you have a blender bottle? Its powerful mixing action can make your eggs extra fluffy for perfect omelettes and pancakes.
The humble blender bottle is truly a versatile and indispensable kitchen gadget. It’s like having a personal, portable blender that’s ready to whip up a delicious fruit smoothie, protein shake, or even a quick omelette at a moment’s notice. Who knew a bottle could do so much?
So there you have it, folks. The benefits of using a blender bottle for fruit blending in your daily routine are many and varied. So why not give it a try and see what it can do for you?
Blender Bottle Hacks: Creative Ways to Use Your Blender Bottle for Fruit Blending
Let’s dive right into the topic of the day, folks. I know you’ve been wondering, can that trusty Blender Bottle of yours handle more than just protein shakes? Can it, dare we say, blend fruit? Well, you’re in for a treat because the answer is a resounding yes! With a little creativity and the right techniques, your Blender Bottle can become an all-in-one, fruit blending powerhouse. So, let’s explore those creative ways to use your Blender Bottle for fruit blending, shall we?
1. The Simple Shake
First things first. The simplest way to blend fruit in a Blender Bottle is just by shaking it. Yes, you read it correctly. No need for electricity or fancy equipment. Just you, your Blender Bottle, and a couple of ripe fruits.
- Step One: Start by cutting your favorite fruits into small pieces. Think bananas, strawberries, or even blueberries.
- Step Two: Then, toss them into your Blender Bottle.
- Step Three: Add a little bit of liquid – water, juice, or yogurt will do just fine. This helps to give your drink a smoother texture.
- Step Four: Secure the lid, and then shake, shake, shake! In less than a minute, you’ll have a delicious, healthy fruit shake ready to enjoy.
2. The Overnight Soak
Now, if you’re more of a plan-ahead type of person, the overnight soak might just be the hack for you. It’s as easy as it sounds but does require a little bit of patience.
- Step One: Cut your chosen fruits into small pieces and place them in your Blender Bottle.
- Step Two: Add your favorite liquid. This could be anything from milk to fruit juice.
- Step Three: Leave the mixture to soak in your fridge overnight. The fruits will soften, making them easier to blend.
- Step Four: In the morning, give it a good shake, and voila! You have a ready-made, fruit-filled breakfast drink.
3. The Blender Ball Mash
Our last hack is called the Blender Ball Mash, and it’s just as fun as it sounds. Here’s how to do it:
- Step One: Start by chopping your fruits into small pieces. The smaller, the better.
- Step Two: Place the fruit pieces in your Blender Bottle along with the blender ball.
- Step Three: Secure the lid and shake vigorously. The blender ball will help mash the fruits, creating a smooth and delicious blend.
So, there you have it. With a little creativity and a trusty Blender Bottle, you can indeed blend fruit and enjoy delicious, healthy shakes anytime, anywhere. The power is in your hands!
The Ultimate Guide to Cleaning Your Blender Bottle After Fruit Blending
So, you’ve blended up a storm and now you’re left with the aftermath of your grand fruit smoothie adventure. We’re talking about the sticky, colorful residue lurking in the crevices of your blender bottle. Fear not, cleaning your blender bottle doesn’t have to be a dreaded task! Let’s dive into the ultimate guide to cleaning your blender bottle after fruit blending, because you know what they say, cleanliness is next to godliness!
Embrace the Rinse and Soak Method
First things first, don’t let your blender bottle sit. The longer you leave it, the harder it’ll be to clean. Before the fruit pulp turns into a stubborn, clingy tenant, rinse your blender bottle with warm water. This is your first strike against the fruity residue.
Then, fill the bottle with warm water, add a drop of dish soap, and let it soak for a bit. You’ll be surprised how much of the mess it will loosen up while you’re catching up on your favorite show or scrolling through social media.
Brush it Off
Next, it’s time to get a little hands-on. We’re talking about brushing. Have you ever thought about using a bottle brush? It may seem old school, but it’s incredibly effective. The long handle can reach the bottle’s base and the bristles can wiggle their way into those hard-to-reach areas, evicting any stubborn fruit bits.
Do a Vinegar Soak
Still noticing a bit of a fruity smell or spots? There’s one more trick up our sleeve – Vinegar. Yes, you read right. This household staple isn’t just for pickling veggies or jazzing up your salad. Fill your blender bottle with a mixture of warm water and a few tablespoons of white vinegar, then let it soak for at least an hour. This will help disinfect and deodorize the bottle. Just remember to give it a good rinse afterwards unless you want your next smoothie to have a hint of vinegar!
For Intense Cleanliness: Go for a Dishwasher
If you’re looking for a hands-off approach, and your blender bottle is dishwasher safe, toss it in the dishwasher. Remember to place it on the top rack to avoid any heat-related deformities. The high temperature and intense wash cycle will efficiently deal with any remaining fruit residue.
And there you have it, folks! A step-by-step guide to maintaining your blender bottle’s sparkling reputation. It may seem like a lot, but once you get into the groove, it’s just like learning the salsa – One, two, cha cha cha!